Friday, 21 June 2013

Lemon Berry Cake

Pin It Now!

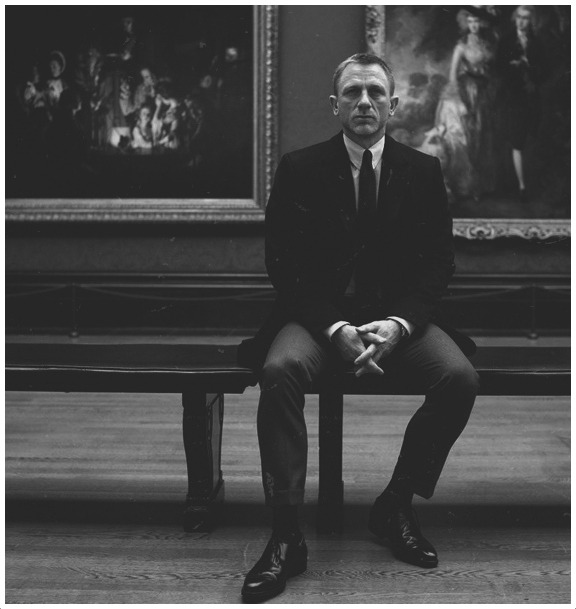
It's nearly the end of June, which in my annual calendar means saying farewell to my final year students and wishing them good luck for life after University. We had a little get together with drinks on Wednesday and I baked a cake.


Congratulations to the Class of 2013, BA (Hons) Photography, Manchester School of Art!

Some of them are having an exhibition in London in July, following on from their degree show. Have a look at their website and pop in if you're in the area.

Oh and the cake was good and well worth making! The recipe can be easily halved and made in a loaf tin or 20cm ring pan. That's what the original recipe was, but I doubled it to use my Gugelhupf pan.


Lemon Berry Cake (makes 1 cake)

250g butter
1 1/2 cups caster sugar (I used light brown as I was out)
4 eggs
rind of 2 lemons
3 cups self-raising flour 
1 cup milk
1/2 cup lemon juice
150gr blueberries/raspberries
icing sugar for dusting

Preheat your oven to 180°C/Gas 4/350 F. Grease a gugelhupf pan really well and dust with flour.

In a large bowl beat the butter and sugar with an electric beater until pale and creamy.

Beat in the eggs and  grated lemon rind. 

using a wooden spoon fold in the self-raising flour,  milk and lemon juice until well combined.

Spoon half the mixture into the pan. 

Scatter over the berries. 

Spoon over the remaining cake batter.

Bake for 50 minutes, check after 40 minutes and cover with baking parchment or tin foil if the top of the cake is getting too dark.

Insert a wooden skewer to check if the cake is cooked through. The skewer will come out clean if it is ready. If there is still batter clinging to the skewer, return the cake to the oven for 5 more minutes and test again.

Set aside for 5-10 minutes before turning out onto a wire rack to cool. 

Serve dusted with icing sugar.

Enjoy!

Wednesday, 5 June 2013

Yotam Ottolenghi's Stuffed Aubergine with Lamb & Pine Nuts

Pin It Now!

I know, I know.....it has been ages! So many things have happened in the last six months. Some good, some less so, some very happy times and also some sad stuff. All of it together meant that I didn't really feel like blogging about what was cooking in my kitchen.

But here's to hopefully finding my (blogging) mojo again. Thanks for still reading!

This is a recipe that I made a while agao. Easter Sunday to be more precise. I was spending Easter on my own this year and I didn't want to miss out on having lamb for Easter, but it seemed silly to do a whole roast for myself, so instead I just scaled down this wonderful Yotam Ottolenghi recipe from the Jerusalem cookbook.

It was delicious and the only issue I had was there wasn't quite enough sauce for basting when adjusted for one serving rather than four. My conclusion is that I'll just make it for four people next time, because than there won't be any sauce issues and it's so good that it should be shared anyways!

(Sorry about the crappy picture, I couldn't wait to dig in!)


Yotam Ottolenghi's Stuffed Aubergine with Lamb & Pine Nuts (serves 4)


4 medium aubergines (about 1.2kg), halved lengthways
6 tablespoons olive oil
1 teaspoon ground cumin
One and a half tablespoons sweet paprika
One and a half tablespoons ground cinnamon
2 medium onions (340g in total), finely chopped
500g minced lamb
50g pine nuts
20g flat-leaf parsley, chopped
2 teaspoons tomato purée
3 teaspoons caster sugar
150ml water
One and a half tablespoons lemon juice
1 teaspoon tamarind paste
4 cinnamon sticks
Salt and black pepper

Preheat the oven to 220C/200C fan/gas mark 7. Place the aubergine halves, skin-side down, in a roasting tin large enough to accommodate them snugly. Brush the flesh with 4 tablespoons of the olive oil and season with 1 teaspoon of salt and plenty of black pepper. Roast for about 20 minutes, until golden brown. Remove from the oven and allow to cool slightly.

While the aubergines are cooking, you can start making the stuffing by heating the remaining olive oil in a large frying pan. Mix the cumin, paprika and ground cinnamon and add half of this spice mix to the pan, along with the onion. Cook on a medium-high heat for about 8 minutes, stirring often, before adding the lamb, pine nuts, parsley, tomato purée, 1 teaspoon of the sugar, 1 teaspoon of salt and some black pepper. Continue to cook and stir for another 8 minutes, until the meat is cooked. Place the remaining spice mix in a bowl and add the water, lemon juice, tamarind, remaining sugar, cinnamon sticks and half a teaspoon of salt; mix well.

Reduce the oven temperature to 195C/175C fan/gas mark 5 and a half. Pour the spice mix into the bottom of the aubergine roasting tin. Spoon the lamb mixture on top of each aubergine. Cover the tin tightly with foil, return to the oven and roast for 1 hour 30 minutes, by which point the aubergines should be completely soft and the sauce thick; twice through the cooking, remove the foil and baste the aubergines with the sauce, adding some water if the sauce dries out. Serve warm, not hot, or at room temperature.

Enjoy! (recipe taken from The Independent Online)

Friday, 14 December 2012

Absence

Pin It Now!

Sorry, I've been gone......

I have been here ocassionaly...


Wednesday, 31 October 2012

Boozy Banana Bread

Pin It Now!

If you are anything like me, you will occasionally find some rather yucky sad looking bananas in your kitchen or your fruit bowl or wherever you keep your bananas. I mean the ones that aren't even really freckled any longer, but are turning a monochrome brown. I used to just throw bananas in the freezer before they got to that state, perfect for smoothies straight from frozen, no need for ice cubes. But since my current freezer compartment is teeny-tiny and space is at a total premium I now suffer a case of brown bananas more regularly. That's when I know it's time to make banana bread

Photobucket

If you have ever googled banana bread recipes you will know that there is a nearly infinite number of recipes out there. So you might ask if the world really need another blog post about Banana Bread? Well, I think so and this one is my absolute favourite. I like the rum and cinnamon, as well as the walnuts, but feel free to experiment with the spices, types of booze or add chocolate chips instead of the nuts.

Photobucket

Boozy Banana Bread (1 loaf)

3 to 4 ripe bananas, mashed well with a fork
1/3 cup melted butter
3/4 cup muscovado sugar
1 egg, beaten
1 teaspoon vanilla
2 tablespoons spiced rum, or rum, or bourbon or whatever else takes your fancy
1 teaspoon baking powder
Pinch of salt
1 teaspoon cinnamon
1/2 teaspoon nutmeg
1 1/2 cup of flour
1/2 cup of walnuts

Preheat the oven to 180C/350F/Gas 4.

Grease a loaf tin.

Mix the butter and mashed banana in large mixing bowl. You won't need a mixer for any of this. A wooden spoon will do.

Add the sugar, egg, vanilla and booze and mix in well.

Add the spices and stir again.

Sprinkle the baking soda and salt over the mix and combine.

Finally add the flour and stir and once combined pour into your prepared loaf tin.

Place in the centre of the oven. Check after 50 minutes if done by inserting a wooden skewer in the middle. If it comes out clean, the cake is done if there is still some batter clinging to the skewer return to oven for another 10 minutes. Check again etc.

Allow to cool for 5 minutes in the tin, then carefully remove from the tin and cool on a wire rack.

Enjoy!

Tuesday, 30 October 2012

Spanish Fish Stew

Pin It Now!

I won a competition a few weeks ago on Lavender & Lovage. The prize? £65 worth of fish from Delish Fish, a great family run business up in Scotland that delivers fresh fish directly to your door. I thought to myself at the time, that it was a little daft of me to enter, as I don't have a freezer and I live on my own. I figured I never win anything anyways though.

You can imagine my reaction when Karen got in touch to tell me I was the competition winner. I mean I was excited. It's always nice to be the winner of something, but I also started panicking slightly as to what to do with all that fish that was going to arrive on my doorstep shortly. Luckily, my friend Jacqueline who lives around the corner from me was kind enough to make some room in her freezer for all that fish, that I am now slowly and very happily cooking my way through. There'll be more recipes to follow, but let's start with Spanish Fish Stew, which I made with some of the lovely hake fillets I received.

Photobucket

My friends Lucy and Yuri had been driving back up to Manchester after a weekend in Brighton and I thought it'd be nice for them not to have to sort their own dinner out when they finally made it back after driving for six hours. Since they live in the same building as I, it was easy for them to drop their bags and just come upstairs to a hearty, smoky and warming fish stew (plus a very small beer).

I found the original recipe here and have adapted it to suit my taste and the contents of my larder.

Spanish Fish Stew (serves 4)

2 garlic cloves, finely chopped
1 lemon, zest and juice of
a generous handful of fresh coriander, roughly chopped
olive oil
1 onion, finely sliced
250g new potatoes, peeled and cut into 2cm chunks
1 heaped teaspoon paprika
a pinch of chilli powder or cayenne pepper
400g can chopped tomatoes
1 veg stock cube
1/2 - 1tbsp sugar
salt and freshly ground black pepper, to taste
200g raw king prawns
1 x 410g can chickpeas, rinsed and drained
500g skinless hake fish fillets

Mix the chopped coriander, lemon zest and half the garlic and set aside for later.

Heat then a large heavy bottomed pan, heat the oil and add the onions and potatoes. Cover and saute for about 5 minutes or so on medium heat, until the onions begin to soften. Stir from time to time.

Add the remaining garlic, paprika and chilli powder (or cayenne), stir to coat and cook for another couple of minutes, until fragrant.

Add the lemon juice, followed by the tomatoes and half a can of water. Crumble in the stock cube and add the sugar, it'll help cut some of the acidity of the tomatoes.

Cover and simmer for about 20 minutes until the potatoes are almost cooked.

Season with salt and pepper to taste.

Add the chickpeas and prawns and stir through.

Place the hake fillets on top of the stew, cover with a lid and simmer for another 10 minutes.

Remove from heat, scatter with the coriander/garlic/lemon zest mix and serve with some crusty bread to mop up the sauce.

Enjoy!

Monday, 29 October 2012

Top Five from five years of A Pot of Tea

Pin It Now!

With the blog just having turned five, I thought it might be nice to look back and to write a post in which I share my favourite recipes of the last five years again.

It wasn't easy to narrow it down to just five, because there are plenty of others that I think are worth shouting about and that I make and eat all the time. I did my best however and here is Sylvie's Top Five in no particular order.....

Rockamole
Photobucket
The Rockamole is always a hit at a party. It is finger licking good and makes a great change from the usual Guacomole.

Aubergine and Green Bean Curry
Photobucket
This is a recipe from my favourite cookbook. River Cottage Veg Every Day by Hugh Fearnley-Whittingstall. It's fragrant and well spiced without being too much for those who like to go easy on the heat. I'd happily eat it every week.

Slow-cooked Venison Ragout
Photobucket
I don't eat much meat these days, but when I do I make sure it is good quality and hasn't been intensely farmed. Venison can be pricy, but when cooked properly it is worth every penny. This ragout was so good I wanted to lick my fingers and the plate.

Spicy Roast Aubergine with Chickpea Stew
Photobucket
This has become somewhat of a favourite for when I have friends round. I once heard one of them mutter the words 'better than sex' to describe the dish.

Easy Peasy Lemon Drizzle Cake

When I need cake and I need it quick, this is the one I make. I have been asked for the recipe so many times and you can make it into a much more elaborate cake for a special occasion by topping it with lemon cream and fresh berries (as the one in the picture above).

Interestingly enough when it comes to most popular posts in terms of viewing numbers, only the Easy Peasy Lemon Drizzle Cake is in the top five. In fact it is number four, number one with over 23000 views is Tana Ramsey's Lemon Drizzle Cake, which I don't think is anywhere near as good. Number two is Turkish Red Lentil Soup, number three Tomato, Mozzarella and Basil Appertizers and number five is Caramelised Onion and Feta Tart.


Sunday, 28 October 2012

Roast Roots with Lentils and Cumin Yoghurt

Pin It Now!

I've signed up to a weekly Organic Veg Box scheme recently. Of course with this being the end of October there are a lot of root vegetables about. I like roots, but I have to admit that I don't usually buy them all that often. I mean I try and eat seasonal food as much as possible, but in autumn I get excited by brassicas, such as savoy cabbage and Brussels sprout or by squashes, butternut being my favourite. Therefore having carrots delivered on a weekly basis, in addition to the occasional parsnip has meant trying out completely new recipes and it has been a bit of a challenge to not just let them sit in the fridge until limp.

I'm glad for the challenge though because it means that I discover brilliant new recipes, such as Any Veg Lentils with Cumin Yoghurt, or as I have called it Roast Roots with Lentils and Cumin Yoghurt, because I used up both the lingering carrots and parsnips. It would work equally well with red peppers, onions and roast beets I'm sure, or with roast cauliflower. Experiment and see what your favourite is. I was a little skeptical about the addition of lime zest and juice to the lentils, but it is really, really good!

Photobucket

The recipe is based on one that came from one of the Abel & Cole newsletters delivered with the box (this is not a sponsored post, they just deserve a mention). I served it with some grilled haloumi cheese and it made me and three friends happy eaters, so happy indeed that there wasn't a lentil left.

Roast Roots with Lentils and Cumin Yoghurt (serves 3-4)

olive oil
1 large onion, red or white, chopped finely
200g brown lentils, rinsed
400ml vegetable stock
6 carrots, peeled and halved lengthways
2 parsnips, peeled and quartered lengthways
salt and black pepper, to taste
1 small pot of natural yoghurt (150g)
1 heaped tsp of cumin seeds, toasted
a good pinch of chilli powder
1 lime, juice and zest of
a large handful of fresh coriander, chopped

Heat the oil in a large heavy bottomed pan (one that you have a lid for).

Add the onions, lower the heat and sautee for about five minutes or so, until beginning to soften, but not brown. Stir regularly.

Turn the heat up and add the lentils, cook for a minute or so.

Add the veg stock, bring to a boil and then reduce the heat.

Cover and simmer for about 30-40 minutes until the lentils have absorbed the stock. You should check regularly towards the end of the cooking time to avoid the lentils sticking and burning. Or like me you can add a little extra stock and drain it off once the lentils are tender.

As soon as the lentils go on you should toss your root veg in some oil, season with salt and pepper, spread out in one layer on a large baking tray and pop it in a preheated oven 220C/Gas 8.

Turn once after about 15-20 minutes and continue to roast for another 15-20 minutes until golden.

Whilst your lentils are simmering and your veg is roasting, mix the yoghurt in a small bowl with a splash of olive oil, cumin seeds and season with salt and pepper. Set aside.

Add the lime juice, zest and a pinch of chilli powder to the cooked lentils.

Season to taste with salt and pepper.

Toss in the roast roots and freshly chopped coriander.

Serve with the yoghurt dip.

Enjoy!


Wednesday, 24 October 2012

Norwegian Apple Cake to celebrate 5 years of A Pot of Tea and a Biscuit

Pin It Now!

Well, the real reason for making an apple cake was that my lovely friend Liz came round on Sunday with a bag full of windfall apples from her garden that needed using. However,  I also realised that A Pot of Tea and a Biscuit is five years old this week and figured I should bake a birthday cake to celebrate.

Photobucket

How time flies and how things change...

When I started blogging in 2007 there weren't all that many food blogs around. Sometimes it seems to me that you can't move around the internet for food blogs these days. On the one hand that's great, because it is wonderful to see how many people out there all over the world share my love for food and it also means that there is hardly a recipe or tip that I can't find online when needed. On the other hand at times it has made me question why I still bother, especially as so many of the blogs out there are absolutely amazing with magazine quality photographs and a regularity of posts that makes me wonder how the writers do it!?

There have been times over the last five years when I didn't feel like cooking or writing and the blog became like a neglected friend. You know the one? The one you know you should call, but for no apparent reason you keep putting off picking up the phone. And the longer you leave it the more guilty you feel. Well, in this case it's all you wonderful followers out there, those of you who leave nice comments or send me a friendly e-mail, asking questions about a recipe, wondering if I have a tip for a specific cooking related problem and also all you silent followers that register as a number in the blog stats, it's all of you that make me 'pick up the phone' in the end and get back to writing and cooking! So here is a BIG THANK YOU to all of you who keep reading even when I'm being neglectful.


Photobucket

I'd send you all a slice of this lovely apple cake, but I'm afraid technology has not yet advanced to that level, so you'll just have to try the recipe yourself. If you like apple cake, you'll love this one!

Norwegian Apple Cake (serves 8-12)

200g unsalted butter
1 cup sugar
4 eggs
1 tsp baking powder
1 ¼ cup flour
3 apples, peeled and sliced thinly
4 tsp sugar
1 ½ tsp cinnamon
a handful of slivered almonds

Preheat your oven to 180C/350F/Gas

Grease and line a 24/26cm springform pan.

If you want to peel, core and slice your apples before starting on the batter, put the slices into a bowl of water mixed with a bit of lemon juice until ready to use them. Just make sure you dry them off well with a bit of kitchen towel. Alternatively, you can peel and slice as you go along.

In a large mixing bowl, cream the butter and sugar together until light and fluffy with an electric mixer.

Once the butter/sugar mix has become quite light in colour, start adding the eggs, one at a time, beating well after each addition.

Combine the baking powder and flour and sift it over the batter.

Use a wooden spoon to fold the flour into the batter. Don't over mix it, just combine and fold rather than stir. you want to keep the air you have beaten into the eggs/butter/sugar mixture, otherwise the sponge will become quite dense.

Pour half the batter into lined pan, spread out evenly.

Arrange 2/3 of the apple slices (or peel and slice 2 apples at this stage) over the batter.

Sprinkle with the 2tsp of sugar and cinnamon.

Pour the remaining batter over the apples and spread out evenly.

Arrange the remaining slices (or peel and slice the last apple) over the top in a decorative pattern.

Sprinkle top of apples with another 2tsp of sugar.

Bake on the lowest oven shelf for about 25 minutes. Scatter the flaked almonds over the top and return to the oven to bake for another 25 minutes or so. The cake is done when a skewer inserted in the middle comes out clean.

Serve still warm with ice cream or cold with whipped cream.

Enjoy!