When I want comfort and a bit of spice I often make dhal. It's simple, it's tasty and best of all all the ingredients are part of my kitchen staples, so I usually don't have to worry about shopping for ingredients. There are plenty of different recipes if you google dhal and I have various different versions in my cook books as well.
This is quite a basic and quick recipe as uses red lentils, which cook quickly, so that I can have it on the table in just half an hour after coming in from work. This dhal is a bit soupy, so if you like your dhal thicker and a little drier just increase the amount of lentils or reduce the water (just watch that it doesn't stick and burn).
Serve it with our without rice and some chapatis for a comforting and
warming meal, perfect for these cold, dark and (at least in Manchester)
wet autumn nights.

Sorry about the poor picture. It's about time I dug my proper camera out again, especially now that it's getting to that time of year where I'm mainly having to rely on artificial light again.
Dhal (serves 3-4)
1 cup (250ml) red lentils, rinsed well
3cm fresh ginger, chopped finely
2 bay leaves
1 cinnamon stick
2 tbs butter
1 large onion, finely chopped
2 cloves garlic, crushed
2 tsp turmeric
1 tsp cumin
1/2 tsp garam marsala
1/2 red chilli, chopped finely (I left the seeds in, but that's up to you)
3 tomatoes, skinned and chopped
2 tbs lemon juice
1/2-1 tsp salt
a handfull of chopped fresh coriander
Put the rinsed lentils, chopped ginger, bay leaves and cinnamon stick in a large sauce pan and add 3 cups (750ml) of cold water.
Bring to the
boil and then reduce the heat to a simmer. Cook for 12-15 minutes until soft, stirring regularly to stop them from sticking.
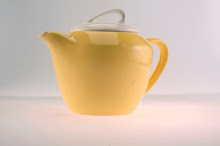
Wednesday, 26 September 2012
Dhal, darling?
Sunday, 9 September 2012
Yottam Ottolenghi's Cod Cakes in Tomato Sauce
I know I have been singing Hugh Fearnley-Whittingstall's praises a lot lately, but Yottam Ottolenghi is another chef who rarely disappoints and whose recipes often get me very excited, wanting to run to the shops for (the admittedly often long list of) ingredients right away. I still owe Yuri a pork belly dinner for giving me his duplicate copy of Ottolenghi - The Cookbook and now I want to buy Jerusalem by Ottolenghi and Sami Tamimi, too.
This recipe was published in last weekend's Guardian Weekend and as soon as I saw it I knew I had to try it. I love fish cakes anyways, but what really excited me about the Cod Cakes in Tomato Sauce was the lack of the usual mashed potatoes to bind and fill. These cod cakes are mainly just that, cod. Or in my case Haddock.

It takes a bit of time to prepare, but comes together easily and to be honest, most of what looks like a fairly substantial list of ingredients are staples and spices that I always have in my kitchen anyways. The fishacakes are delicate, moist and well seasoned. The tomato sauce is sweet with a very subtle hint of heat from the chili.
I served them with rice and the only thing I might criticize a little is that it would have been nice to have a bit more sauce. I guess I could have added a little extra water in the last step though. Here is my adapted version (no parsley in my kitchen, sorry). The original recipe can be found here.

Yottam Ottolenghi's Cod Cakes in Tomato Sauce (serves 4)
For the fishcakes:
3 slices good white bread, crusts removed
600g sustainably sourced cod (fillet, or halibut, hake or pollock), skinless and boneless
1 medium onion, peeled and finely chopped
4 garlic cloves, peeled and crushed
60g coriander, finely chopped
1 tbsp ground cumin
1½ tsp salt
2 large free-range eggs, beaten
4 tbsp olive oil
2 tbsp fresh mint leaves, roughly chopped
For the sauce:
2½ tbsp olive oil
1½ tsp ground cumin
½ tsp sweet paprika
1 tsp ground coriander
1 medium onion, chopped
125ml white wine
400g tin chopped tomatoes
1 red chilli, deseeded and finely chopped
1 garlic clove, crushed
2 tsp caster sugar
Salt and black pepper
Start with the tomato sauce:
Chose your largest frying pan with a lid and heat some olive oil.
Add the onion and spices and fry, stirring regularly for around 10 minutes, until soft.
Pour in the wine and continue to simmer for three minutes or so.
Stir in the tomatoes, chilli, garlic, sugar, half a teaspoon
of salt and some black pepper to the pan.
Continue to simmer over medium heat for around 15 minutes. The sauce should be quite thick at that point.
Check the seasoning, adjust if necessary and set the sauce aside.
Whilst the sauce is simmering away you can start on the fishcakes.
Blitz the bread in a food processor till you have breadcrumbs.
Chop the fish very finely and place it in the bowl, together with the breadcrumbs, onion, garlic, corriander, cumin, salt and beaten eggs.
Use your hands to mix well and then shape it into 8 fishcakes. They should be about 2cm thick and 8cm wide.
They will be quite wet and loose. Refridgerating them for half an hour will help firm them up if needed. Or if like me you are prepping ahead of time you can stick them covered in the fridge for a few hours.
Heat the olive oil in non-sticking frying pan and fry the cakes for three minutes on each side in two batches, adding oil as necessary. This is just to give them some colour and seal the outside a little, not to fully cook them.
Cover with a lid and simmer on a very low temperature for 15-20 minutes. After that time turn of the heat, remove the lid and let the fishcakes sit for another 10 minutes or so.
Sprinkle with the chopped mint (I didn't read this bit of the recipe properly and added the mint to the fishcakes which worked really well too) and serve with rice, coucous, bulghur or just some fresh crusty bread.
Enjoy!
Friday, 7 September 2012
Macaroni Peas by Hugh Fearnley-Whittingstall (aka Cheesy Peas or Cheesy Peasy Pasta)
If you follow this blog than you will know that my absolute favourite cookbook this year (or maybe even ever) is River Cottage Veg Everyday by Hugh Fearnley-Whittingstall and here is another from it. In the book it's called Macaroni Peas, but my friend H. quickly renamed it cheesy peas and it is her favourite comfort food at the moment.
It's delicious, it's so easy and quick to make and best of all, it's one of those recipes for which I always have all the ingredients in the house. As a result it has become part of my regular meal rotation and the go to recipe when I want something quick. I have made it so many times I don't measure the ingredients any more and to be honest there is no need to be all that exact anyways.
I have tried it with both Parmesan and goat's cheese and have to say that I prefer it made with Parmesan. I think the saltiness of it works better with the sweetness of the peas. But why don't you see for yourself?If you want to see the recipe as it is printed in the book, you'll find it here.
The reason I haven't blogged it about it before is that in all the times I have made it, I have never taken a proper picture of it. Ever. Just this mobile phone picture, but it'll just have to do.........

Macaroni Peas or Cheesy Peasy Pasta (serves 4)
500g peas or petit pois (fresh or frozen)
300g small macaroni or other small pasta shapes
50g butter
1 garlic clove, chopped
25g Parmesan or hard goat's cheese, coarsely grated, plus extra to serve
sea salt and freshly ground black pepper
shredded basil, to serve (optional
Bring a large pan of salt water to the boil for your pasta.
Simmer the peas for a few minutes until tender. If you are using older fresh peas this will take a little longer.
Whilst the peas are on, cook your pasta in the large pan of salt water until al dente.
Whilst the peas and pasta are cooking away, melt the butter in a pan over low heat and add the chopped garlic just for a minute or two. You don't want it to brown as that would make it bitter.
Take off the heat.
When the peas are cooked, drain them, but keep the cooking water.
Put about half the peas, the melted garlic butter and the grated cheese in a blender together with about 6tbsp of the pea cooking water and blitz until you have a smooth and loose puree. You can add more water if needed.
Add the remaining whole peas and season to taste with salt and pepper.
Drain the pasta and mix with the hot pea sauce straight away.
Serve topped with extra grated cheese and shredded basil if desired.
Enjoy!
Monday, 3 September 2012
Rounding up the summer
I just realised to my horror that it has been over two months since I last posted, but I really did need a break from everything to recharge and ensure my continued sanity!
It's been a lovely summer, despite the more than miserable weather here in the UK. I was lucky enough to go the Olympics to witness Usain Bolt do his thing (Thanks again, R.!), I spend ten surprisingly sunny days traveling up the west coast of beautiful Scotland with my lovely sister (who would have thought that that's where summer had been hiding all along) and I followed that with more sun and fun in Catalonia with H.
Now, however, it's time to get back to normal life. Work starts back tomorrow, even though we have another two weeks before our old students return and the new ones arrive. I will also endeavor to get cooking and trying out new recipes in my little kitchen to share on here. I hope you're still with me and haven't completely given up on A Pot of Tea and a Biscuit yet!
For now here are some pictures from the last couple of months.....See you soon!