I'm spending Christmas as usual with my family in Germany this year and have been here for nearly a week already. Therefore apologies for my posting and leaving comments still being rather sporadic. As I have said before, once I'm back in the UK in January my intentions are to get back to blogging more regularly and also to get back into making time to leave comments on all your wonderful blogs out there!!!!!
I'll be cooking Rolled Stuffed Loin of Pork with Rubied Gravy from Nigella's Christmas book, Roast Potatoes and Brussel Sprouts with Bacon and Shallots for our family Christmas dinner tomorrow. There'll be eight of us, so please cross your fingers that it all goes swimmingly and without disasters, so that nobody has to go hungry.
I'm not sure when I'll get to share the pictures and recipe with you, as I have brought my camera, but I'm not sure I can edit the pihotos on my Dad's computer. So, it might have to wait until January. We'll see.
For now, let me wish you all a Merry Christmas and
Frohe Weihnachten and leave you with a recipe for a lovely party snack, that's easy and quick to make and perfect for any of the parties that seem to be happening at this time of the year.
Ham and Leek Roll Ups
1 block of frozen puff pastry, thawed
1 package cream cheese
1 package cream cheese with herbs
125gr ham, chopped
1 leek, cleaned and sliced finely
150gr gouda, grated
salt, to taste
pepper, to taste
Preheat your oven to 200C/Gas 6.
In a bowl mix all ingredients, except the puff pastry and set aside.
On a lightly floured surface, roll out the block of puff pastry into a large rectangle. To make it a little easier, I divide the block into two and roll out two rectangles.
Spread the cream cheese mixture evenly over the pastry.
Starting from the long side, carefully roll up the pastry.
With a sharp knife cut the roll into 1/2 inch thick slices and place them cut side down onto a non-stick baking tray.
Bake for 20-25 minutes until golden.
Allow to cool on a wire rack, before serving.
These can be made a day ahead.
Wednesday, 24 December 2008
Merry Christmas from Germany
Saturday, 13 December 2008
Mexi Cashews
The party is over, the place is tidy once more, all the dishes are washed, just my headache hasn't quite stopped yet. It doesn't matter though, it was a lovely evening and I think everyone else enjoyed it, too.
So, I'm not up to much writing today, but thought I'd share this really easy recipe for some great, slightly spicy cashew nuts.
Mexi Cashews
1 egg white
2 1/2 cups cashews
1 tablespoon ground cumin
1 teaspoon chili powder
1/2 teaspoon ground ginger
1/2 teaspoon cayenne pepper
2 teaspoons sugar
2 teaspoons kosher salt
Preheat oven to 150C.
Line a baking sheet with baking paper.
In a medium bowl, whisk the egg white with a few drops of water until frothy.
Add the nuts to the egg white and toss to mix.
Transfer the nuts to a large bowl, using a slotted spoon to get rid of any excess egg whites.
Mix all the spices and sprinkle over the nuts. Toss to coat evenly.
Spread the nut in a single layer on the baking sheet.
Bake for 25-35 minutes, stirring once after about 15 minutes to make sure they get toasted evenly.
Place the nuts onto a cool surface to cool and crisp up.
Tuesday, 9 December 2008
Holiday Wreath Bread
When I was uploading images to tastespotter.com yesterday, I came across pictures of a Holiday Wreath Bread and thought that it'd be a lovely addition to the list of finger foods I'm preparing for a party I'm having on Friday.
As I don't have the 'magic' no-kneed bread dough always ready in my fridge, I used the recipe for bread dough from my Olive and Parmesan Bread. Once it had risen for the first time, I divided it into three equal parts and followed the instructions given on the Artisan Bread in Five Minutes a Day blog, to make three bread wreaths.
It was really easy, as promised, and looks wonderful. I just wished I could break a piece off right now and eat it, rather than putting it in the freezer for Friday.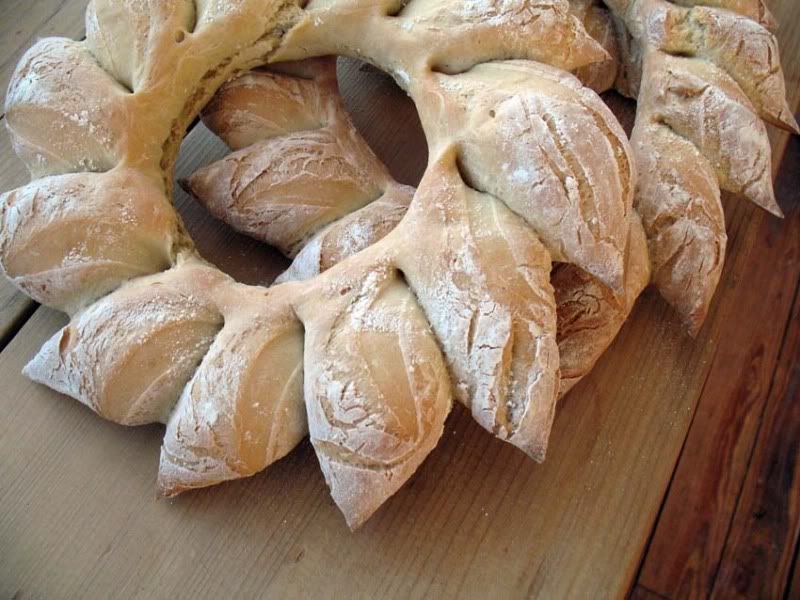
Sunday, 7 December 2008
Nussecken - Christmas Baking
Nussecken are a popular treat in Germany. You can go into any bakery and buy them all year round. They are usually about the size of an Eclaire or Danish, and you could certainly cut them to that size, but I made bite sized ones to go on the Christmas cookie tray.
This is my sister's colleague's wife's recipe, which my sister (Hello I., I know you're reading this. So, please tell your colleague to say a big thank you to his wife!)) has been going on about for ages, saying they are even better than my mum's recipe. She finally typed it and e-mailed it to me last week. Well, now that I have made them and of course eaten one, or two or three...., I'll have to agree. They are fantastic, with a shortbread like bottom and a moist nutty topping.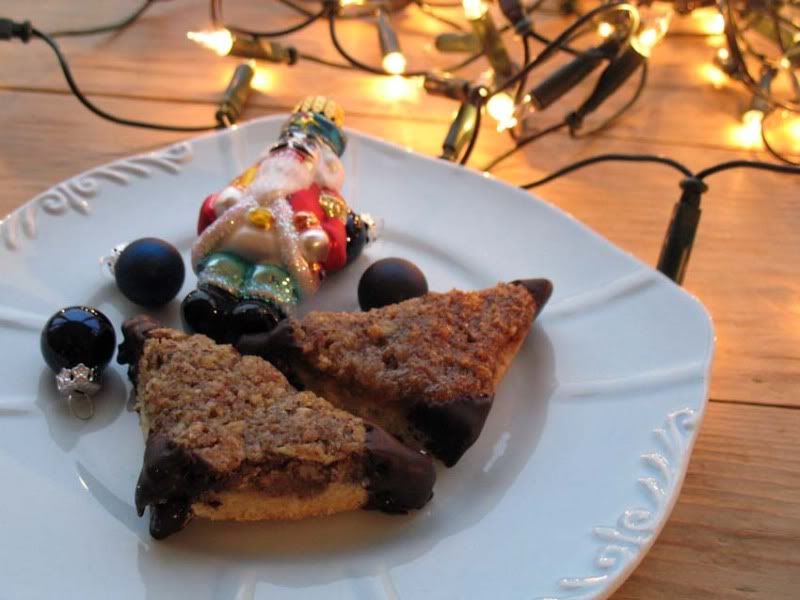
In Germany you can buy ground hazelnuts in the baking section of any supermarket, but here in the UK they are not really available, apart from a couple of times a year when Aldi does a baking special. I usually pick up a couple of bags for the pantry, but was out of them this time. So, I bought whole hazelnuts instead and ground them with my stick blender. I have to say I might keep doing this in future as well, as the result is less 'uniform' and you're left with a few nice crunchy bits of hazelnut. If you decide to grind your own as well, just make sure you cover the bowl with a cloth when switching on the blender, as they go flying everywhere otherwise, as I found out! I also used vanilla essence and a mix of 1/4 caster and 3/4 brown sugar in the nut topping as I ran out of caster sugar, but I'll share the original recipe here as it was given to me, with my alterations in brackets.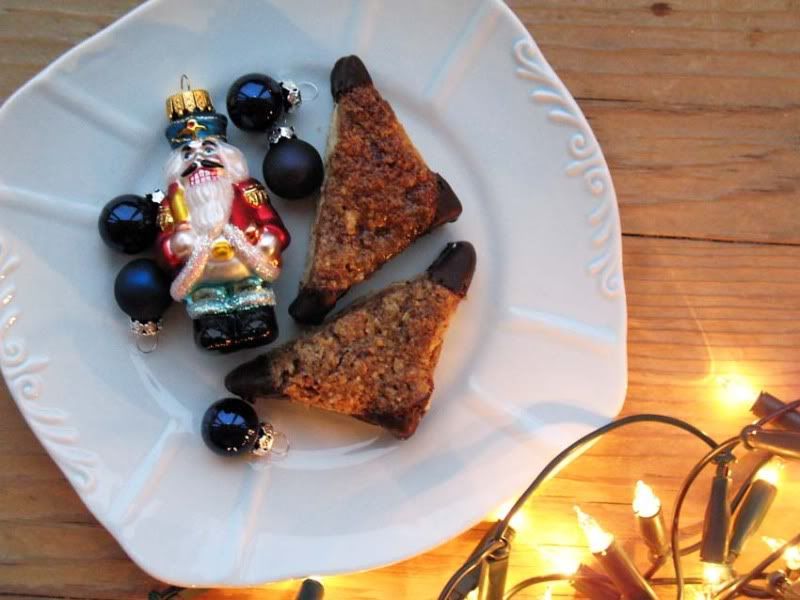
Weltbeste Nussecken - World's Best Nut Triangles (makes about 60)
200gr butter
150gr caster sugar
1 egg
2 sachets vanilla sugar (or 1 1/2 tsp vanilla essence)
375gr flour
2 heaped tsps baking powder
approx. 6 generous tbsp aprikot jam
200gr magarine
200gr caster sugar (or caster sugar/brown sugar mix)
2 sachets vanilla sugar (or 1 1/2 tsp vanilla essence)
2 tbsp water (if you're using vanilla essence reduce the amount accordingly)
400gr ground hazelnuts
120gr dark chocolate, 75% or more cocao content
Preheat your oven to 175C/340F/Gas 3 1/2.
In a large bowl cream the butter with the sugar, using a hand held electric mixer.
Add the egg and vanilla and continue to beat.
Add the flour and baking powder little by little. You might have to change to using you dough hook attachments.
Once all ingredients are combined use your hands to bring it all together until you get a ball of dough.
Spread the dough out onto a large square baking tray lined with baking paper. Press it well into a the corners and up to the edges, until the whole sheet is covered and the dough has an even thickness.
Spread the jam over the dough until it's evenly covered with a thin layer.
For the topping, heat the margarine in a pan on the hob, once it's melted add the sugar and vanilla and stir until disolved. Take of the heat and stir in the ground hazelnuts.
Pour the nut mix over the dough and jam and spread out until it covers the whole tray and has an even thickness.
Bake for 20-30 minutes.
Remove from oven and set aside to cool for 10 minutes.
While it's still warm cut into triangles using a sharp knife, by first cutting it into squares and then cutting the squares diagonally.
Once cool take the triangles and dip the corners of each triangle into the melted chocolate.
Place on a wire rack to set.
These will keep for a couple of weeks in an airtight biscuit tin, layered between grease proof paper, if they don't get eaten first.
Saturday, 6 December 2008
A sign of life
It's been such a long time since I've posted anything on here that I thought I'd better let people know that I'm still alive. The second half of November passed in somewhat of a blur, both a busy, hectic kind of blur and a feverish, fluy kind of blur.
I'm better now though and even though there are so many things on between now and Christmas, I'll make sure that I'll be cooking and of course there is always some Christmas baking to look forward to as well.
Therefore, unless it turns out to be a complete disaster, look out for the recipe for 'Die Weltbesten Nussecken' or 'World's Best Nut Triangles', which I'm gonna bake tomorrow!
Thanks for being patient and sticking with me.
Sunday, 16 November 2008
Olive and Parmesan Bread
I had my first dinner party since moving into my flat last night. Just a lovely, informal night with six friends, good food, some G&Ts and plenty of wine. As my friend J. wasn't too sure what time he'd arrive, due to be on putting-the-kids-to-bed-duty, I wanted to cook something that I could pretty much make ahead and then finish when everyone got here. I decided on making a lasgane and bake some bread to go with it, as I could get everything done in the morning and just had to quickly make a bechamel sauce to pour over the top, sprinkle it with cheese and stick it in the oven. Pudding, in the form of a wonderful Eaton Mess, was provided by my friend E. and B. brought a great salad along.
I dare say that everyone enjoyed themselves and the food and it wasn't until about 2.45am that I was facing mountains of dishes. When I woke up this morning I'm glad I did clean up before I went to bed, even though at the time I would have given anything for a dish washer!
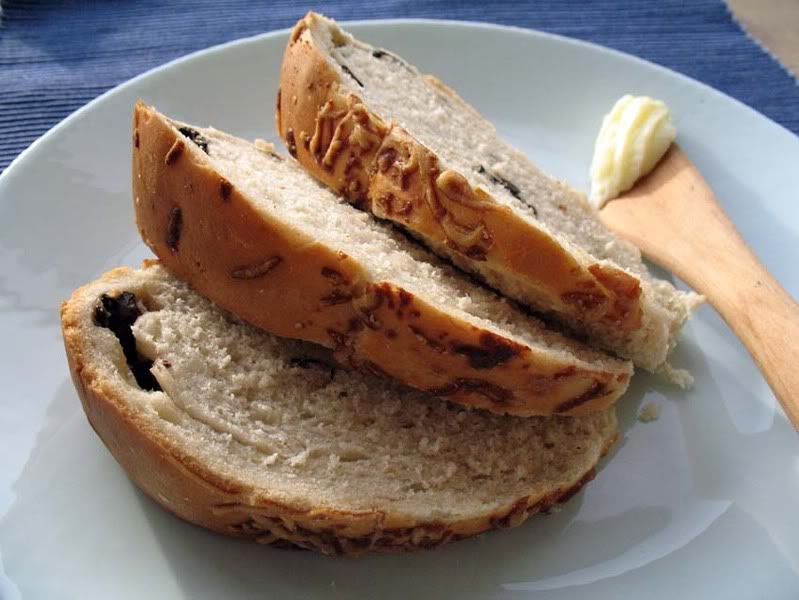
The bread was supposed to be a ring, with olive and parmesan swirls running through it, but I must have kneeded so much air into it that it just kept on rising and the hole that I had left in the middle, was soon taken over by the ever expaning dough. It was lovely and fluffy as a result though. I bet it also would work great with crisp bacon and onions, fried mushrooms and herbs, or peppadew peppers.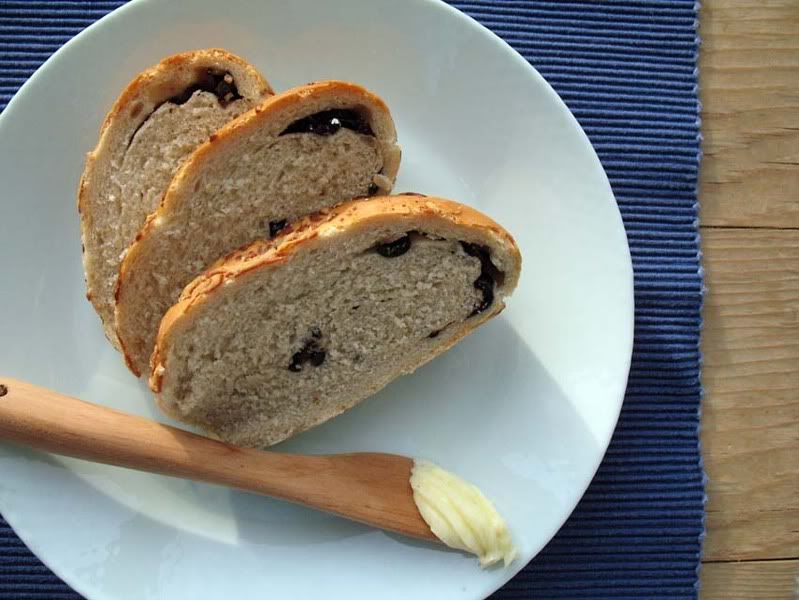
Olive and Parmesan Bread
5 1/2 cups flour
2 cups warm water
1 tablespoon sugar
1 tablespoon dry yeast
2 tablespoons olive oil
2 teaspoons salt 5 1/2-6 cups flour
1 cup kalmata olives, pitted and chopped
3/4 cup parmegiano regiano, grated
milk, for brushing
Measure the flour into a large bowl and make a deep well in the middle.
Carefilly pour the warm water into the well, and add the sugar and dried yeast to the water. Give it a stir, without collapsing the well. (A bit of the flour will 'fall in', but that is fine.)
Cover and put in a warm place. Allow the yeast to proof, it'll be ready when the surface has gone all frothy, it should take about 10-15 minutes.
Add the olive oil and salt and using your hands mix everything together until you get a dough.
Turn out onto a lightly floured surface and kneed for about 5-8 minutes. If the dough is too sticky to handle properly and keeps sticking to the counter, you might want to add a little more flour, one heaped tbsp at a time.
Once finished with kneeding place the dough into an oiled bowl and make sure it gets coated with a little oil all round.
Cover and leave it in a warm place until the dough has doubled in size. This usually takes somewhere between 45-60 minutes.
Punch the dough down and turn it out onto a lightly floured surface again. Roll it out into a large rectangle about 3/4 inch thick.
Sprinkle with the chopped olives and 1/2 cup of parmesan, or whatever your filling of choice is.
Roll up from the long side of the rectangle, swiss roll style, and place onto a baking tray. You can bring the ends together and form a ring, or leave the bread in a log shape.
Cover with a clean tea towel and put in a warm place again for a final rise, approx 30 minutes.
In the meantime, pre-heat your oven to 180C/Gas 4.
Brush your risen loaf with a little milk and sprinkle with the rest of the parmesan before placing it in the oven for about 40-45 minutes. The loaf will be done when the top is golden and it sounds hollow when tapped on the bottom.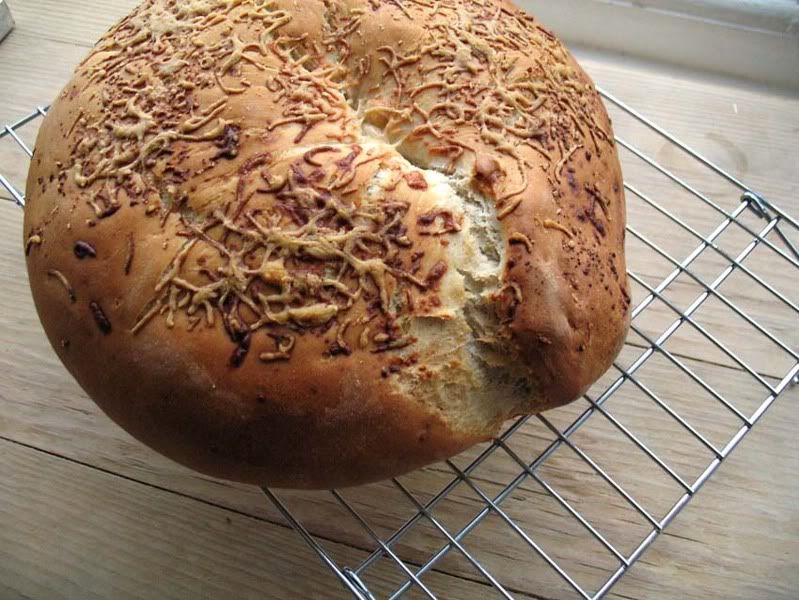
I baked this bread not just because my friends were coming round, but also because the lovely Rosie from Rosie Bakes a 'Peace' of Cake, tagged me for a cause that is well worthy of support.
 Breadline Africa is a registered charity in South Africa that is seeking to put an end to poverty in South Africa and further afield in Africa. Their aim is to break the cycle of poverty and help communities to achieve long term self-sustainability. Breadline Africa was founded in 1993 by social workers and communities in South Africa with minded colleagues in Europe, (who were well placed to source out donations). They are geared to help fund small ground level projects in Africa which are most likely to succeed with financial help.
On Blog Action Day Breadline Africa launched their Worldwide Blogger Bake-Off campaign. The aim is to raise $1 million in funds for a project to convert shipping containers into locations for food production and distribution in Africa. It is hoped that these sustainable community kitchens will not only provide food such as bread and soup to those in need, but also opportunities for skills development within poor communities.
I hope my five chosen people, don't mind being tagged for this, I know you like a challenge:
Marie from A Year at Oak Cottage
Jan from What do I want to Cook Today
Nic from Cherrapeno
Sam from Antics of a Cycling Cook
Fiona from A Cottage Smallholder
Tuesday, 11 November 2008
Lentil and Potato Soup with Kielbasa Tuchowska
I don't know how it is happening, but every night I seem to get home later and later. So, it's quick dinners for me and there have been a few nights now, where I have resorted to beans on toast and similar meals to just quickly fill the hole in my stomach. I know there are better ways and when I saw Marie over at A Year at Oak Cottage posted her recipe for Lentil and Smoked Sausage Soup yesterday I knew that it would come in as a life saver, because it is quick and I'll happily tuck into a steaming bowl of soup any night!
I have adjusted Marie's recipe a bit and combined it with another recipe I often use for Turkish Red Lentil Soup and ended up with a great tasting soup that made me feel really warm and happy.
Lentil and Potato Soup with Smoked Sausage (serves 3-4)
1 onion, chopped
3 cloves of garlic, crushed
1 can of chopped tomatoes
1 cup red lentils, rinsed
2 medium potatoes, diced
4 cups vegetable stock
approx. 200gr Kielbasa Tuchowska
1 tbsp sweet paprika
1 tsp ground cumin
salt, to taste
pepper, to taste
In a large pan, heat a little olive oil and fry the onion until translucent.
Add the garlic and fry for another minute or so.
Add the rest of the ingredients and bring to a boil. Reduce the heat and simmer for about 20-30 minutes until your potatoes and lentils are cooked.
Remove the sausage and cut into slices.
Using a stick blender, puree the soup until smooth.
Return the sliced sausage.
Bring back to a simmer and once hot through serve with a nice slice of crusty bread.
Another award and a tag
Wow, I've just been given another award. This one comes from Nina Timm at My Easy Cooking.
I would like to pass the award on to everyone out there whose blog I regularly read. There are too many of you to name individually, but I guess you know who you are, because I leave comments on most your posts (even though I've been a bit short for time lately and might not have commented each time I visit).
Also, Sam from Antics of a Cycling Cook has tagged me to share six random things about me, so here goes...
1. I have lived in Oslo, Norway for one year before I went to University.
2. I wish I had a middle name, two got to be better than one, right?!
3. I started writing my Christmas cards last night.
4. I'm the youngest of three by some distance.
5. I love shoe shopping.
6. I'm thinking of starting swing dancing classes next week.
Wow, that was harder than I thought. I know that not everyone likes to do these tags, so I'm just going to say: You're tagged if you would like to be!
Wednesday, 5 November 2008
Roast Vegetable Pasta Sauce with friends
I didn't mean to not post for as long as I have, but things have been a bit manic. I've been quite busy at work, spending evenings preparing lectures and getting some work ready for the Manchester Artist Book Fair on Saturday. (If you're in Manchester at the weekend, come along it's a great event and full of lovely handmade books and cards etc. which will make great Christmas pressies.) So there hasn't been much in the way of exciting cooking happening at my house.
The only exception was on Sunday night when my friends L. and H. came round for dinner, before we all headed out into town for some swing music and as we had hoped dancing. It turned out the club was too small and too busy for much swing dancing to be happening, but we had a lovely time nevertheless. Well, I say exception, the meal I made is not high dining or exceptionally beautiful, if that is what you're thinking now, but it is great in flavour, packed with vegetables and herbs and simple to make and that's what excites me every time I make this Roast Vegetable Pasta Sauce. Both L. and H. also seemed to enjoy it as well and we all had seconds.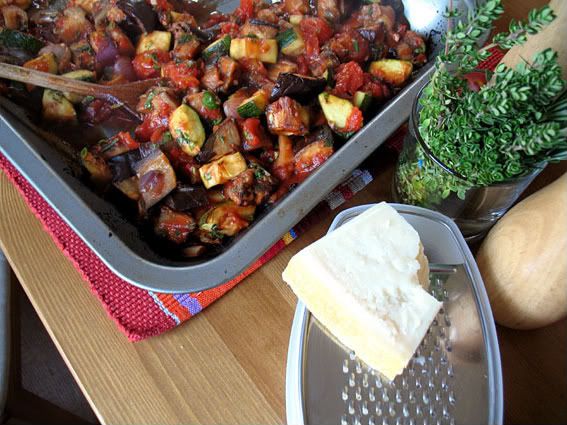
However, before I share the recipe with you I have to say a big THANK YOU to Fiona over at The Cottage Smallholder, for passing the Kreativ Blogger Award on to me. Fiona, I'm thrilled and very excited to receive this from you. It is now my pleasure to pass this on to six other bloggers and also as part of the award I am meant to share six things that I like.
So, firstly here are the six blogs I would like to pass this award on to (as always in no particular order):
Cherrapeno, because I love the wonderful recipes and brilliant photographs and also because Nic has helped me out with some great hints about blogging.
Maninas: Food Matters, for hosting the Eating with Season's event every month, one of my favourite blog events out there.
Little Foodies, because I love the creative ways that Amanda makes her kids love food.
Domestic Goddess in Training, because Jules shares my love for seasonal produce and trying out new things.
Tinned Tomatoes, because Holler gets me really excited about vegetarian recipes as I'm cutting more and more meat out of my diet.
Operation Night Brace, because I know I would have given up by now, but Amy and Gareth are still going and make me laugh at a regular basis.
Now to the six things that I like:
The smell of freshly baked bread.
Sunflowers and all their yellow happiness.
Writing with a fountain pen.
My bicycle.
Sitting on the sofa with a good book and a pot of tea.
Finding some money in a coat or trouser pocket that I had forgotten about.
And finally, here is the recipe:
Roast Vegetable Pasta Sauce (serves 4)
1 large aubergine, cut into 1-inch chunks
1 large onion, roughly chopped
2 tablespoons olive oil
2 medium courgettes, trimmed and sliced
2 garlic cloves, minced
1 can chopped tomatoes
1/3 cup chopped fresh basil
1 tablespoon chopped fresh rosemary
2 tablespoon chopped fresh thyme
1/2 cup vegetable stock
Preheat oven to 200C/Gas 7/400F.
Place the aubergine and onion into a large baking tray and drizzle with oil Season with salt and pepper
Roast for about 25 minutes, until they start to brown. Stir once or twice during that time.
Add the courgette and return to the oven for another 20 minutes or so.
Stir in the chopped tomatoes, garlic, rosemary and thyme and put back into the oven for another 15 minutes.
Pour in the vegetable stock.
Add your cooked pasta and the basil to the tray and stir until the pasta is coated with the sauce.
Serve with freshly grated parmesan and a glass of your favourite wine.
Monday, 27 October 2008
Roast Garlic and a Belated Anniversary
I just realised that yesterday was A Pot of Tea and a Biscuit's first anniversary. I can't believe it (not that I missed it, because I'm quite good at missing things), but the fact that it has been a year since I wrote my first post. I don't think I thought back then that I'd really get into this whole blogging thing myself, and I certainly didn't think that there would be over 13,000 visits to my blog and nearly 60 people reading my ramblings in their Google Reader on a regular basis. So, thank you, each and everyone of you, whether you are just lurking or whether you leave comments, without all of you it'd only be half the fun!
Onto the food now though....
I love roasted garlic. It's great for using in all sorts of dishes. However, I like it best just as it is, squeezed straight onto some fresh crusty bread. Heavenly. Some of you might think that it must be awfully strong, but believe me when I say that roasting it makes it wonderfully mellow and brings out a lovely sweetness, just like slow cooking onions does.
Most recipes I know call for a huge amount of olive oil to roast the garlic in, which makes it somewhat 'unhealthy' (I know, I know, some olive oil in your diet is actually really good for you). So, this recipe replaces most of the oil with vegetable stock and in my opinion the garlic tastes just as great and it is the recipe I always use these days. You can roast as many bulbs as you like at once, the large elephant garlic bulbs work great, but standard bulbs work just as well.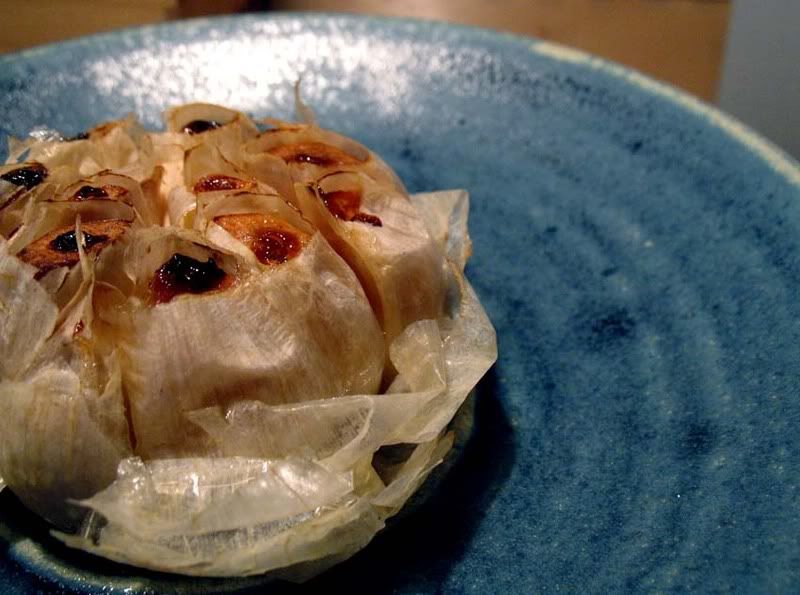
Roast Garlic
2-3 bulbs of garlic
vegetable stock
olive oil
6 sprigs of thyme
Cut the tops off the garlic bulbs, just enough that the tops of the individual cloves are taken off. (You can keep the cut-offs and use them minced in another dish.)
Place the bulbs in a small oven proof dish, top each one with a couple of sprigs of thyme and drizzle with a little olive oil.
Pour enough stock into the dish to come up to about 1/3 of the bulbs.
Cover with some tin foil and bake in a pre-heated oven at about 160C/325F/Gas 3, for about an hour.
Sunday, 26 October 2008
Chocolate Mud Cake
As I said in my last post I baked two cakes last weekend, but I've been so busy all week that I'm only just getting around to writing about the second one. Last Saturday I was invited to an informal dinner party and I promised to bring the dessert, so the night before I went through quite a few of my cook books to decide on what to make. In the end I decided to go with a tried and tested recipe for a wonderful chocolate cake, because I was pretty sure that most people do love chocolate cake and I wasn't wrong.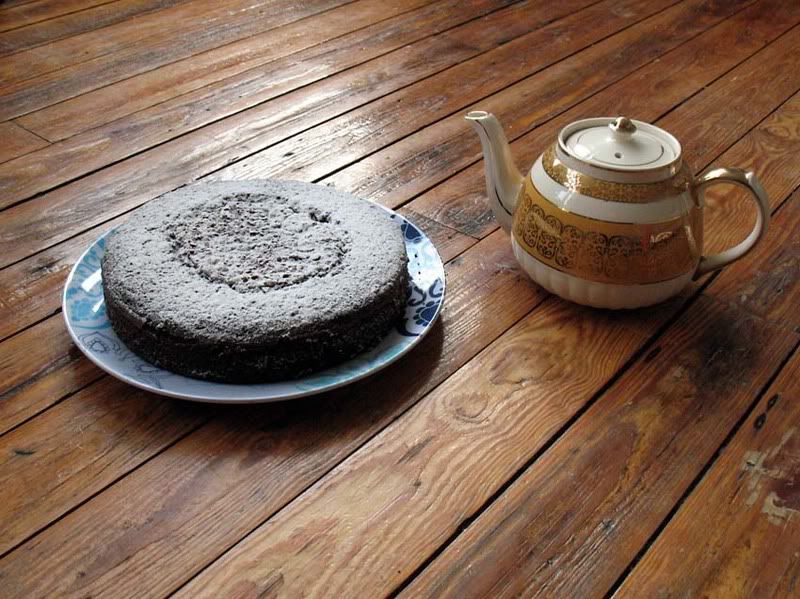
The coffee and dark chocolate in the cake means it is not overly sweet and thanks to the orange juice it is also wonderfully moist. Of course using all that butter and sugar means it is not the kind of cake you want to eat while on a diet (if there is such a cake at all), but it definitely makes for an indulgent chocolate cake, which is worth forgetting the calorie count for once in a while. Don't let the childish name of the cake fool you, it's without doubt a cake that will also please the grown-ups!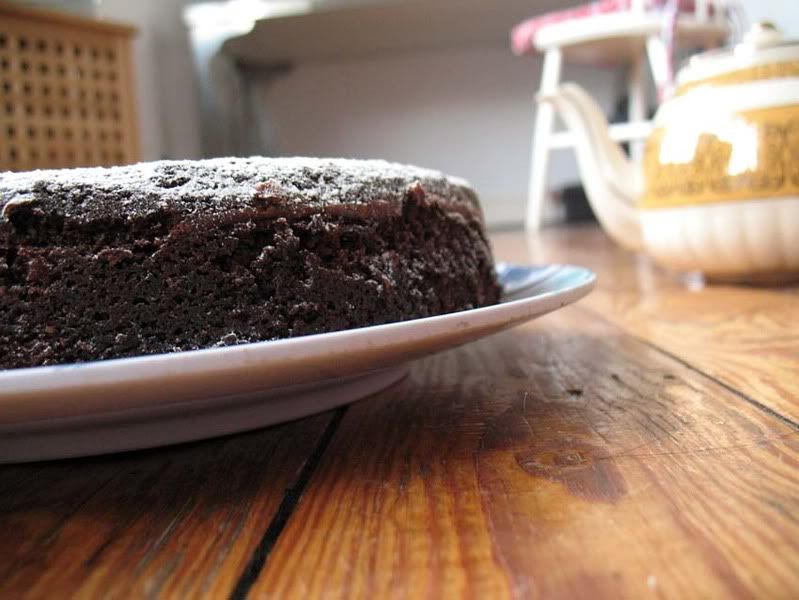
Chocolate Mud Cake
1 1/4 cup strong coffee
1/4 cup orange juice
175gr good quality chocolate, 70% cocoa solids (I use Green & Blacks or Lindt)
250gr unsalted butter
1 3/4 cup sugar
2 cups flour
1 tsp baking soda
2 eggs
1 tsp pure vanilla essence
In a sauce pan bring the coffee and orange juice to a simmer and add the butter and broken up chocolate. Stir until both have melted.
Add the sugar and stir until it has dissolved. Remove from heat, set aside and allow to cool.
Sift the flour and baking soda into a large bowl and make a well in the middle.
Beat the eggs and vanilla essence and stir into the cooled chocolate mix.
Pour the chocolate mixture into the well you have made in the flour and using a wooden spoon stir until combined.
Pour into a well greased and floured 24cm springform pan and bake in a preheated oven at 140C/275F/Gas 1 for 1 1/2 to 1 3/4 hours or until a wooden skewer inserted into the middle of the cake comes out clean.
Allow to cool for 20 minutes, before removing the springform pan's ring.
Sunday, 19 October 2008
Tana Ramsey's Lemon Drizzle Cake
I used to bake quite a lot, but since moving and living on my own it doesn't seem to make that much sense to bake a cake. Either I'd have to eat it all, in which case even cycling to work and everywhere else would not stop me from piling on the pounds, or alternatively a lot of it would go to waste, and that just doesn't go with the whole love food, hate waste philosophy. This weekend I've baked two cakes though, one which I took to a dinner party yesterday and which I'll post about later this week and a Lemon Drizzle Cake, just because I fancied some and I figured that even if nobody comes round to visit to today, I'll just have a slice or two by myself and take the rest to work and make my colleagues happy tomorrow.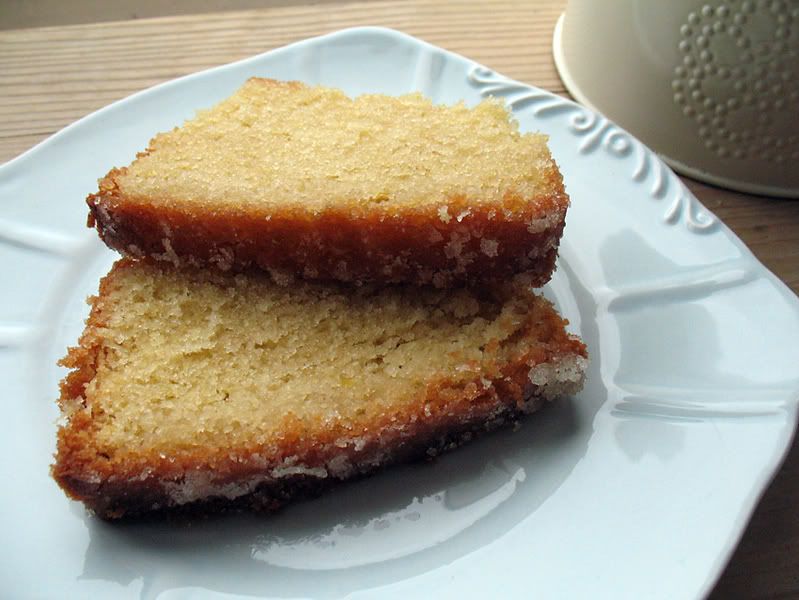
A couple of months ago Tana Ramsey's Lemon Drizzle cake made an appearance on quite a number of food blogs and I've been meaning to try it ever since. So, I finally did. It's a good cake, easy to make, moist and lemony and I'm sure it'll still be good and not dried out after a couple of days, but for me it's not quite lemony enough and my other recipe remains my favourite.
Here's the recipe as it appears on the BBC Good Food website for you, so you can try it for yourself and see if you like it better than your favourite Lemon Drizzle Cake.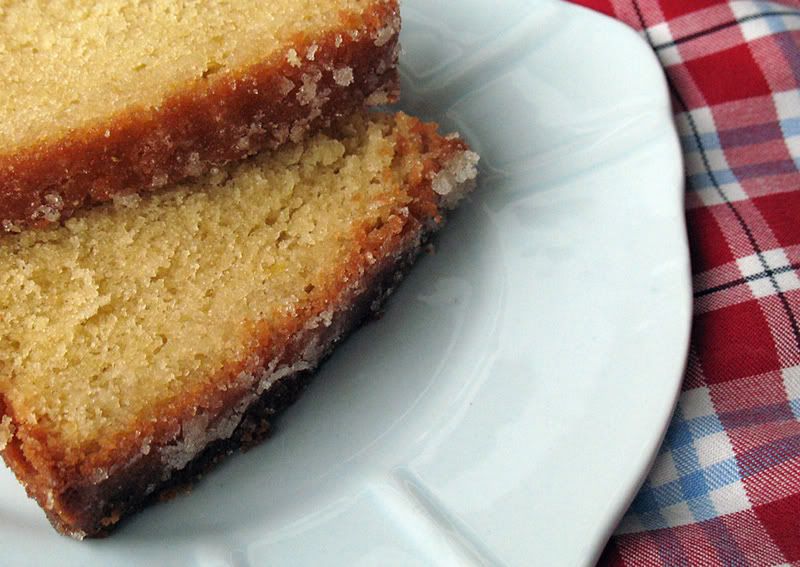
Tana Ramsey's Lemon Drizzle Cake
225g unsalted butter, softened
225g caster sugar
4 eggs
finely grated zest of 1 lemon
225g self-raising flour
juice of 11⁄2 lemon
85g caster sugar
Heat oven to 180C/fan 160C/gas 4.
Beat together the butter and sugar until pale and creamy, then add the eggs, one at a time, slowly mixing through.
Sift in the flour, then add the lemon zest and mix until well combined.
Line a loaf tin (8 x 21cm) with greaseproof paper, then spoon in the mixture and level the top with a spoon.
Bake for 45-50 mins until a thin skewer inserted into the centre of the cake comes out clean. (Mine took 60 minutes.)
While the cake is cooling in its tin, mix together the lemon juice and sugar to make the drizzle.
Prick the warm cake all over with a skewer or fork, then pour over the drizzle - the juice will sink in and the sugar will form a lovely, crisp topping.
Leave in the tin until completely cool, then remove and serve. Will keep in an airtight container for 3-4 days, or freeze for up to 1 month.
Monday, 13 October 2008
The best ever Brussel Sprouts (with Bacon and Shallots)
It definitely is autumn now! How do I know? Well, there are a number of things, I've started to make soup again, the leaves outside my window are turning and plenty of them are to be found in big piles on the ground, I've occasionally put the heating on for a few hours, all big give-aways I know, but best of all, and definitely a sign that summer is over: I can buy fresh brussel sprouts at the green grocer's again!
Yes, that does make me a very happy bunny. From absolutely hating them as a kid (I learned recently that our taste buds die as we grow up and that's why we start liking some foods that as children we might have considered too bitter or too hot etc.) sprouts have quickly made their way up the 'Sylvie's Favourite Vegetables Ladder' and definitely reside in my top five these days. And yes, I'm fully aware that for a lot of people they'd probably be in their bottom five.
I love them just simply steamed with some butter and nutmeg, but the best way to have them in my opinion is this Rachel Ray recipe. The first time I made them this way was for a Christmas dinner, even D.'s stepmother who usually doesn't particularly embrace change and new ways of cooking old favourites, asked the next year if I'd make my special sprouts again. Then I made them for my family in Germany and where they also went down very well. So, if you want to raise the good old sprout to a whole new level, give this recipe a go. You might even transform some sprout haters into sprout likers, if not lovers!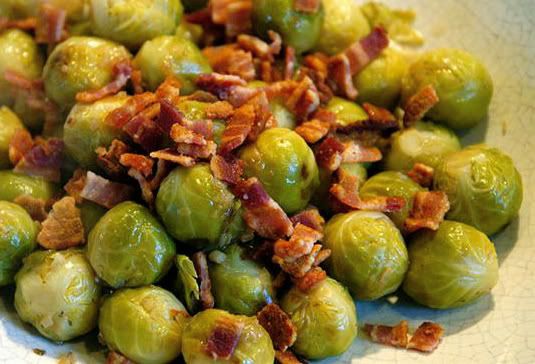
This is also my entry for the Eating with Seasons - October event hosted by Maninas: Food Matters, because as I said, sprouts have just started to re-appear after their long summer break in all the green grocers and supermarkets here in the UK!
Brussel Sprouts with Bacon and Shallots (serves 4)
3 rashers bacon, chopped into small bits
1tbsp olive oil
2shallots, chopped finely
1 1/2lb smallish brussel sprouts, trimmed
1 cup good quality chicken or vegetable stock
salt, to taste
pepper, to taste
In a frying pan, fry your bacon until brown and starting to crisp.
Remove the bacon from the pan, reduce the heat to medium and add the olive oil and shallots for a couple of minutes, until they start to soften.
Now add the sprouts and fry for about 2-3 minutes.
Add the stock and bring to a boil, reduce the heat, put on a lid and simmer for 10 minutes or until tender.
Top with the bacon bits and serve.
Enjoy!
Sunday, 12 October 2008
Pizza
My dad is one of the very few people I know who do not like pizza, and I'm having a hard time trying to understand why you would possibly not like it. Of course there are pizzas that I don't like that much either, for example I am not so keen on chicken on a pizza or all those weird ones you can get here in the UK that have donner meat on them. Generally though I see pizza as a great treat.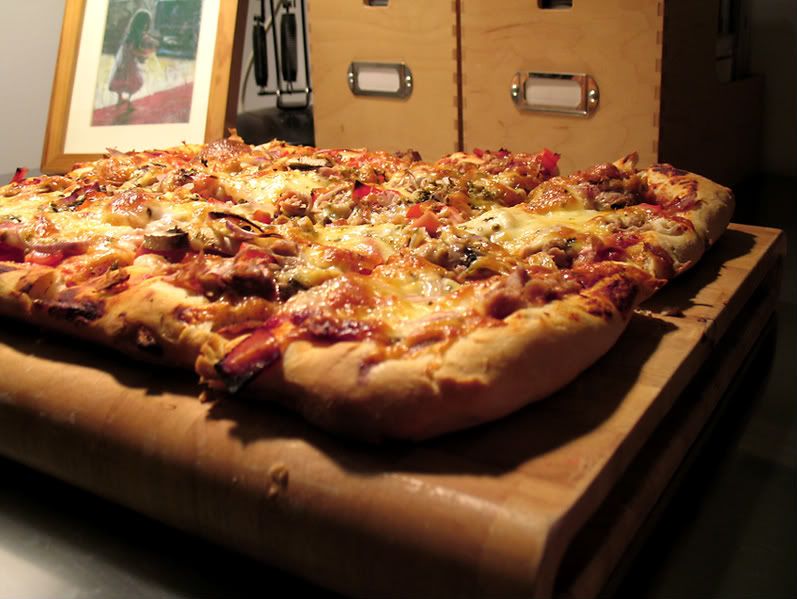
There's of course a difference between the pizza you buy in a restaurant or take away place and homemade pizza. I guess it mainly has to do with the temperature it's baked at, but I like either and if you have never made your own you just gotta try it. It's so much fun making your own dough and then topping it with all your favourite things.
One of my favourite toppings will seem strange to some of you US readers out there, as it is not a common topping in the US at all, but it's a different story in Germany and you can find it here in the UK and all other European countries I have ever had pizza in as well. It is tuna. Sounds strange to you? Trust me, it's good. Just try it!
This time, my friend C. helped me to make this pizza and in addition to a can of tuna we also added some strips of deli ham, mushrooms, peppers, red onion and plenty of cheese. Just like the Jambalaya, we finished every last crumb of it! The recipe for the dough and the sauce both make quite a lot, but they freeze well and it means that next time you can have your pizza ready in a jiffy, just gotta remember to take everything from the freezer to thaw.
Cheesy Pizza Crust
2 packages fast rising yeast
2 cups warm water
2 tbsp sugar
2 tsp salt
4 tbs olive oil
1/2 cup vegetable oil
1/3 cup grated parmesan cheese
6 cups flour
Put the flour in a large bowl and make a well in the middle. Mix the warm water water, yeast, sugar, and salt and carefully pour into the well you made in the flour. Allow to sit until foam appears on the top.
Once the yeast is foaming, add the oil and start mixing everything together with your hands or you can use a food processor with a dough hook attachment.
Once it has all combined, turn it out onto a floured surface and kneed for about 5 minutes, incorporating the grated parmesan as you go along. You might need to add a little more flour to make the dough stop sticking. Do so 1tbsp at a time.
Transfer the dough to a large, oiled bowl and cover with a cean tea towel.
Place in a warm location and allow to rise for one hour or until doubled in size. (I always put some hot water in a sink and place the bowl on a rack over the top of it.)
Punch down dough, kneed for another few minutes, return to the bowl and allow to rise a second time.
After the second rise the dough is ready to be divided and rolled, or stored in the freezer.
Once you have rolled the dough out into the desired shape, top with your favourite toppings and bake in a preheated oven at 220C/Gas 7 for 12-15 minutes.
Pizza Sauce
200gr tomato puree (tomato paste)
70ml water
1 1/2 tsp sugar
1tbsp olive oil
1/4 tbsp lemon juice
1 clove of garlic, crushed
1/2 tsp oregano
1/4tsp basil
1/8tsp thyme
Combine all ingredients in a saucepan and bring to a boil.
Turn down the heat and simmer for about 15 minutes.
If your tomato puree is very acidic, add a little more sugar and water and simmer a little longer to thicken.
Friday, 10 October 2008
Jambalaya
Where do the days go? It's the weekend again and I have no idea what happened to the rest of the week! My friend C. flew back to Germany on Tuesday, but before she did, we managed to do some cooking together. One of the dishes we cooked was Jambalaya.
Usually I'm not that keen on smokey flavours, I always prefer my bacon, salmon, ham etc. unsmoked, but for some reason I do enjoy the smokiness of a good Jambalaya and the two of us polished off the whole thing. Well, I did cut the recipe in half to serve two, but when we first looked at how much there was we thought we'd made way too much. We were definitely wrong though and somehow managed to find enough room for every last bit.
This is a recipe from Lesley Waters' Simple Ways to Success - Healthy cookbook. I sometimes find her a bit annoying when she's on telly, but I have to say every dish I have tried from this book so far has been a success and I guess that's what really counts. As I said, I cut the recipe in half, used white Basmati rice and left out the cloves, but I write the original amounts and ingredients here for you to try or tinker with. Oh, and sorry about the bad picture, I've gotta get used to taking pictures with artificial lighting again, as the days are getting darker quickly!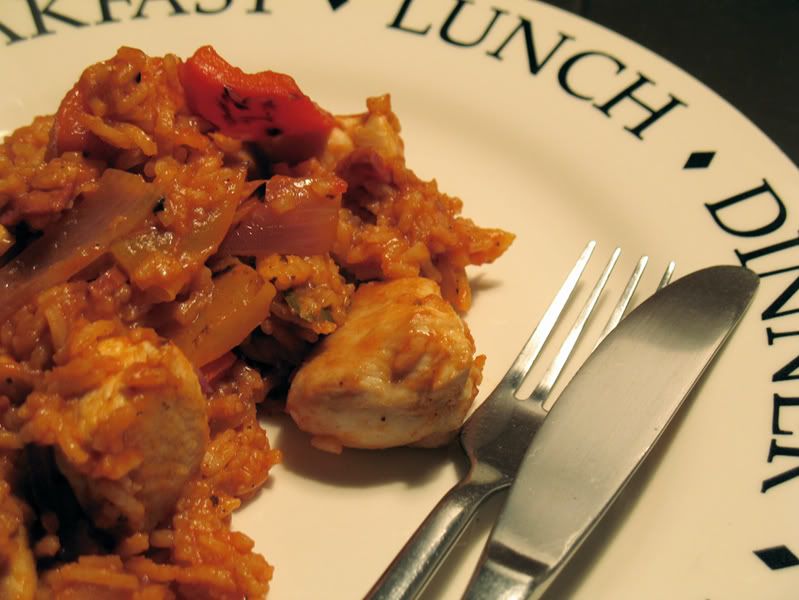
Jambalaya (serves 4)
2 chicken breast fillets, cut into bite sized pieces
3 peppers (red, yellow and orange), roughly chopped
350gr Camargue red rice, cooked
80gr sliced chorizo
1tbsp olive oil
1 red onion, cut into wedges
2 garlic cloves, crushed
1 1/2 tespoons smoked paprika
pinch of ground cloves
3 bay leaves
400gr can of chopped tomatoes
200ml vegetable stock
freshly ground black pepper, to taste
salt, to taste
In a large shallow frying pan, fry the chorizo slices for about half a minute on each side. Take them out using some tongs, leaving as much of the released fat in the pan.
Add the chicken pieces and fry until golden, approx. 10minutes. Take out off the pan and drain on some kitchen paper.
Add the oil to the pan and fry the peppers and onion for about 5minutes. Add the garlic, paprika, cloves and bayleaves and cook for another minute or so.
Add the cooked rice, chorizo, chicken, tomatoes and the stock and stir well. Bring to a simmer and continue to cook for about 10 more mintes, stirring frequently. Most of the liquid should be absorbed.
Season with salt and freshly grounf black pepper to taste.
Enjoy!
Sunday, 5 October 2008
To market, to market to buy a fat pig...
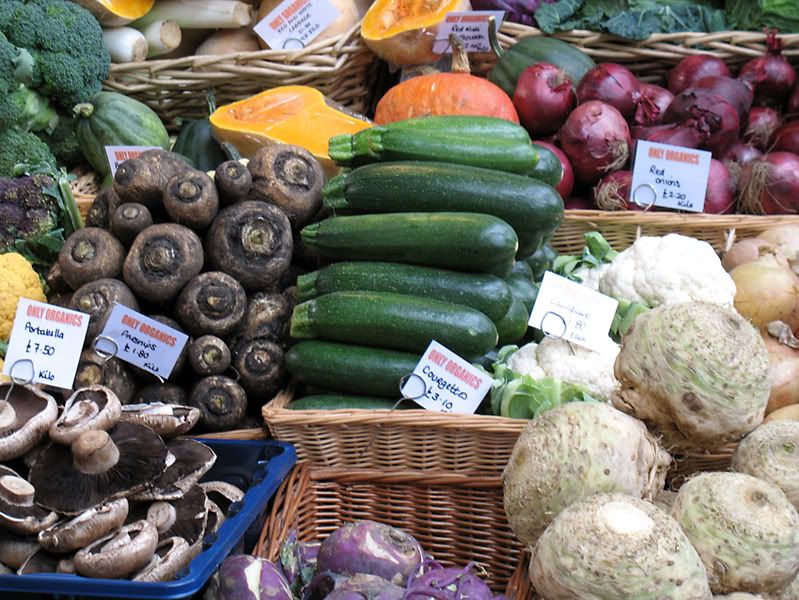
I have been wanting to go to London's Borough Market for ages now, because everything I have ever read about it, describes it as a fantastic place, a total foodie paradise. On Saturday I finally had a chance to go and so I did! My friend C. (the one who smells freshly baked bread from miles off) is over from Germany for a week and we took the 6.41am train from Manchester to London for a day of shopping and just enjoying ourselves.
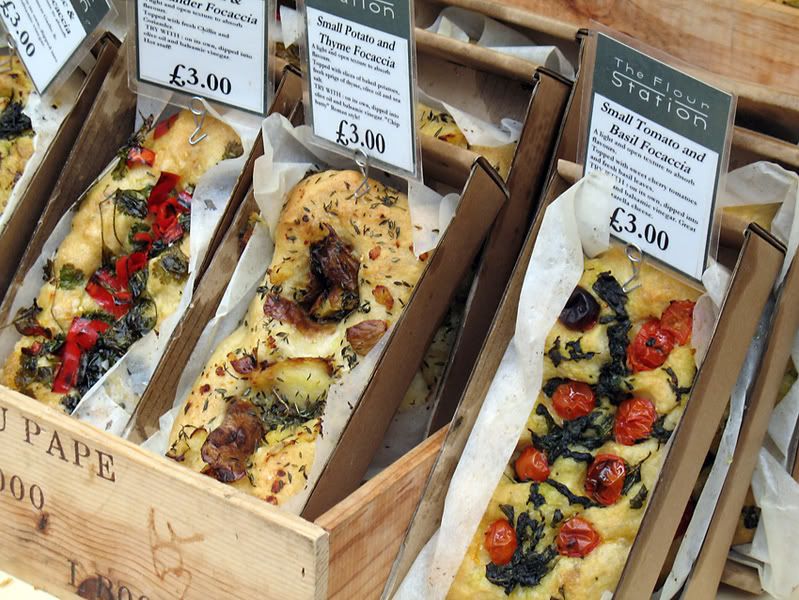
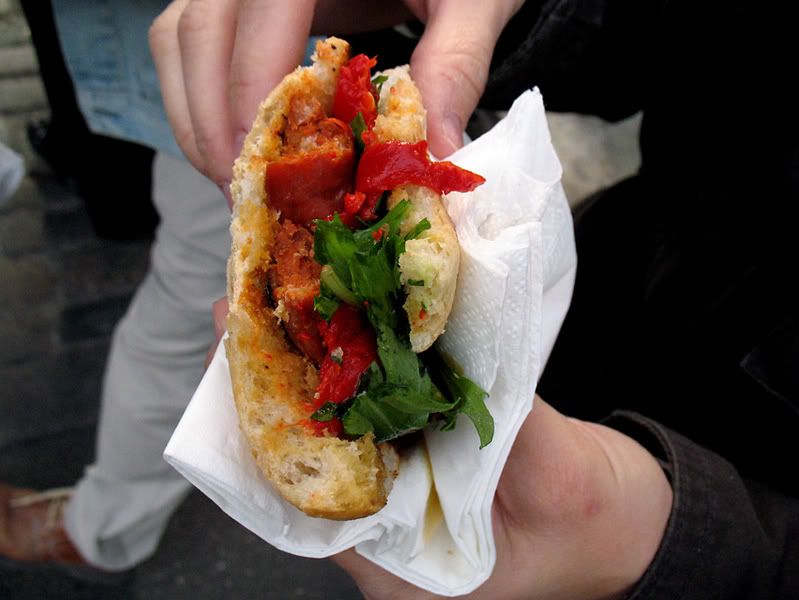
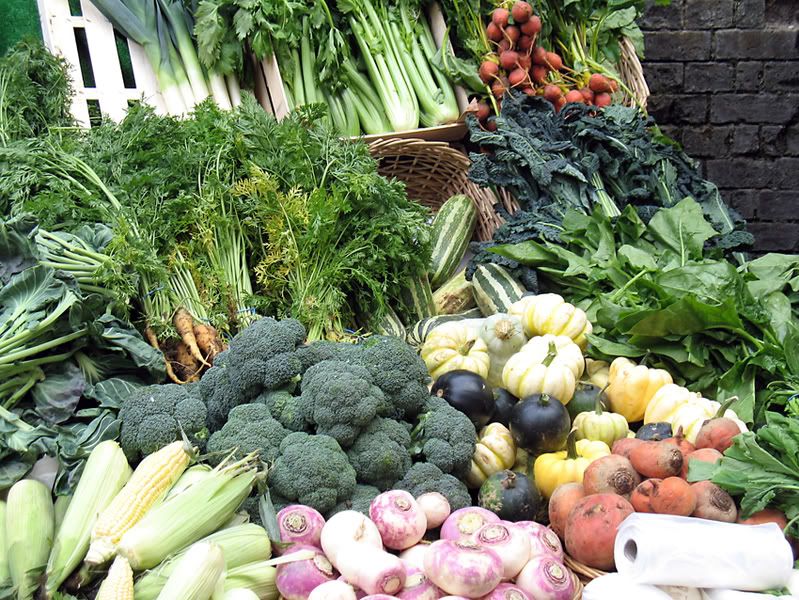
Arriving in London a good few hours later and feeling a little jaded, our first stop was Borough Market and let me tell you, everything you've ever heard about it, is true. Just how I imagined, if not better! I was feeling very awake, very quickly. There were so many stalls selling fantastic produce, bread, cakes, cheese, meat, and all kinds of snacks, that my senses were a bit overwhelmed at first. There were things to see and smell everywhere. Unfortunately, as we still had a whole day of traipsing around London ahead of us, I couldn't really shop to my heart's content, but we had a wonderful chorizo, pikante pepper and rocket sandwich from Brindisa and I had some Raspberry and Bitter Chocolate Cake, while C. chose a large Chocolate Brownie from one of the bakers.
I feel that my words just aren't enough to describe what it was like, therefore I'll let some pictures do the rest of the talking....


Tuesday, 30 September 2008
British Food Fortnight - Yorkshire Parkin
I'm a little ahead of myself as Parkin is traditionally served for Bonfire Night on the 5th November, but I thought I'd blog about Parkin now as it fits perfectly into the British Food Fortnight Challenge and Competition, hosted by Amanda at Food, Glorious Food. Also, I like Parkin at any time during autumn and winter and think it'd be a shame to just limit it to Bonfie Night.
Parkin is a ginger cake that comes from the North of England, and is especially associated with Yorkshire. Often it is moist and sticky, but there are also drier variations. Another great thing about it is that it keeps really well, and some people even prefer eating it after it's sat for a few days.
125 g butter or lard
125 g golden syrup
125 g black treacle
125 g sugar
250 g plain flour
250 g medium oatmeal
1 pinch salt
4 teaspoons ground ginger
2 teaspoons ground cinnamon
1 teaspoon baking soda
1 egg, beaten
Preheat oven to 150°C/Gas 2/300°F and grease an oven proof dish, approx 10x10 or equivalent.
Place the butter, golden syrup, treacle and sugar in a pan and place it over a very low heat, stirring constantly until all the sugar is dissolved.
In a bowl sift together flour, oatmeal, baking soda, salt, ginger and cinnamon.
Make a well in the centre and pour in the melted butter mixture, beat until everything is comkbined.
When combined add the egg and mix until you have a smooth soft batter.
If the batter seems to be stiff add 1tbsp of milk.
Pour into the greased oven dish and bake 50-60 minutes in the top half of your oven.
Allow to cool before removing and cut into squares.
The Parkin will last a a couple of weeks if you store it in an airtight cake tin.

Monday, 29 September 2008
Anybody for a Hot Lemon?
This is the second time this month that I've come down with a cold. Either it means I'm pretty run down, or more likely, that I've caught Freshers' Flu. With all the students arriving back, there are just too many germs around at work to avoid them all. Most of my colleagues are suffering, too.
As there isn't a right lot that one can do about a cold, I'm just sticking to paracetamol, hot water bottles and plenty of mugs of Hot Lemon. All the Vitamin C helps the immune system of cause, it warms you through and is refreshing at the same time and of cause it is always good for you, not just when you've got a cold.
Hot Lemon with Ginger and Honey (serves 1)
1 the juice of one lemon
1/2tsp-1tsp of freshly grated ginger
honey, to taste
Squeeze the juice of one lemon into a large mug.
Add the grated ginger.
Fill the mug with water that has just stopped boiling.
Sweeten with honey to taste.
Enjoy while hot!
Tuesday, 23 September 2008
Some Housekeeping
I've been feeling very flattered this last couple of weeks as I have been given three awards, but I just haven't had time to blog about it or to think about who I'd like to pass them on to and it's about time I did it.
So, without further ado I'd like to thank Jan from What Do I Want to Cook Today? for awarding me with the 'Perfect Blend of Friendship Award'. Thank you, Jan and I'm still hoping that we'll manage to meet up some day!
I'd like to pass this award on to Melissa from It's Melissa's Kitchen, because she was one of the first people to stop by here frequently, leaving encouraging comments and I feel that I have to make up for neglecting to regularly stop by her blog a little lately as I've had so little time!
The second thank you goes to Jan again, but also to Nina of My Easy Cooking for passing on the Brillante Weblog on to me.
1. When you receive a diamond, make a post about it on your blog.
2. Name the blogger from whom you received it.
3. Award the diamonds to seven other bloggers.
4. Link them.
5. Tell them they received an award.
I would like to pass this on to (in no particular order):
Gareth and Amy from Operation Night Brace
Fred and Ginger at Dinner Diary
Annie at Annie's Eats
Sam at Antics of a Cycling Cook
Val at More than Burnt Toast
Gloria at Canela Kitchen
Wendy at A Wee Bit of Cooking
Monday, 22 September 2008
It ain't looking that pretty...
...but it makes up for it in taste. I was thinking of stealing Deborah's Bad Photo Sunday idea for the post about this dish. On Sunday's she blogs about those recipe that taste good but are not very photogenic on her blog Taste and Tell. My Vegetable and Potato Bake is definitely one of those.
I cooked it during my recent trip to Germany at my mum and dad's house. On Friday mornings my mum volunteers in a Residential Care Home, reading to the residents from the local newspaper and generally having a chat about stuff going on in the area. So she asked me if I'd mind cooking that day, so she wouldn't have to do it when she got back. Of course she knew I'd happily oblige and so I started looking for recipes, because I quickly realised that a lot of the things I cook without using a recipe would not really be to my parents' taste as my dad doesn't like garlic and both of them are not into spicy food either, plus I didn't want to go shopping for tons of ingredients and use some of the veg from my mum's garden.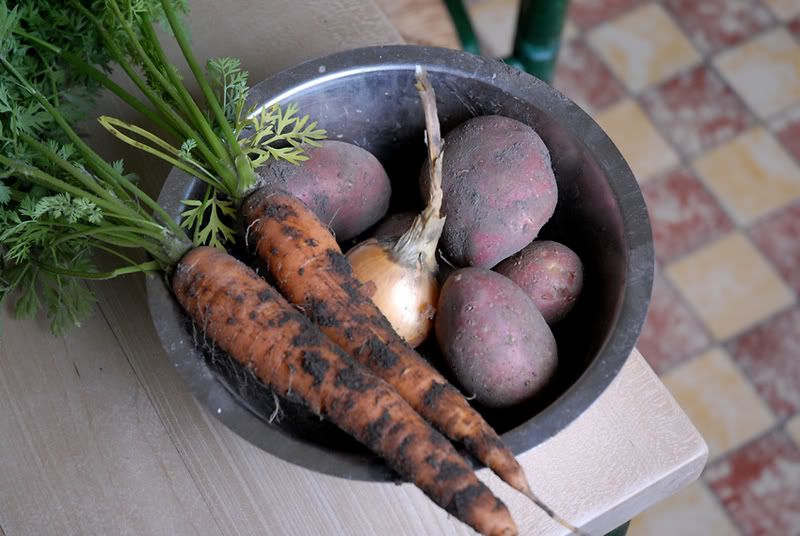
After a while trawling the internet, I found a recipe that looked somewhat promising on chefkoch.de, a German food website. Best of all, it meant I could get fresh onions, carrots and potatoes from the garden and only had to buy the broccoli and meat. The outcome actually surprised me. Even though I thought the recipe sounded okay, I chose it more for my mum and dad's taste buds than my own, but I have to say I enjoyed it a lot and thought it well worth sharing. The original German recipe can be found here, oh and here's also the bad photo before I forget it: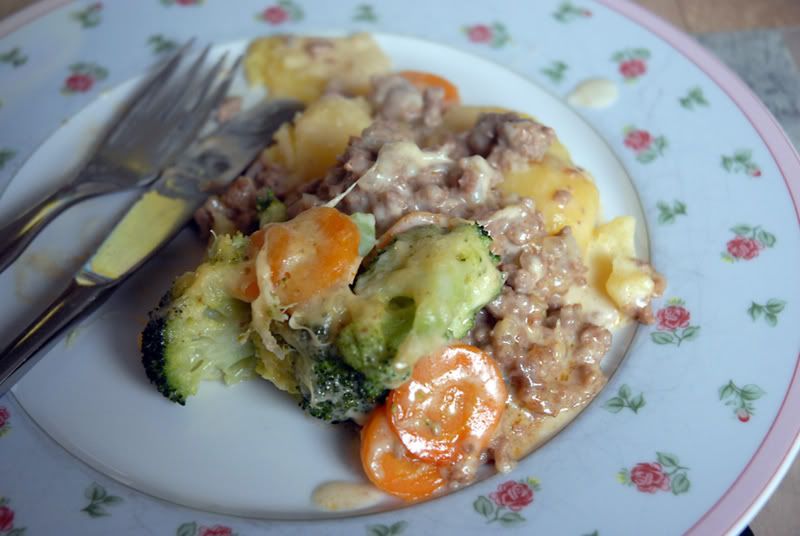
Vegetable and Potato Bake (serves 4)
1lb potatoes, peeled, cooked and sliced
1 head of broccoli, cut into florrets
3-4 carrots, sliced
1 onion, chopped
2 cups vegetable stock
1/2 lb minced beef (ground beef)
1/2lb minced pork (ground pork)
1 cup grated cheese
2/3 cup single cream (half and half)
4 tbsp tomato ketchup
1 tbsp margarine or butter
2 tbsp flour
salt and pepper, to taste,
ground nutmeg, to taste
sweet papika, to taste
Preheat your oven to 180C/Gas4.
Bring the vegetable stock to a boil and cook the sliced carrots for about 4 minutes. Add the broccoli florrets and cook for a further four minutes. Drain, but retain about 1/4 of the stock.
While the veg is cooking, heat some oil in a frying pan and sweat the onions until translucent. Add the minced meat and brown well. Season with salt, pepper and paprika. Stirr in the tomato ketchup.
In a seperate sauce pan, melt the butter and combine it with the flour using a whisk, until it starts to colour lightly. add the cream and the retained vegetable stock, little by little, whisking constantly to avoid lumps. Season the sauce with salt, pepper, nutmeg and paprika. Stir in 1/2 of the grated cheese.
Grease an oven proof dish and cover the bottom of it with the potatoes by overlapping the slices a little. Season with salt and pepper.
Next cover the potatoes with the cooked minced meat,top with the cooked vegetables and finally pour over the sauce.
Top with the remaining cheese and bake in a preheated oven for about 30 minutes.
Tuesday, 16 September 2008
A Good Start - Porridge
I know a lot of people hate porridge, thinking it bland and having a horrible consistency, but I also know plenty of people who love it as a great way to start a day. I used to be one of the former, but have been converted to become one of the latter.
Of course there are many of different ways of making porridge, starting with your choice of oats, whether you use milk or water, salt or sugar. I usually use normal porridge oats and a mix of milk and water and leave out both, salt and sugar, but I add plenty of other things (most of the time as toppings after cooking) to keep it varied and interesting.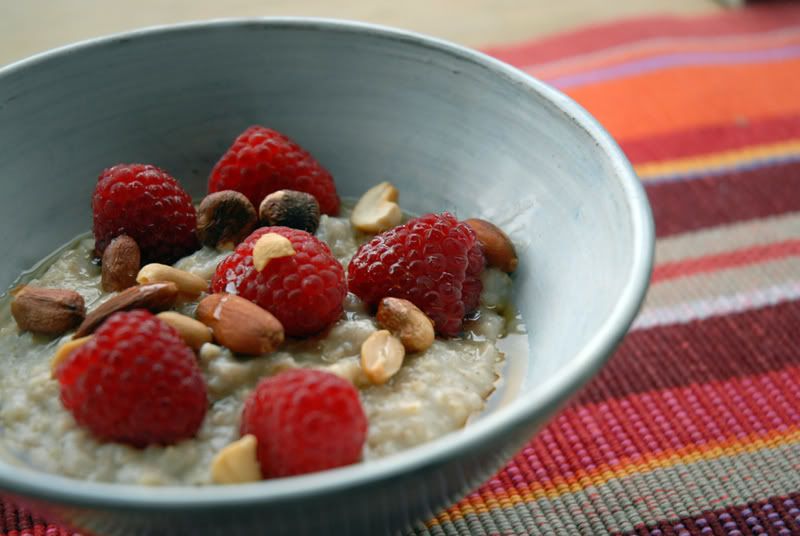
This morning I peeled myself out of bed at 6.30am to go for a run before work, when I got back and had had a shower, I really wanted a nice breakfast and since it wasn't particularly warm outside I made porridge to set me up for the day. It's not really a recipe as such, but as well as the usual mix of oats, milk and water I added a large pinch of Penzey's Apple Pie Spice and once it was cooked I topped it with mixed toasted nuts, fresh raspberries and some maple syrup. Well, let me tell you it certainly was not bland!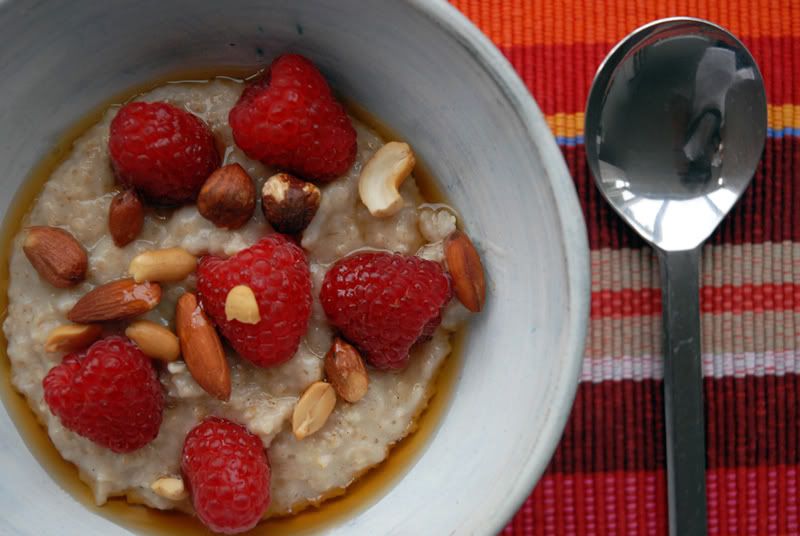
Thursday, 11 September 2008
Butternut Squash and Roasted Red Pepper Soup
Since last night the summer soup break is officially over. I love soup and it is getting to that time of year where the evenings are getting cold and dark enough to have loads of it. Don't get me wrong I'll occassionaly eat soup during the summer, but only when I eat out.
The last couple of days, since getting back from Germany it has been pretty miserable outside, so the weather combined with my cold made me crave a bowl of hot, steaming soup. While I was at my mum and dad's house, one of the local farm shops had a pumpkin and potato fete, which really got me into thinking about autumn and all it's glory, the lovely colours, the frosty and misty mornings, the still sunny days and of course all the autumn vegetables that are already or will soon be available everywhere.
Inspired by all the glorious varieties at the farm shop fete, I quickly decided that pumpkin soup would be the first soup I would make. When I went to my local shop here though all I could get my hands on was a butternut squash, so that's what I used, but if you have of a beautiful pumpkin why not use that instead. I also cheated and used roast pepper from a jar, as it needed using up, but you could easily roast your own at the same time as the squash or pumpkin.
As butternut squash is in season here in the UK in September, I'll enter this into Maninas: Food Matters' Eating with Seasons: September blog event. Go check it out, there are still a couple of days left to enter!
Butternut Squash and Roasted Red Pepper Soup
(serves 3-4)
1 butternut squash
1 onion, chopped
1 clove of garlic, chopped
1 rosted red pepper, chopped
1 inch of fresh ginger, grated
1 red chili, desseded and chopped finely
1- 1 1/4 litre vegetable stock
salt, to taste
pepper, to taste
Cut your butternut squash in half lengthwise and remove the seeds with a spoon.
Drizzle with a little olive oil and place in a baking tray in an oven at 200C/Gas 5 for about 45 minutes to an hour, until the flesh is soft.
In the meantime heat a little oil in a large, heavy-based pan and sweat the onions until translucent. Add the garlic and cook for another minute or two. Add the pepper, ginger, chili and half of the stock. Bring to a simmer and cook for about 10 minutes. Remove from heat.
Once the butternut squash or pumpkin is done, scoop out all the soft flesh and add to the pan. Puree, using a stick blender until smooth and add the rest of the stock until you get your desired thickness.
Season with salt and pepper and bring to a simmer. Cook for a further 5-10 minutes.
Serve with some fresh, crusty bread.
Wednesday, 10 September 2008
Returning from Germany with a Dutch Recipe - Fillet Bake Amsterdam
I got back from Germany yesterday morning. After only a few hours sleep I caught an early flight back to the UK, got in a taxi, dropped my suitcase off at my flat and went straight into work. On top of all that I've been coming down with a cold the last couple of days. So, needless to say I wasn't much in the mood for cooking last night and just shoved a pizza into the oven.
Luckily though I got to try two new recipes while I stayed at my mum and dad's house, so that I have something to blog about. This first one my mum made on the day I arrived. I have no idea why it has Amsterdam in the title and don't really think it is typically Dutch, but it was very good nevertheless and it's easy to make as well. I'd happily serve it to friends at in informal dinner. If you don't have majoram you can use oregano, you'll just need a little less.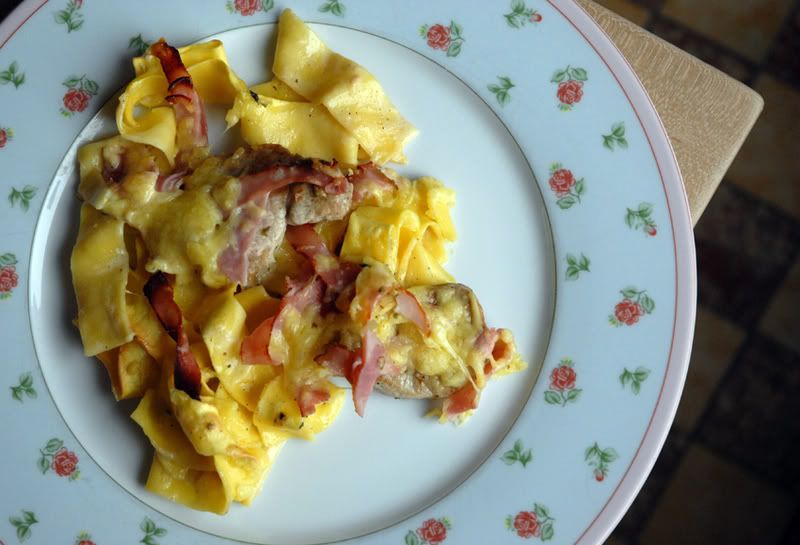
Fillet Bake Amsterdam (serves 4)
250gr ribbon pasta
150gr Edam cheese, grated
500gr pork fillet
100gr sliced deli ham, cut into strips
40gr butter
1 carton single cream (half and half)
125ml vegetable stock
a dash of white wine
salt, to taste
pepper, to taste
Preheat your oven to 180C/ Gas 4.
Cook the pasta al dente, drain and mix with 50gr of the grated cheese.
Place into an oven proof dish.
Melt the butter in a frying pan, cut the pork fillet into 1 inch slices, season with salt, pepper and majoram to taste and fry until sealed.
Place the fillet on top of the pasta and return the pan to the hob.
Pour the cream and stock into the pan and stir well, making sure that you loosen all the residue from the fillet into the sauce.
Bring to a simmer and cook until it has thickened a little. Season with salt, pepper, majoram and a dash of white wine, before pouring it over the pasta and meat.
Sprinkle with the strips of ham and top everything with the remaining cheese.
Place in your preheated oven for about 20 Minutes until the cheese turns golden.
Monday, 1 September 2008
And the Winner is.....
Drum roll please.......the copy of The Irish Spirit cookbook goes to ........Maninas from Maninas: Food Matters is the lucky person whose name I pulled out of the hat (well, it was a bowl really). Congratulations!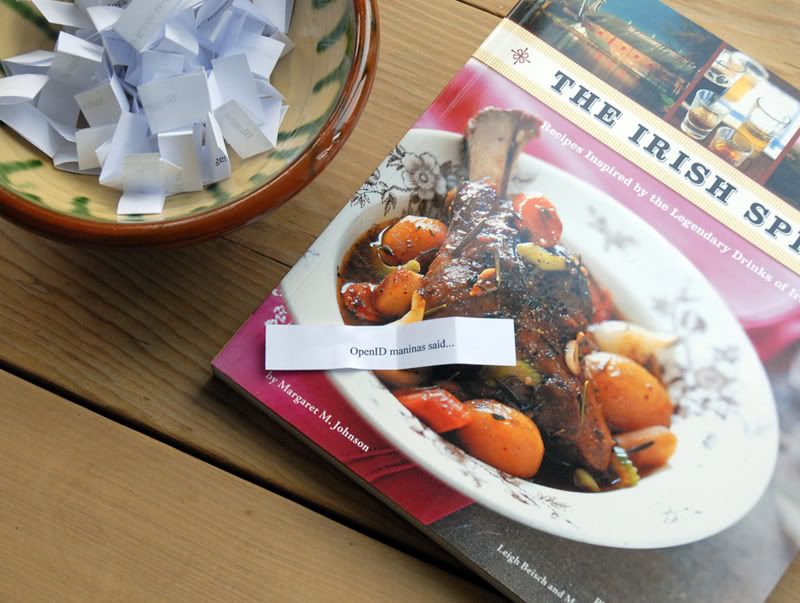
Thanks to everyone for entering the give away. It was the first one I ever did, but I'm sure it won't be the last one on here, so keep on checking!
I'm off to Germany tomorrow morning to visit my family and hopefully I'll have a handful of new recipes to share on my return. I better get on with packing my bags!
Manina's, I've e-mailed you..........
I'll let you know....
So the deadline for the cookbook give away is gone, thanks to everyone who entered. I have just made a list of all the people who entered and will draw and announce a winner later today. Watch this space.........
Thursday, 28 August 2008
Chicken Peanut Curry or Addicted to Peanut Butter
I love peanut butter. I like it on sandwiches with or without jam, in cookies and in savoury dishes like satay and this Chicken Peanut Curry. The funny thing is that I remember the first time I tried it I didn't like it at all. You see, in Germany, it isn't as popular as in America and many people probably won't have heard of a PB&J Sandwich. So when I bought a jar some time in my teens I didn't enjoy it. I didn't mind the taste but hated the way it made your tongue stick to the roof of your mouth. Well, I have definitely been converted since.
The best peanut butter I have ever had is the freshly ground honey roast peanut butter from Whole Foods Market in America. I always by some when I'm there and bring it back, but as I don't get to go to the States regularly, I usually have a large jar of organic Suma Unsalted Chunky Peanut Butter in my cupboard, which is just that, chunky ground peanuts without any other additives.
I find peanut butter and peanuts quite addictive and can never just eat a handful or just one sandwich, which is bad and I have as a result been known to continue eating until I feel slightly unwell, which is not good and I'm ashamed to admit. What's the thing you can't stop eating?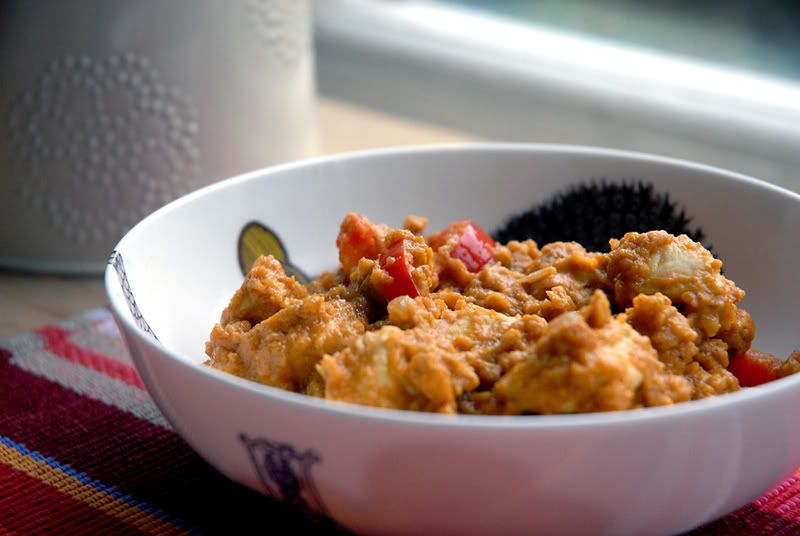
Chicken Peanut Curry (serves 2)
1 large chicken breast fillet, diced
1/2 onion, chopped
1/2 red pepper, chopped
1 clove of garlic, minced
1 tbsp red curry paste, heaped (this time I used Korma paste)
2 tbsp chunky or smooth peanut butter
3/4 can of coconut milk
1 tsp ginger syrup (optional)
1 tbsp soy sauce or nam pla
salt, to taste
pepper, to taste
Heat a little vegetable oil in a frying pan and fry the onion and chicken until the chicken is sealed on the outside.
Add the pepper and the garlic and fry for another minute or so.
Add the rest of the ingredients and stir until everything is well combined.
Bring to a simmer and cook until your chicken is cooked through.
Serve with Jasmin rice.
Monday, 25 August 2008
Some pictures
Okay, so this doesn't have anything to do with cooking or even food, but many of you left comments saying they'd like to see some pictures from my holiday in Ireland, so I thought I'd be obliging and share a couple.......


Remember, if you haven't done so already you need to leave a comment on Returning with a Give Away by 31st August, for your chance to win a copy of The Irish Spirit cookbook!


