One of my favourite things about Christmas dinner is the cranberry sauce. I know that might sound a little strange when there are also loads of other treats on the table and don't get me wrong I do also get excited about a good turkey, perfect roast potatoes and the best ever brussles sprouts.
However, not only is the cranberry sauce one of the prettiest dishes on the table it also adds the extra special Christmas factor in my opinion and it just goes so well with everything. Even once the meal is over I enjoy it for days to come (if there is enough of it) with cheese, pate, pork or game pie. My mouth is watering just thinking about it and even better since I know that there is a bowl of it my fridge right now.
Merry Christmas everyone! Frohe Weihnachten, Joyeux Noel, Feliz Navidad and God Jul!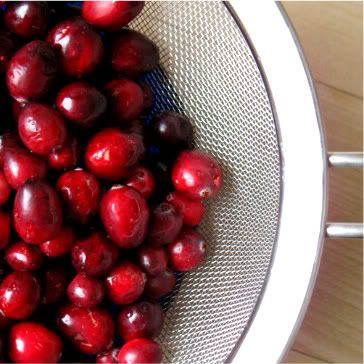
Cranberry Sauce with Orange and Port
250gr fresh cranberries
1 orange, juice and zest of
100gr sugar
100ml ruby port
Bring the orange juice, zest and cranberries to a boil in a saucepan.
Reduce heat and simmer for about 5 to 10 minutes, until the cranberries become soft.
Add the sugar and ruby port and continue to simmer until the sauce thickens a bit and the berries begin to become pulpy.
Remove from heat and allow to cool a little before pouring into a bowl.
Cover and refridgerate.
Thanks to the sugar and alcohol it'll keep for weeks in the fridge, if you can make it last that long.
Enjoy!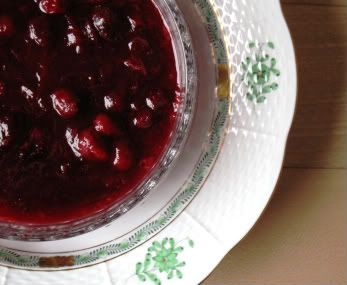
Tuesday 22 December 2009
Cranberry Sauce with Orange and Port
Sunday 20 December 2009
Baked Apples
I can't believe we're only a week away from Christmas and this is my first December blog post!
This year the usual baking, pickling and cooking that usually comes with the month of December in my kitchen has not happenend. That might be partly due to having been away in New York for a week at the beginning of the month and also the fact that I am already back home at my mum and dad's house in Germany for my annual Christmas break.
It's been freezing cold here the last couple of days. We've seen temperatures of -13C and plenty of snow, which has really helped to get me in a more christmassy mood, which up until now I've been lacking. I've also been out to buy the turkey and all the trimmings for a proper Christmas dinner next week. Yes, I'm spending Christmas in Germany, but there'll be a proper English Christmas dinner at this house nevertheless, and I'm sure there'll be a few recipes to share over the next few weeks because of it.
For now I'll leave you with a recipe of Baked Apples, which my mum and I tried today, after she spotted it in a amagazine last night. It was the perfect treat to have whilst watching the snow being blown about outside!
Baked Apples with Marzipan serves 4
4 medium sized red apples
60gr marzipan paste, chopped up finely
4tbsp cashew nuts, chopped roughly (we used chopped almonds)
2tbsp raisins
rum, calvados or cointreau
Soak your raisins in some rum, calvados or cointreau.
Preheat your oven to 180C.
Wash and decore your apples.
Cut a slice of the top of the apple and carefully remove most of the flesh, until you are left with a shell that's roughly half an inch thick (1.5cm).
Finely chop the flesh you have removed and place in a small bowl, together with the marzipan, nuts and raisins.
Mix well and then divide and stuff the apples with the mix.
Place the stuffed apples on a baking tray and bake in the oven for half an hour, until soft.
Serve with custard or vanilla ice cream.
Enjoy.
Wednesday 25 November 2009
World's Best Cheesecake
I'm off to New York for a week, so I've been thinking of diner breakfasts, bagels, smoky pretzels and of course cheesecake. You just can't beat a slice of really good cheesecake, can you? I'm gonna make sure I have some at Dean and Deluca, but even theirs can't be much better than this one.
It was my dad's 70th birthday at the end of last month and my mum asked me to bake a cheesecake for his party. All my aunties were baking cakes as well and I knew that there'd be a lot of cake competition, but I had made this cheesecake before and knew it was good.
I blame the cracked top on my mum's oven being different to mine (I like excuses), but it didn't really matter because the cake was just as rich and creamy as I wanted it to be and everyone that ate some seemed to enjoy it.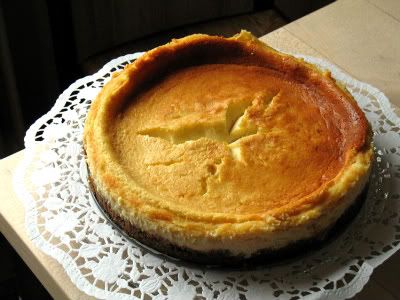
World's Best Cheesecake
1 1/2 cups digestive biscuit crumbs (fine)
1/3 cup butter, melted
2tbsp sugar
500 gr cream cheese
1 1/2 cups granulated sugar
2tsp pure vanilla extract
3 eggs
3tbsp cornflour
500 ml whipping cream
a pinch of salt
1/2 teaspoon salt
2 tbsp fresh lemon juice
Preheat your oven to 180C.
Mix the digestive biscuit crumbs (make them by placing digestives in a food bag and bashing them with a rolling pin) with the melted butter and sugar.
Spread over the bottom of a lined 10inch springform pan, making sure it comes up a little around the edges.
Bake for 8-10 minutes.
Remove from oven and allow to cool.
In a bowl cream the cream cheese, sugar, and vanilla extract.
Add eggs, one at a time and mix well.
Add the cornflour, whipping cream and a pinch of salt.
Continue to beat or about 3 minutes at high speed.
Finally add the lemon juice before pouring into a prepared crust in your springform pan.
Bake for 75minutes, until the mix has set completely and the top is golden in a 180C oven.
Allow to cool in oven with door ajar for about one hour.
Remove the cake from the oven and place on a cooling rack until it has reached room temperature.
Place in the fridge for twelve hours before removing the cake from pan.
Tuesday 17 November 2009
Venison Stew
The time of year where I crave comfort food, such as stews, soups, mashed potatoes and winter vegetables has definitely arrived. The days seem to be getting seriously short (which doesn't help the feeling that I am constantly trying to play catch up on things), most of the trees are bare and my selection of hats, scarves, gloves and mittens has been excavated from the depth of my wardrobe.
Last week the wonderful people from Abel&Cole sent me some diced venison to try, because as well as the season for woolly jumpers it is of course also the season for game. I was really excited as it had been absolutely ages since I last ate venison. Some of my friends were a little disturbed by the thought of me eating Bambi, but JM and E were as excited as I was, so we had a wonderful Venison Stew on Sunday night. I served it with mashed potatoes and green beans and it was the perfect meal for a cold and dark Sunday night. If you, like some of my friends, don't like the thought of venison you can of course use beef instead. I forgot to buy bacon, so left it out and the original recipe called for roast chestnuts, but I'm not so keen so used chestnut mushrooms instead.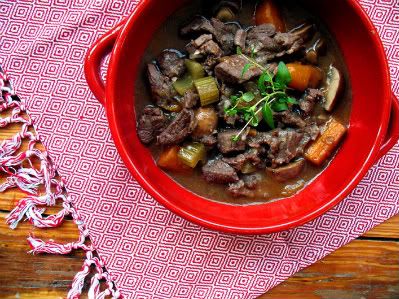
Venison Stew (serves 4)
800gr diced venison
100gr streaky bacon, cubed
125ml red wine
3 red onions, sliced thinly
1 celery stick, sliced
12 baby carrots, peeled
2 garlic cloves, roughly chopped
1 tbsp tomato purée
1 sprig fresh thyme
1 fresh bay leaf
250g chestnut mushrooms
(cornflour paste to thicken if desired)
Preheat the oven to 150°C/Gas
Heat some oil in a heavy-based pan and fry the bacon until golden. Remove from the pan and set aside, but make sure you keep the fat in the pan.
Brown the venison in the same pan. Fry it in batches to avoid the meat boiling in its liquid, rather than frying.
Remove the meat and transfer to a casserole or pot with a tight-fitting lid, along with the bacon and any scrapings from the pan.
Add the wine, garlic, onions, carrots and celery and increase the heat until the wine bubbles fiercely.
Add the tomato purée, herbs and enough water to just cover the meat.
Cover, bring to a simmer and cook for 2 hours in the oven.
Check from time to time – if it’s dry, add more water and reduce the heat.
After 1 1/2 hours (1 hour if using chestnuts), add the chestnut mushrooms and cook until the meat is very tender.
If you want a thicker sauce, remove the pan from the oven, add some cornflour mixed with water. Place on the hob and bring back to a simmer stirring continuously until your desired thickness has been achieved.
If necessary, season with salt and pepper before serving.
Wednesday 4 November 2009
Aubergine Salad
I don't know where the days are disappearing to at the moment. I seem to be playing catch up constantly, at work, at home and with my blogging. I hope you won't give up on me completely!
The weather has really turned now. It definitely feels like November, grey and very wet. Most of the leafs have come down now and I have to wear gloves and a scarf when I get on my bike to cycle to work in the mornings now, if I don't want to arrive with chaffed red hands when I get there.
I'm in the mood for soup, stews and comfort food, but for now I've got another recipe from the dinner party a couple of weekends ago, a recipe for a Moroccan Aubergine Salad. I use quite a lot of aubergines in cooking and think they are a highly underrated vegetable. They are so versatile and taste great prepared in many different ways. This salad takes a bit of effort, but it is well worth it.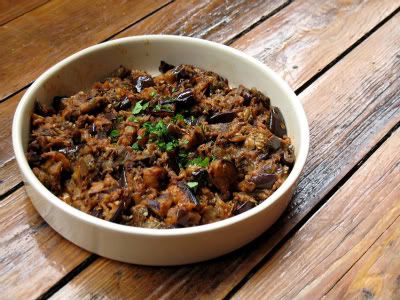
Aubergine Salad (serves 4)
1lb aubergines (eggplant)
oil for frying
2tsp paprika
1/2tsp cayenne pepper
1tsp ground cumin
4 cloves of garlic, peeled and finely chopped
6tbsp olive oil
3tbsp fresh lemon juice
salt, to taste
freshly gound black pepper, to taste
1tbsp fresh flat-leaf parsley, finely chopped
Cut the aubergines into 1/2inch round slices. Rub each one with salt and place them in a colander for about half an hour, then wash off the salt and pat them dry with a kitchen towel.
Heat some oil in a large non-stick frying pan and fry the slices (a few at a time) until golden brown on both sides.
Remove them from the pan and rest them on some kitchen towel to absorb any excess oil. Leave to cool.
Clean the frying pan, discarding all the oil.
Chop the cooled slices coarsely and mix them well with the spices and garlic.
Return them to the pan without adding any oil and cook them over medium heat. Stir frequently and cook until most of the liquid has evaporated.
Place in a serving dish. Add the olive oil, lemon juice and salt and pepper to taste.
Place in the fridge to chill.
Remove from fridge just before serving. Stir well once more and top with the chopped parsley.
Enjoy!
Sunday 25 October 2009
Labneh with Olives and Pistachios
I never thought I'd be making cheese at home, but when I saw Yotam Ottolenghi's recipe for labneh in the Guardian Weekend a couple of weeks ago, I knew I had to try it.
Actually, I guess calling labneh cheese is stretching the term a little. Labneh is made by straining yogurt until most of the whey has been removed and you're left with a spread that is similar in texture to soft cream cheese and lovely and fresh.
It was just the right thing for the mezze dinner we had at my flat last night. Seven people, great food, plenty of wine and loads of laughter. The perfect Saturday night.
The original recipe calls for oregano. I replaced it with coriander (cilantro) as I couldn't find any fresh oregano at my local grocers. It also uses lemon zest from two lemons, but mine were waxed, so I just squeezed the juice of half a lemon and added that instead. 
Labneh with Olives and Pistachios (serves 4)
450gr natural yogurt
450gr goat's yogurt
coarse sea salt
20 black olives, pitted and roughly chopped
1 1/2tbsp of fresh coriander (cilantro), chopped
1tbsp flat leaf parsley, chopped
half a lemon, juice of
1 clove of garlic, crushed
50ml olive oil
20gr pistachios, lightly toasted
20gr pine kernels, lightly toasted
1/2 tsp chili flakes
3 ripe tomatoes, cut into wedges
1/2 red onion, sliced thinnly
Stir both yogurts together with about half a teaspoon of salt.
Pour into a deep bowl lined with cheese cloth or muslin. Carefully bring together the corners of the cloth and tie tightly with some string.
Hang the bundle over the bowl, so that it is suspended and the whey can drain from the cloth. I tied mine to a wooden spoon which I then balanced on the rim of the bowl.
Place in the fridge for 24-36 hours.
Remove from fridge and spread the into a serving dish with the back of a spoon.
In another bowl mix the olives, coriander, parsley, lemon juice, garlic, olive oil and chili flakes.
Put your toasted pine kernels and pistachios in a pestle and mortar and crush them roughly.
Add to the olives and combine.
Spoon the mix over the labneh.
On a separate plate mix the tomato wedges and onion and drizzle with some olive oil.
Simply serve the labneh and the tomatoes with some fresh bread.
Monday 19 October 2009
Proper Onion Gravy
When I saw the first brussel sprouts at the grocer on Saturday I couldn't help myself, I had to have some. Some people really hate them, but they are amongst my top ten vegetables. The decision was made, brussel sprouts with bangers, mash and onion gravy were quickly added to this week's menu!
I guiltily admit to sometimes reaching for the packet of Bisto to make onion gravy to have with bangers and mash or chops. Especially if it is a midweek dinner and I want something quick, because making proper onion gravy takes time, but nothing comes close to real onion gravy.
It's all about slow cooking the onions, letting them brown over low heat for an hour and watching them slowly soften and then caramelise. I know some people say you can speed it the process up by adding some sugar for the onions to colour faster, but there is no need as they are full of natural sugar and all you need is a little time and patience. The reward is amazing and turns something that is a simple meal into a comforting, delicious feast.
Onion Gravy (serves 4)
large knob of butter
3-4 large onions, thinly sliced (I mix standard and red onions)
400ml beef stock
100ml red wine or bitter (optional)
2tsp wholegrain or French mustard
1tsp Worcestershire Sauce
salt, to taste
pepper, to taste
Melt the butter in a heavy based frying pan.
Add the sliced onions and fry for about 20 minutes over medium heat, stirring frequently until soft.
Turn the heat down low and continue to fry the onions. Don't cover them with a lid.
Continue to cook for about another hour, stirring occasionally until the onions are well browned.
Add the liquids and seasoning and bring to a simmer. Continue to simmer, stirring regularly until the gravy has reduced a little. Check the seasoning.
Enjoy with bangers and mash or over pork chops.
Monday 12 October 2009
Flapjack
Surely flapjack is something everyone likes, isn't it?! I don't mean American flapjacks (even though I guess most people like them too), but the chewy, crunchy, oaty English kind.
I'm trying not to reach for a chocolate time every time I have a little slump and have other snacks instead. I know flapjacks are still laden with calories, probably more so than some chocolate bars, but being packed full of oats, and as in this case fruit and seeds at least the energy will sustain me for a while. Plus of course I knows everything that goes into them and they are sugary enough to satisfy my sweet tooth. In fact this recipe was a little on the sweet side and I'd probably reduce the amount of syrup or sugar next time I'll make them. Whether you make them with just oats or you play around with various additions is up to you. I like varying between different combinations of dried apricots, cranberries, nuts and seeds. 
English Flapjacks
8oz (jumbo) porridge oats
4oz butter, unsalted
4oz golden syrup (you can use corn syrup or maple syrup if you can't find corn syrup in the US)
4oz brown sugar
optional ingredients
2oz craisins or raisins
2oz chopped dried fruit
2oz nuts or seeds
2oz chocolate chips
(I used a combination of craisins and vanilla flavoured sunflower and pumpkin seeds.)
Preheat your oven to 180C.
In a sauce pan melt the butter, together with the syrup and sugar over low heat, stirring to combine.
Remove from heat and add the oats and any of the optional ingredients you are using.
Spoon into a square, paper lined cake pan or oven dish. Spread out and smooth with the back of a spoon.
Bake for 30 minutes or until golden.
Leave to cool for about half an hour, cut into squares or slices and leave in the pan until cooled completely.
The flapjacks will keep for about a week or a little longer if stored in an air tight container, but they won't last that long!
Enjoy!
Thursday 8 October 2009
I've got flu
I've been in bed with flu all week and am only just starting to come around today. So it's been another week without any cooking. Big, big thanks to my wonderful friends E, JM and J who've been delivering an amazing meals-on-wheels service to my front door. Another big thank you to A, B, H, L and J who've all been asking what I need and offering to get me anything from aspirin to zwieback.
All of you, you are amazing and I feel very blessed and humbled by your care!
Before I go, here's something I signed up to quite a while ago now, but maybe you could do so today, if you haven't already done so!

Monday 5 October 2009
Getting stuck in again
I know I have been an extremely lazy blogger for the last eight or so weeks. I'm trying to get stuck in again. Autumn is definitely here now. I'm feeling like soups, stews and other comfort foods, so I'll be trying new recipes and sharing all the old favourites.
No recipe yet for today, but I'll leave you with a few photographs from my weekend in Paris. L and I only had a hotel for one night and spent the second night walking the city for La Nuit Blanche with E, J and JM until 4.30am before catching the first flight back to Manchester. It was fabulous and I want to do it all over again.


Tuesday 22 September 2009
An Old Favourite and an Artist Book Fair
Some dishes are just too good to only have them once. Spicy Roast Aubergine with Chickpea Stew and Jewelled Couscous is definitely one of them for me. It is one of my favourite vegetarian meals, but when I made it last Friday I felt like experimenting a little and added some lamb.
I did everything as in the original recipe, but when making the chickpea stew, I first fried some chopped up lamb shoulder until sealed, before adding the onions and all the other ingredients. Of course it meant that the stew had to cook for a lot longer than in the vegetarian version. I simmered it on low for about two hours, stirring from time to time. Everything else stayed exactly the same and the result was just wonderful.
I still think that the original is great just as it is and doesn't really need the meat to be a perfect meal, but for those who need a little meat in their dinner to be happy or just to make a change, the lamb is a great addition.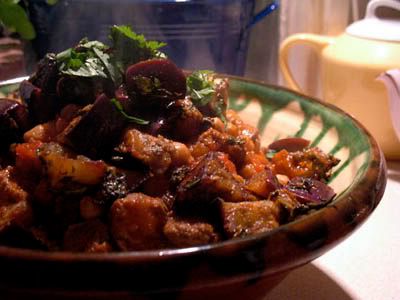
And now for something completely different, the London Art Book Fair...
This coming weekend the annual Art Book Fair returns to London at a new venue. Previously it was held at the ICA. This year it will be at the Whitechapel Gallery for the first time, but with hopefully just as many exciting stalls and exhibitors. So, if you are around and are looking for some wonderful handmade and limited edition art books, gifts made from paper, cards and much more why not pop in. I'll be on the Righton Press Stall for most of the weekend and as well as selling I am really looking forward to having a good browse, chat with other artists, read and to buying some special Christmas presents myself.
Wednesday 16 September 2009
And the winner is.....
Katiecakes! Congratulations! I have e-mailed you.
Thanks to everyone who entered. Sorry you couldn't all win. You can blame it on my colleague G if you didn't win, as he was responsible for picking the name from the hat.
Tuesday 8 September 2009
A Giveaway
Maybe you are like me and are planning to go and see Julie & Julia at the cinema. I know it looks a bit cheesy and chick flicky, but I can't always just watch serious intellectually stimulating foreign films. Occasionally, I need a bit of Hollywood escapism. Therefore, a film that has Meryl Streep in it and is about food seems like a good choice.
Well, this is where the giveaway comes in. The lovely people at Duckworth Overlook sent me two copies of the book the film is based on, Julia Child's (with Alex Prud'homme) My Life in France. One copy is for me to read and the other copy is for one of you.
All you need to do, to be in with a chance of winning the book, is to leave a comment on this post before the 15th September 2009. I will be drawing one of the names at random and send the book to the lucky winner. Unfortunately, this giveaway is only open to UK residents, due to issues to do with publishing rights.
Monday 7 September 2009
Chorizo, Vegetable & Pasta Bake
I know. It has been a long time. I needed a break and I took it, traveling out to the Western Isles and Germany and also just enjoying time with friends at home. If you want to see some of the places I went and some of the things that I saw have a look at Photobooth. I'll let the pictures do the talking this time.
I finally got back on Saturday and yesterday E and JM came up for a simple dinner of Chorizo and Vegetable Pasta Bake. I got the recipe from a card I picked up at Waitrose in Edinburgh. It appealed to me instantly with it's few simple ingredients.
I adjusted it slightly as it needed garlic and more cheese in my opinion, but the main ingredients didn't change. At one point the original recipe just states to season the sauce, but not how, so below is my take on seasoning as well. 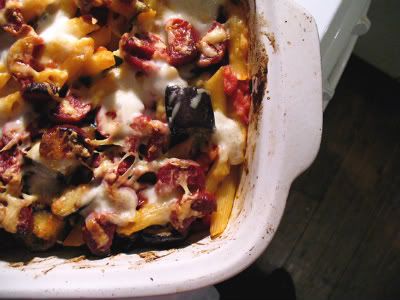
Chorizo, Vegetable & Pasta Bake (serves 4)
olive oil
a handful fresh basil leaves, shredded
1 clove of garlic, minced
400gr tinned chopped tomatoes
2tsp sugar
1 1/2 tsp powdered vegetable stock
1/2 green pepper
1/2 red pepper
1 aubergine (eggplant), cut in half lengthways
350gr dried Penne Pasta
125gr mozzarella, torn into chunks
1/2 cup grated cheese
250gr chorizo, cut into bite-sized chunks
Preheat your oven to 200C.
Heat some oil in a frying pan, add the basil and garlic and fry for 30 seconds before adding the chopped tomatoes.
Simmer for 5 minutes and season with the vegetable stock powder, sugar and salt and pepper to taste.
While the sauce is simmering, brush the peppers and aubergine halves with some oil and fry in a griddle or frying pan for 10 minutes, turning once. (I found it easier to half the peppers again into quarters, to cook them more evenly.)
While the vegetables are frying cook the pasta in plenty of salt water until al dente, drain and mix with the tomato sauce.
Transfer into a large baking dish.
Cut the cooked vegetables into strips and carefully stir into the pasta.
Tuck the chorizo into the top of the pasta and top with the grated cheese and fresh mozzarella.
Bake for 15 minutes.
Tuesday 25 August 2009

Saturday 25 July 2009
Raspberry Buttermilk Cake
J and her daughter V decided to host the first Annual Whalley Range Cherry Berry Festival at their house yesterday. As the name says, it was all about celebrating cherries and berries and the abundance of great fruit that's around at the moment. Everyone invited was asked to bring along a treat and the table nearly collapsed under the weight of all the fabulous food.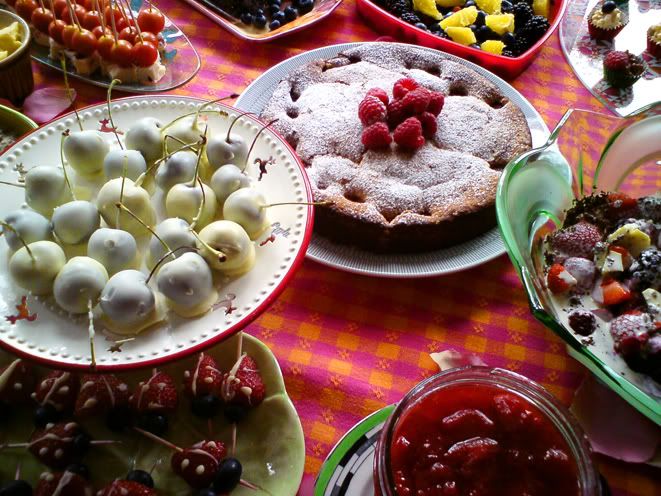
Unfortunately, the sun didn't really put in much of an appearance so it ended up being an indoors picnic instead of a garden party, but that really didn't put a damper on things and everyone ended up being high on sugar and/or berry cocktails!
One of the fun things was to look for recipes that would be suitable, which took up quite a bit of my time over the last week. Whenever I was supposed to do something that I didn't really want to do, I just started searching the net and going through books and magazines looking for recipes. In the end I chose a Raspberry Buttermilk Cake that I found on another blog. You can see the original on Cookworm.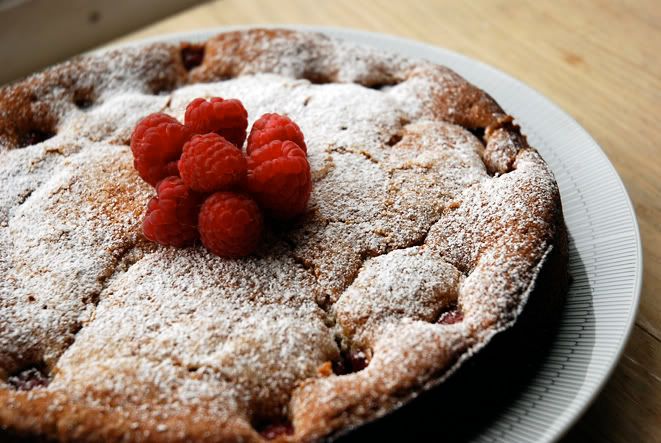
Raspberry Buttermilk Cake
1 cup plain flour
1/2 teaspoon baking powder
1/2 teaspoon baking soda
1/4 teaspoon salt
4oz unsalted butter, softened
2/3 cup plus 1 tablespoon sugar, divided
1/2 teaspoon vanilla extract
1 large egg
1/2 cup well-shaken buttermilk
6oz fresh raspberries (about 1 cup)
Preheat oven to 200C. Butter a 9-inch cake pan and line with parchment. (I used a 26cm springform pan, so it was a little bigger than suggested.)
Whisk together flour, baking powder, baking soda, and salt in a medium bowl.
With a standing or hand mixer, beat the butter with the 2/3 cup sugar until light and fluffy, about 2 minutes.
Add the vanilla extract and the egg, beating thoroughly.
Turn speed to low and alternate adding flour mixture and buttermilk, mixing until just combined.
Spread batter into your prepared pan, smoothing the top. Scatter the raspberries evenly over the top and sprinkle with the 1 tablespoon sugar.
Bake for about 25-30 minutes or until cake is golden and a toothpick inserted in the center comes out clean. (Mine took about 35 minutes, despite being thinner due to the bigger cake pan.)
Cool in pan 15 minutes, then transfer to a rack to cool completely.
Tuesday 21 July 2009
Butternut Squash and Sweet Potato Soup with Chorizo
Last Friday the weather was really bad and I got absolutely soaked cycling back home from town, so I needed something warm and comforting. I don't usually make soup often during the summer months, but it didn't feel like summer at all and I had a butternut squash that had been hanging around my kitchen for at least six weeks. Soup seemed like the perfect solution.
Also my friend JM had been to Brindisa at Bourough Market and brought back some fresh chorizo. Since he and E left for their holiday before they could finish all of it, I was the lucky recipient of the 'leftovers' that they hadn't got round to eating. In addition to that I found a sweet potato in my pantry and threw that in the mix as well.
B was also in need of some comfort on Friday so she came round to help me eat the resulting soup. A perfect quiet Friday night in with food, loads of pots of tea and good talk.
Butternut Squash and Sweet Potato Soup with Chorizo (serves 4)
1 butternut squash, cut in half lengthwise and seeds removed
1 large sweet potato, peeled and thickly sliced
1 onion, chopped
2 cloves of garlic, minced
1 inch of fresh ginger, grated
1/2 tsp chili flakes
1-2 tsp of paprika
1 1/4 litre vegetable stock
salt, to taste
pepper, to taste
4 fresh chorizo sausages, casings removed and sliced
Place the squash and sweet potato on a large baking tray and drizzle with a little olive oil. Place in an oven at 200C/Gas 5 for about 45 minutes, until the flesh is soft.
In the meantime heat a little oil in a large, heavy-based pan and sweat the onions until translucent. Add the garlic and cook for another minute or two. Add the ginger, chili and half of the stock. Bring to a simmer and cook for about 10 minutes. Remove from heat.
Once the butternut squash and potato is done, chop them up roughly and add to the pan. If you prefer you can just use the flesh of the buttenut squash by scooping it out with a spoon, but I just use it as it is including the skin. Puree, using a stick blender until smooth and add the rest of the stock until you get your desired thickness.
Season with salt and pepper and bring to a simmer. Simmer for a further 5-10 minutes.
While your soup is simmering fry the sliced chorizo in a pan. You don't need to add any oil as their is enough fat in the sausages. Once cooked place on some kitchen towel to soak up some of the excess fat and divide between four bowls.
Spoon over the hot soup and serve with some crusty bread.
Sunday 19 July 2009
Lemon Drizzle Cake with Lemon Cream and Berries
I know it's been a while since I've last posted, but for some reason I've not really been in the mood for much writing. I've also been off sick for a bit, which meant I spent quite a lot of time sleeping and just generally not having much energy for anything. I'm better now though and just thought that I'd better get back to it, especially as I'll be off again on my summer holiday soon, which will mean another dry period.
Last weekend I was invited to T's first birthday party. I promised to bring a cake for the buffet. It didn't have to be a birthday cake, as they already had a fabulous one., so I decided to make a lemon cake. I knew that JM was bringing a chocolate one and I like the freshness of lemon cake on a sunny day.
Wanting it to be a little more special for the ocassion I decided to top it with lemon cream and fresh strawberries, which made it that bit more decadent and also looked great.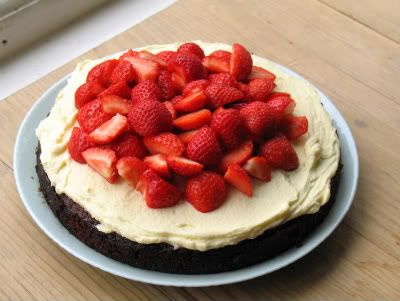
There isn't really a new recipe, but this is what I did:
Lemon Drizzle Cake with Lemon Cream and Berries
Use the recipe for Easy Peasy Lemon Drizzle Cake, but bake it in a 26cm springform pan, rather than the usual loaf tin to give you the base for the cake. Baking it in a larger tin means of course that it bakes quicker, so it should be done after about 30 minutes. Test with a wooden skewer.
Allow to fully cool before assembling the cake.
Whip 200ml of double cream (or you can use whipping cream) with 1tbsp of icing sugar.
Once stiff, stir in 2 generous tablespoons of lemon curd.
Evenly spread the cream over the base with a palate knife.
Top with loads of your favourite summer berries. I used just strawberries, which I cut into different sizes, but you could use rasperries, blackberries or blueberries, or a mixture of all.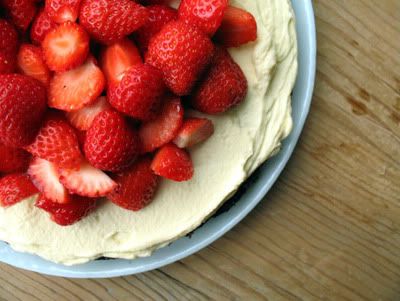
Saturday 4 July 2009
Taleggio
Do you ever find that you've never heard of something and then once you have it crops up everywhere?!
Well that happens to me quite often. The last occasion was when Abel & Cole sent me some Taleggio cheese to try. I had never heard of it before or seen it anywhere as far as I was aware, but since I got some a couple of weeks ago I've seen it at the cheese monger, which might be because now I am aware of it and looked out for it, but I even found it on the breakfast buffet at the hotel I stayed at in Brighton this week.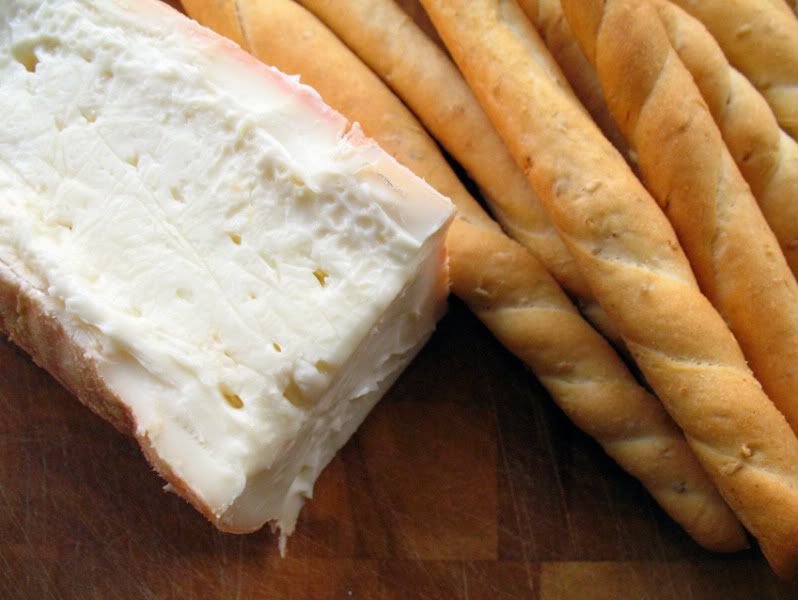
Taleggio is an Italian soft cheese with a washed orange rind, named after a Val Taleggio near Bergamo in Lomabardy. It definitely has quite a pong to it, especially after a couple of days in the fridge, but it is generally mild with a fresh and fruity taste. The rind has a somewhat stronger flavour, but if you don't like it you can cut it off. I do like the stronger flavour though and just like with brie or camenbert I eat it just as it is, rind and all.
It was gone too quickly for me to try using it in cooking, but I have since found out that it is great for melting over vegetables and polenta or used in risottos.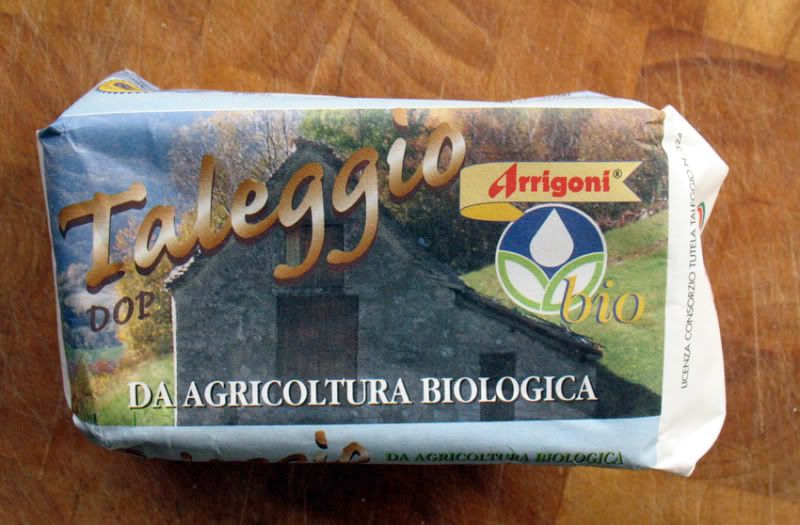
Monday 29 June 2009
Ramsay's Roasted Rhubarb Crumble
This rhubarb crumble recipe has been waiting around a bit to be blogged about and there is no reason for it other than that I have been busy. I made it for the dinner party a few weeks ago.
When I was going through my cookbooks to see what kind of roast chicken to do, I came across the recipe (well, the picture first) and knew that I just had to give it a go. It's from Gordon Ramsey's Sunday Lunch cookbook, and whether you like the man or not, he can cook. I liked the sound of the ginger and nuts in this crumble, so the chicken was forgotten, at least for a little while, while I started jotting down the rhubarb crumble ingredients on my shopping list.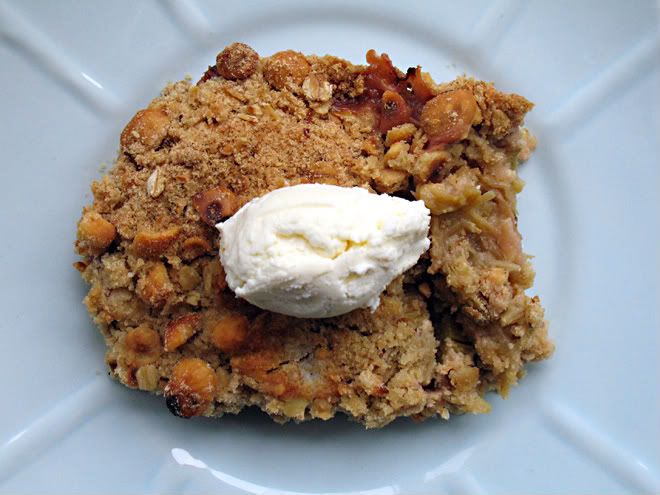
I changed the recipe a little bit as even after my shopping trip I didn't have any stem ginger or vanilla sugar, so here is my version with the original in brackets.
Roasted Rhubarb Crumble (6-8 servings)
800gr rhubarb (forced rhubarb if in season), cut into 4-5cm long chunks
150 gr caster sugar (vanilla sugar)
a few knobs of butter
2tbsp ginger syrup (20gr Japanese pickled ginger, chopped finely)
1tsp vanilla essence (unless you are using vanilla sugar)
150 gr toasted, skinless hazelnuts
100gr plain flour
75gr unsalted butter, chilled and cut into small cubes
50gr demerara sugar
pinch of freshly grated nutmeg
40 gr porridge oats
finely grated zest of a lemon
200gr mascarpone
1tbsp ginger syrup
Preheat your oven to 190C/Gas 5.
Toss the rhubarb in the sugar and place in a large pan over medium heat. Add two tablespoons of water and the vanilla essence and cook for bout 8 minutes stirring once or twice carefully. You don't want it to go to soft, the pieces should feel just tender when pierced with the tip of a sharp knife.
Add the ginger syrup, carefully stir and pour into a 1.5-2. litre baking dish and set aside to cool.
While it's cooling you can start making the crumble.
In a large bowl slightly crush the hazelnuts with a rolling pin, alternatively place them in a freezer bag and bash them a little with a pan or a rolling pin.
In another bowl rub the flour and the butter together with your finger tips until they form a crumb-like mix.
Add the demerara sugar, nutmeg, oats and nuts and mix well.
Evenly spread the crumble over the cooled rhubarb and bake for 20-25 minutes until golden brown.
Allow to cool for 10 minutes before serving.
While it's cooling, mix the mascarpone with the lemon zest and ginger syrup to serve with your crumble. Of course it also goes well with ice cream or custard.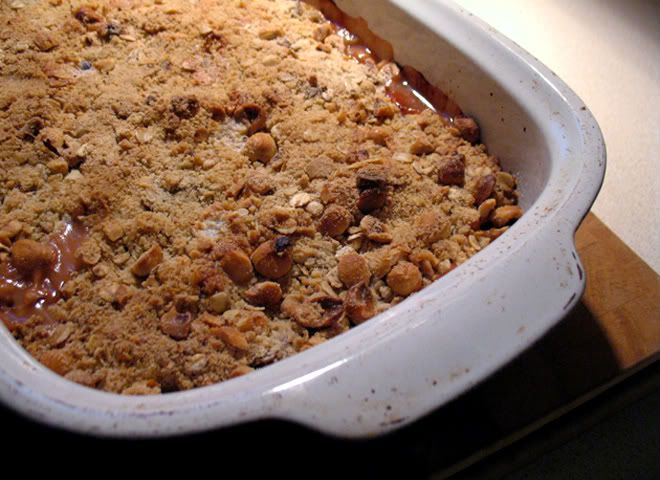
Thursday 25 June 2009
Black Cherry and Cointreau Jam
On Sunday my friend J told me that one of the small local green grocers had boxes of cherries on offer for just £2.99 and that she'd been making cherry and blueberry jam just that afternoon. Hearing this I just couldn't resist to get on my bike on Monday and nip down to bag a bargain for myself. Cycling home with a wooden box containing 4 lbs of black cherries strapped to my pannier rack, my mind started to race through various possibilities of using them even before I got home.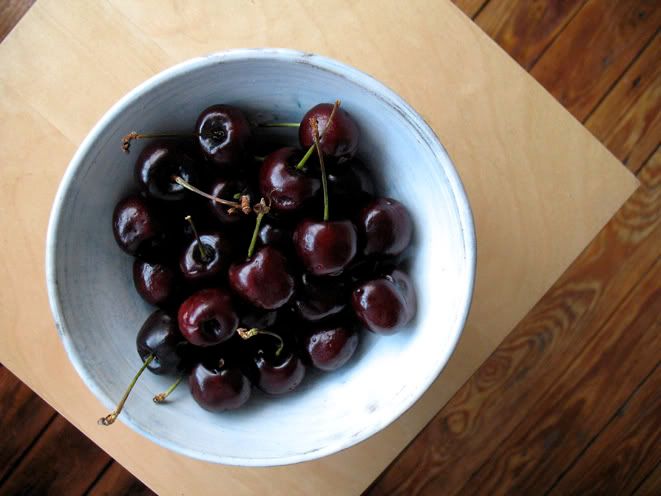
To eat them fresh as they were, make cherry pie, clafouties, pancakes or to make jam, that was the question. Initially the thought of removing the stones of 4lb of cherries all at once to make jam put me off that possibility, but after a little nap I thought 'what the heck' and got to work.
I remembered that I bought a Jam and Preserves cookbook last summer which I had never used and in it I found a recipe for Black Cherry and Brandy Jam. I didn't have any brandy in and having already been on my bike to buy the cherries and then again later to by jam sugar I didn't want to go out again, so I decided to make Black Cherry and Cointreau Jam instead, following the recipe and just switching the types of booze.
My fingers looked like I had murdered somebody (next time I'll remember to put on gloves), my white kitchen wall now sports some blue speckles and I nearly burned my fingers sterilizing the jars, but it was well worth it. Not just because the jam is really good, but also because I've already been able to make some friends happy by passing on a jar of the finished jam.
Black Cherry and Cointreau Jam (makes about 2.25kg)
1.8kg dark cherries, rinsed and stoned
125 ml freshly squeezed lemon juice
125gr jam sugar
1tsp butter
4 tbsp Cointreau, brandy or kirsch
Roughly chop the and place them in a large sauce pan or preserving pan.
Add the lemon juice and simmer over a gentle heat for about 20 minutes, until the cherries are quite soft.
Add the jam sugar and stir until disolved.
Increase the heat and boil rapidly for four minutes.
Take off the heat and carefully pour into warm sterilised jars. Heating the jars and placing them on a damp towel will stop them from cracking when you fill them with the hot jam.
Screw on the lids and place upside down until cool.
Store in a cool place.
Wednesday 24 June 2009
Summer Range from Abel and Cole
Before I catch up on some of the recipes I tried over the last couple of weeks I thought I'd write about the parcel I got from Abel & Cole with some samples from their summer range of deli foods.
It contained sliced Milano Salami, Sesame Artisan Grisini and a jar of Chili and Fresh Ginger Salsa, all organic and great quality. So, I went out and got some cheeses, my friends E and JM added some olives, sun-dried tomatoes- stuffed peppers, saucisson and fresh bread and we had a wonderful supper that made us feel like we were on holiday somewhere in Southern Europe, even though we were sat in a Manchester living room.
Out of the samples I was sent my favourite was the Pollen Chili and Fresh Ginger Salsa. I have to say I love pickles and salsas and to me they are a vital addition to any cheese board. The Chili and Fresh Ginger Salsa, was not too hot and not too tangy, a great balance between sweet, spicy and sauvoury. It went especially well with the goats cheese we had I thought.
Sunday 21 June 2009
Muttar Paneer (Vegetarian Curry)
My friend A has invited me and five other friends (plus kids) for dinner tonight. I offered to help out and make one of the dishes as it is quite a big job to cook for so many and of course because I like to cook anyways. A's menu for tonight is vegetarian, which he's a bit worried about as he really likes his meat and rarely cooks veggie, but not all the other guests do share in his carnivourous preferences. So as to not to have to add any more worry, he decided to make a curry as he's good at it and South Asian is one of his favourite cuisines. He is cooking a cauliflower and potato curry and I thought Muttar Paneer would go quite well alongside it.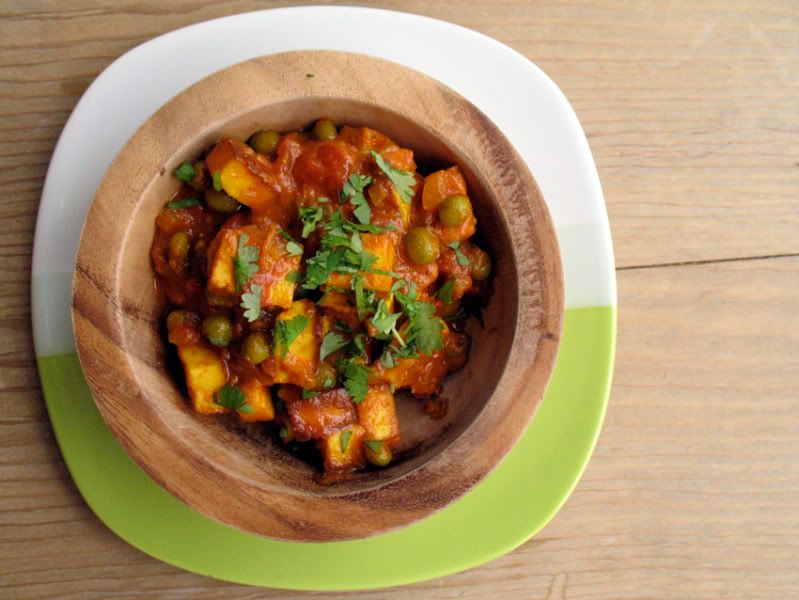
If you haven't heard of Paneer or Panir before, it is a South Asian cheese, which doesn't melt when cooked and therefore makes a perfect ingredient for a vegetarian curry. Muttar Paneer originates from the Punjab and is not a particularly spicy curry, instead it has many subtle flavours that compliment each other perfectly and are well balanced. If you prefer a bit of heat though, just add a finely chopped chili.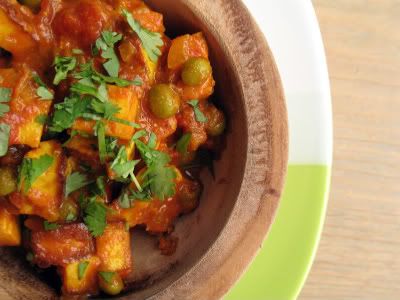
Muttar Paneer (serves 4-6)
500g paneer cheese, cubed
2 medium onions, chopped finely
2 (400 g) cans chopped tomatoes
1 cup frozen peas
4 cloves of garlic, minced
1 1/2 inch of fresh ginger, grated
2 tsp ground coriander
3-4 tsp garam masala
2 tsp turmeric
2tsp ground cumin
freshly ground black pepper, to taste
salt, to taste
vegetable oil or ghee
fresh coriander, chopped (to garnish)
Heat the oil or ghee in a large heavy bottomed frying pan.
Add the cuben paneer and fry until golden. Remove from the pan and set aside.
If necessary add a little more oil or ghee and fry the onions, until soft and golden.
Now add the spices and the garlic and fry for another couple of minutes until fragrant.
Add the tomatoes and about 250ml (1cup) water and stir. Bring to a a boil, reduce the heat and simmer for about five minutes.
Add the peas and return the fried cheese to the pan. Cover and continue to simmer for about 20 minutes.
Serve with pilau rice and/or naan bread or chappati.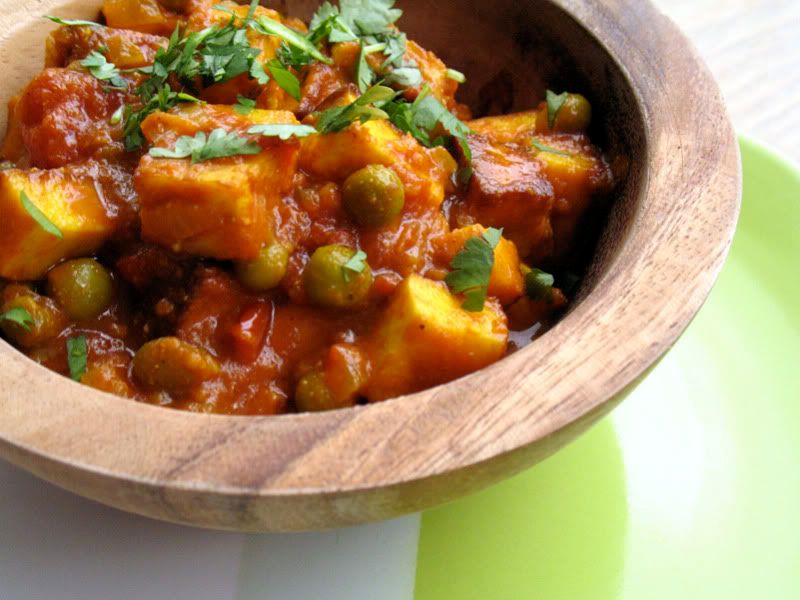
Wednesday 17 June 2009
Another blog
As some of you might know I am an artist/practitioner/photographer. Which of these, I am never quite sure of. I guess it depends on how you define the terms. I also teach photography, and I find that often I don't seem to make enough time for my own practice, unless I work on a big project.
I decided it was time for some daily discipline.
Have a look: PHOTOBOOTH
Tuesday 16 June 2009
The BBC Good Food Show
No recipe today I'm afraid. I thought I'd tell you about my great day out on Saturday instead. The lovely people from Forever Better invited me to join them for the BBC Summer Good Food Show last week. Of course that was an offer which I just couldn't refuse and so I got up at 6.00am last Saturday to get on a train to the NEC arena in Birmingham.
I arrived in good time to meet up with the Forever Better staff and fellow food bloggers, Anne, Celine, Jan, Jules, Naomi, Nic and Sunita. We began the day with watching Simon Rimmer give a cooking demonstration in the summer theatre, after which we had a drink in the VIP cafe (where some of us took the opportunity to take a few snaps of Simon Rimmer, Gino D'Acampo and the Hairy Bikers as you can see on the other blogs) followed by lunch in one of the NEC cafes.
With our bellies full we then had quite a bit of time to explore the stalls and see what wares the various exhibitors had on offer. There was everything from cheese to bread, deli food, cereals, specialist oils, tea and coffee, sweets, cakes, vegetables, cold meats, wine, whiskey and vodka to cookware, cookbooks and magazines. Of course most of the stalls had free taste samples of which we made the most.
We all met back up as a group for an introduction to a range of fantastic Miele appliances, which left me wanting a new fridge, a new cooker and a steam oven. Shame I live in a rented flat with a landlord-special type kitchen, which has got neither enough room nore the flair to do any of them justice. I'll just have to continue to dream and want for now, I guess.
The main event for us was the Miele Cookery Experience, where we got to participate (think Ready, Steady, Cook or Can't Cook, Won't Cook, even though of course all of us can and will cook) in a cooking demonstration by Sophie Michell. That was a bit nerve wracking I have to admit, as it was in front of an audience which I hadn't really considered. Once we started though it was good fun, especially as Sophie and her helpers took us through cooking Thai inspired Steamed Lemon Sole stuffed with Crab Meat on a bed of Green Mango Salad, accompanied by Steamed Scallops. I'm usually not that great cooking seafood, but was really impressed with the result, which of course we got to eat afterwards. That made me want a Miele Steam Oven even more.
And this is what happens when you eat with food bloggers. Everyone has to take a picture of the finished plate before they dig in.
Monday 15 June 2009
Peperonata
This is another of those recipes that is perfect for midweek dinner, or as in my case if you have some peppers that need using.
I had never heard of peperonata until my brother cooked it once a couple of years ago at my mum and dad's house. I've made it quite often since and I just realised that I had never blogged about it. How could that happen? It really is one of those simple ingredients, simple cooking and maximum satisfaction recipes. You can have it warm with pasta as I did tonight, but it is also great cold spread on fresh, crusty bread or as an addition to a tapas table.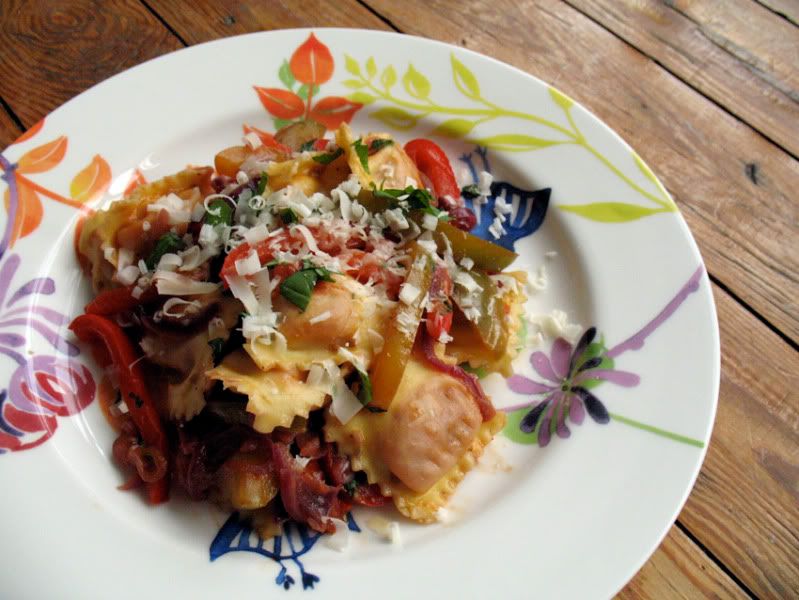
Peperonata (serves 4)
good quality olive oil
2 red peppers, deseeded and cut into strips
1 green pepper, deseeded and cut into strips
1 yellow pepper, deseeded and cut into strips
2 red onions, sliced
4 vine ripened tomatoes, skinned and chopped
2 cloves of garlic, chopped
a good glug of balsamic vinegar
a handfull of chopped flat leaf parsley (I use basil as I like it better)
salt and freshly ground pepper, to taste
freshly grated parmesan
Heat the oil in a large heavy bottom frying pan.
Add the onion and the pepper and sautee over medium heat for about 5 minutes, stirring regularly. You want everything to soften but not brown.
Add the tomatoes, garlic balsamic vinegar and season with salt and pepper. Stir, cover and continue to sautee over a low to medium heat for about 20 minutes or so. Stir occasionally.
Add the parsley or basil, some parmesan and stir to mix.
If you are serving it with pasta, mix in the cooked pasta and top with plenty more parmesan.
Otherwise allow to cool before serving. You can make it a day in advance and keep it in the fridge.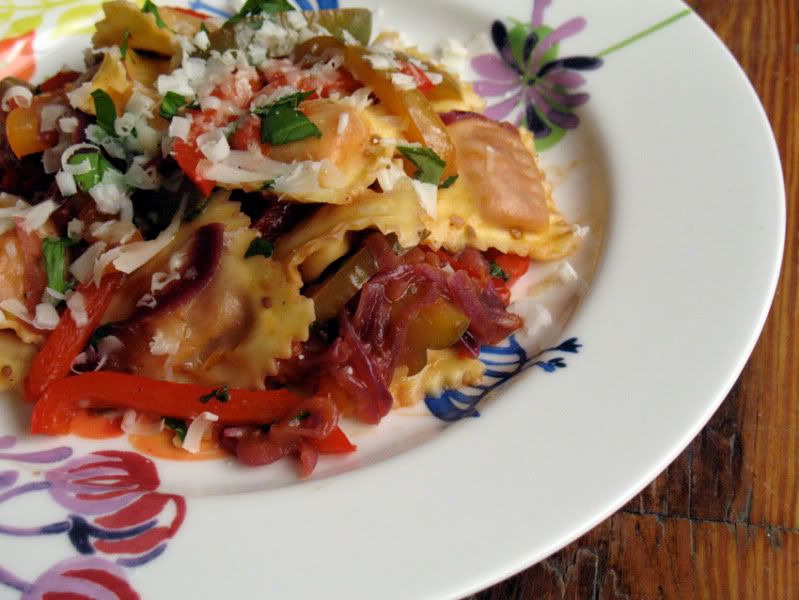
Sunday 7 June 2009
Carrot and Fennel Salad
When I found the recipe for the Moroccan Chicken the other day, I immediately started wondering what to serve with it, in addition to the obligatory couscous. That's when I came across He Cooks, She Cooks, who had also tried the recipe and served it with a carrot and fennel salad as a side, which I thought sounded like a great idea and solved my quandary perfectly.
It's been a while since I last made carrot and fennel salad, but here's my version.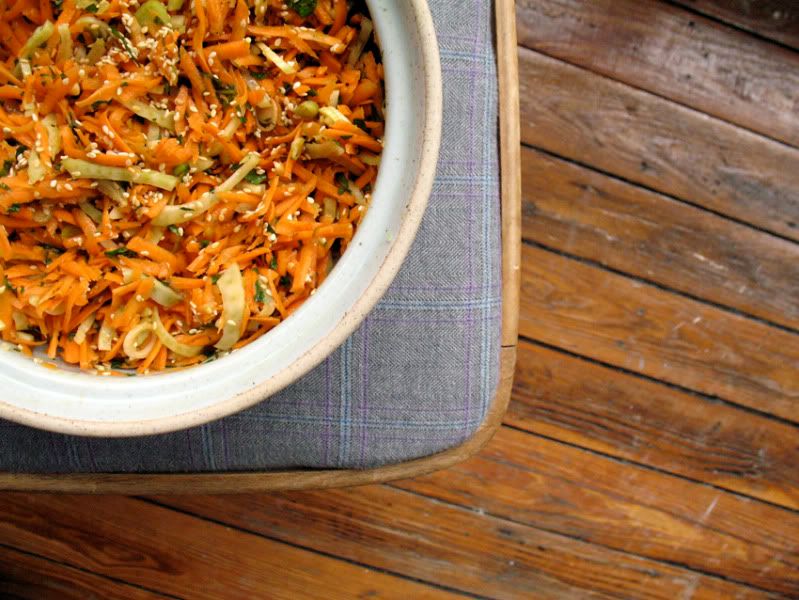
Carrot And Fennel Salad (serves 4-6 as a side)
1 tbsp honey
1 1/2 tbsp balsamic vinegar
3 tbsp olive oil
1 orange, juice off
4 largish carrots, peeled and coarsely grated
1 fennel bulb, trimmed and sliced thinly
2 spring onions, finely sliced
a handful of finely chopped mint
salt, to taste
freshly ground black pepper, to taste
3-4 tbsp sesame seeds, toasted
Whisk together honey, vinegar, orange juice, and olive oil.
Add carrots, fennel, green onions and mint and toss to coat.
Season to taste with salt and pepper and stir in the toasted sesame seeds.
Leave in the fridge for a couple of hours before serving for the flavours to develop.
Moroccan Roast Chicken
What do you do when you are sent a beautiful, plump, has-had-a-good-life Organic Free Range Chicken and you live on your own? Well, of course you roast it and invite your friends round to eat it.
The lovely people at Abel & Cole offered for me to try one of their whole chickens. There was no way I was going to keep all that joy to myself. Even if I had wanted to I would have struggled, as it was a nearly 5lb beauty of a beast. As much as I love roast chicken leftovers, I didn't really fancy eating them every day for a week.
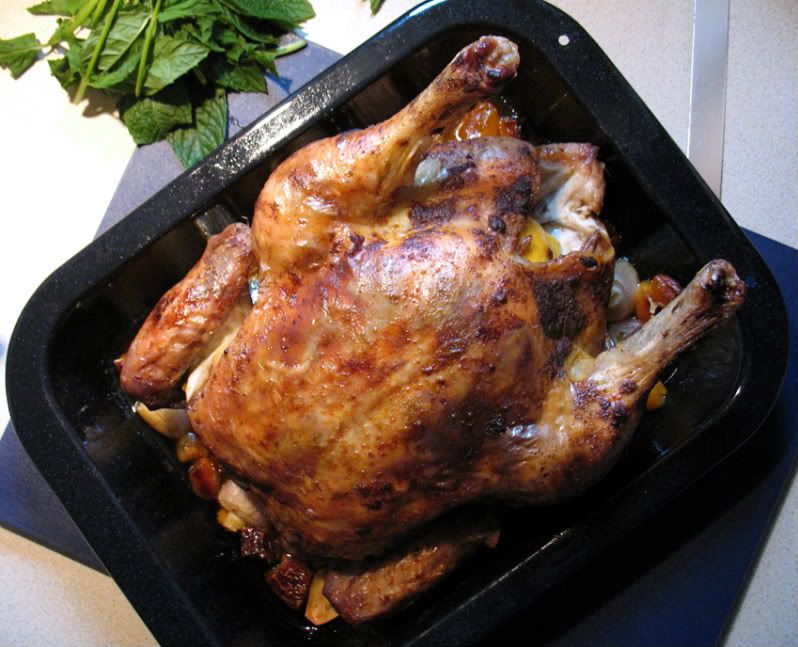
This meant that last night E, JM, B and L came round for roast chicken dinner. I woke up in the morning feeling like trying something slightly different and not just going for the usual Lemon Roast Chicken or Rosemary and Garlic Roast Chicken. Looking for recipes I found one for Moroccan Roast Chicken that sounded pretty good and I planned the menu from there. We ended up having the chicken with chickpea couscous and a carrot and fennel salad, followed by a completely un-Moroccan rhubarb crumble.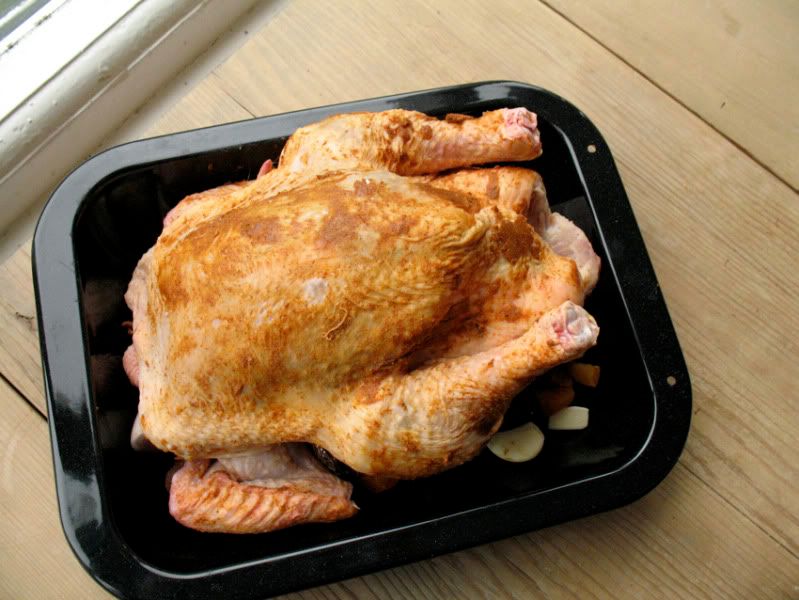
I'll share the other recipes later, but for now here's the recipe for the chicken with my adaptions and changes. The instructions and ingredients seem quite long, but it is really easy and everyone enjoyed it.
Moroccan Roast Chicken
2 tbsp unsalted butter, softened
1 tsp ground cumin
1 tsp ground coriander
1 tsp sweet paprika
1/4 tsp cayenne pepper
1/4 tsp ground cinnamon
salt and freshly ground pepper, to taste
one whole chicken, at room temperature
1 lemon
1 onion, quartered
8 garlic cloves
12 pitted dates, cut in half
12 dried apricots, quartered
1/2 cup chicken stock
1/2 tbsp harissa paste
Preheat your oven to 190C.
Mix the soft butter with the cumin, coriander, paprika, cayenne and cinnamon and season with salt and pepper.
Clean your chicken, inside and out under running water and pat it dry with kitchen towel.
Carefully slide your hands between the skin and the meat on the breast side and top of the legs and rub in half of the spice butter. Rub the other half all over the skin.
Cut the lemon in half and place it inside the cavity.
Set the chicken breast-side-up on a rack in a roasting pan, which is also suitable for use on the stove top.
Place the onion, garlic cloves, dates and dried apricots into a roasting pan and add 1/2 cup of water.
Place the chicken breast side up on a rack into the roasting pan and place in the oven. Your chicken will need 20 minutes per lb plus an extra 20 minutes.
After about half an hour turn your chicken over carefully and baste with the juices that are collecting in the pan.
Leave for about another half hour before turning and basting again, at this point you should also add another 1/2 cup of water.
Continue to roast, basting once more, until completely cooked and the juices run clear when you insert a skewer into the thickest part of the thigh.
Remove from oven and drain any juices that might be caught in the cavity into the pan.
Set the chicken aside and leave to rest for about 10-15 minutes, cover with tin foil to keep warm.
Remove the rack from the pan and spoon off the fat or use a gravy separator to make it even easier.
Set the pan over high heat on the stove top, add the stock and harissa and cook, scraping up any browned bits. If you like you can add a little cornflour/water paste to thicken the gravy.
Carve the chicken and serve with the chunky gravy.
Friday 5 June 2009
Pesto Genovese
Fresh pasta and pesto is one of those meals that I always default to when I get home late from work or on those days when I don't really feel like spending a lot of time in the kitchen. It's quick, simple and good and I usually have all the ingredients around.
Traditionally it would me made with a pestle and mortar, smashing the basil leave little by little, but most time I just use my stick blender. It doesn't make the pesto quite as smooth as doing it by hand, but it's quicker and I actually like a slightly grainier pesto just as much.
What is your quick mid-week dinner of choice?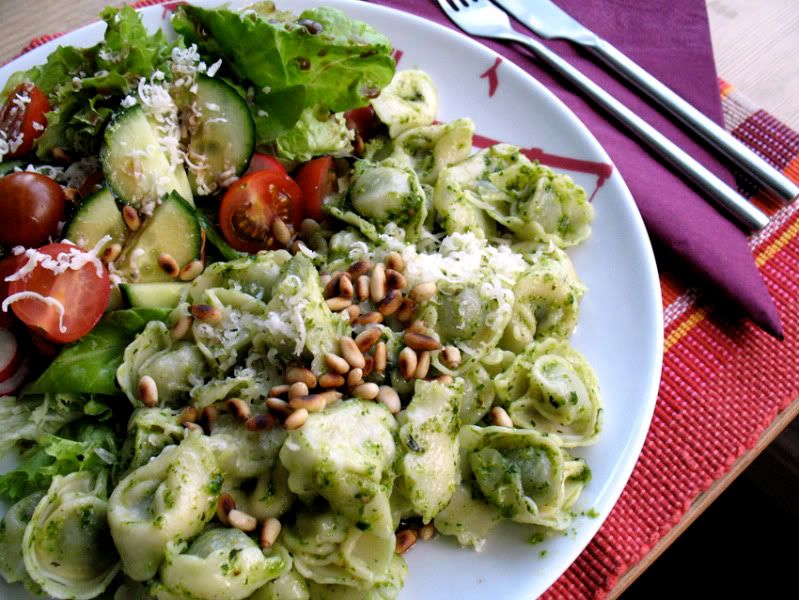
Pesto Genovese (makes enough for 6-8 people)
1 large basil plant, leaves only
25g pine kernels
2 cloves garlic, chopped
1 tsp granular sea salt
50g freshly grated Parmesan
100-200ml extra virgin olive oil
Wash the basil leaves and dry them in a salad spinner.
Toast your pine kernels in a dry frying pan for 2-3 minutes, until golden.
If you're using a mortar, pound the garlic with the salt until you have a smooth paste.
Add the pine nuts and keep pounding.
Then start adding the basil leaves, 2-3 at a time and keep mashing until all is reduced to a silky paste. If you want you can freeze the mixture at this point.
Add the cheese, stir and then add the oil and stir with a wooden spoon until you have a smooth, silky pesto. The amount of oil you adds depends on your preference of texture.
Alternatively place all ingredients in a container and blend with your stick blender until you reach the preferred consistency.
Mix into hot pasta and serve straight away.
You can pour any leftover pesto into a clean jar, top with a layer of olive oil, cover tightly and keep it in your fridge for up to a week.
Monday 1 June 2009
Herb Bread
My friend Lucy is off on another artist residency. This time it's not the remote Shetland Islands, but an equally remote spot in rural Ireland and it involves bread baking. So she came round yesterday morning for a skill sharing exercise in making bread.
If you've never made your own bread, please give it a go. Yes, it does take a bit of time with all the proofing and rising, but it is so worth it. I can't tell you how satisfying it is to pull a hot, fragrant, golden loaf from the oven. To me it's a little bit like magic every time and from Lucy's enthusiasm I deduced that it was the same for her.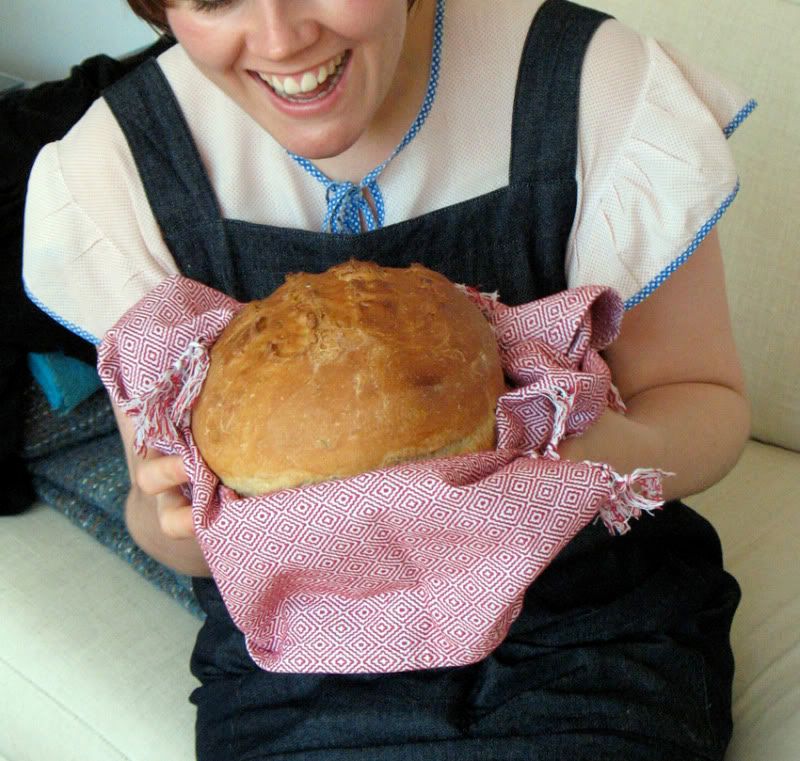
To befit the occasion properly I got out a soup and bread cookbook I bought in Ireland last summer and from it I chose the recipe for Herb Bread to make. So why not bake bread today or as Mrs Doyle would say 'go on, go on, aaahhh go on'.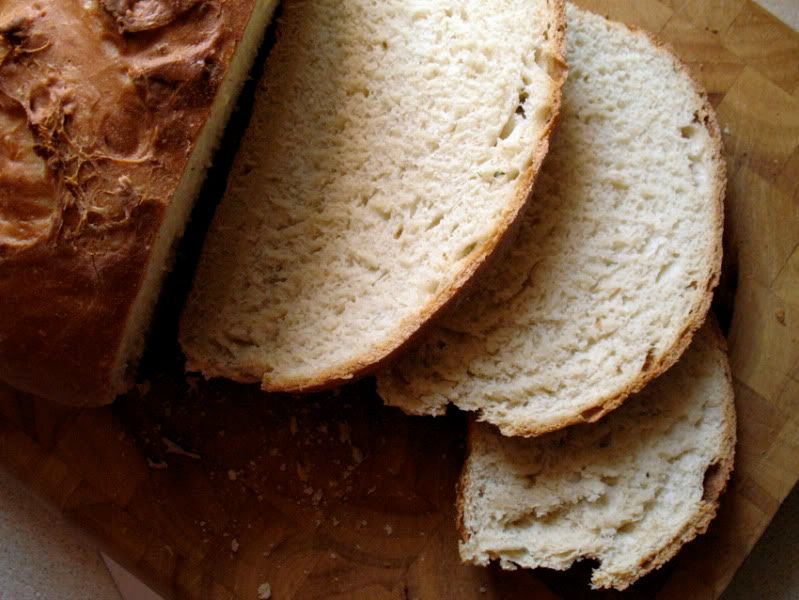
Herb Bread (1 small loaf)
450g/4 cups plain flour
300ml/1 1/4 cup warm milk and water (mixed)
1 tbsp dry yeast
1 tsp salt
8-10 fresh sage leaves
1 sprig fresh thyme
1/2 tbsp fennel seeds
1tsp sugar
Measure the flour into a large bowl.
Mix in the salt, herbs and fennel seeds.
Make a well in the middle and pour in the warm liquid.
Add the yeast and the sugar and stir into the liquid. It's fine that some of the flour gets mixed in as well.
Cover with a clean tea towel and place in a warm place to proof.
Check after about 15 minutes. The yeast should now have frothed up.
Start drawing the dry flour into the yeast and liquid, until it's all combined and you have a dough that is no longer particularly sticky. You might need to add a little more flour.
Turn out onto a floured surface and kneed for about 3-5 minutes, finally form into ball.
Wipe out the bowl and pour a little oil into it, before returning the dough back into it. Turn so it is covered with a light film of oil on all sides.
Cover again with the tea towel and place in a warm place. Leave to rise until double in size. It should take about 1 hour.
Turn out onto a lightly floured work surface again and knock the air out of the dough by kneeding a little.
Shape into a high round ball and place onto a baking tray lined with baking paper.
Make three shallow incisions across the top and do the same in the opposite direction.
Leave for another 20 minutes or so to recover some volume.
Bake in a preheated oven at 230C/Gas 8 for about 15 minutes then reduce heat to 200C/Gas 6 and bake for another 30 minutes.
The loaf is done when it sounds hollow when tapped on the bottom.
Saturday 30 May 2009
Sweetheart Cabbage with Lemon and Pinenuts

If you read my last post you'll also know that I got a sweetheart cabbage in my veg box and wasn't all that sure what to do with it. Thanks for your suggestions. I also started looking on the net for ideas and found a very simple recipe which sounded good to me and which I thought might go well alongside the asparagus and jamon. The basis of the recipe is pretty good and the cabbage and pinenuts work really well but I'd reduce the lemon juice to half a lemon as I found the flavour to be a bit overpowering. Nevertheless, here's the original recipe as found on the Grow Wild website. Try it for yourself and see how much lemon juice you like in there!

Sweetheart Cabbage
1 sweetheart cabbage (shredded)
a handful of pine nuts
Olive oil
freshly ground black pepper
juice of 1 lemon
Steam your cabbage for about 6-8 minutes.
In the meantime toast the pine nuts on a dry pan until light brown. You need to watch them and keep them moving to avoid them burning.
Put about half of the toasted pine nuts in a pestle and mortar and coarsely crush them.
Drain the cabbage, pour over a good swig of olive oil, add the pine nuts (both crushed and whole), the lemon juice and season with black pepper.