This is probably the last recipe I'm going to post this year, but I think it's also one of the best. I wish the picture could do the dish justice, but brown food really doesn't photograph all that well, especially on a dark winter evening with crap kitchen lighting.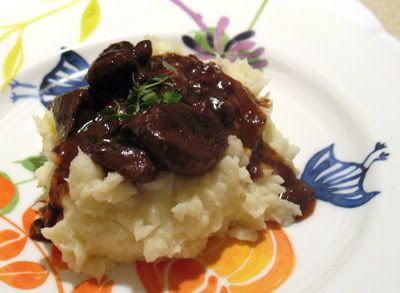
Nevermind, I'll try to describe how good this was...
I was tempted to lick my plate clean.
I could have bathed in this.
As soon as it was finished I wanted to make it again.
I ate too much even though I still felt the after-effects of Christmas.
It was rich, dark, smooth, fall-apart tender with red currant sweetness, bacon saltiness and mushroom earthiness.
Slow-cooked Venison Ragout (serves 4-6)
vegetable oil for frying
1kg venison, cubed
250g shiitake mushrooms, cut in half
2 shallots, chopped finely
4 rashers of streaky bacon, chopped finely (or pancetta)
2 tbsp flour
2 cloves of garlic, chopped finely
2 tbsp fresh thyme, chopped
1/2 pint ale
1/2 pint beef stock
2 tbsp soy sauce
2 tbsp Worcester sauce
4tbsp red currant jelly
salt, to taste
freshly ground black pepper, to taste
Preheat your oven to 160C/Gas 3.
Heat the oil in a heavy based oven-proof pan and fry the venison in batches to seal and brown on all sides. Set aside.
In the same pan fry the bacon for a couple of minutes, then shallots and mushrooms (adding a little more oil if needed) for another 4-5 minutes.
Add the garlic and thyme and fry for another minute or so.
Stir in the flour, making sure it coates everything, before returning the venison to the pan.
Stir and add the ale, stock, soy sauce, Worcester sauce, red currant jelly and season to taste with salt and pepper.
Bring to a boil, cover with a lid and place in the preheated oven for 2 1/2 - 3 hours, until the venison is tender.
Check the seasoning and serve with gnocci, spaetzle or mashed potatoes.
Enjoy!
Thursday, 29 December 2011
Slow-cooked Venison Ragout
Saturday, 24 December 2011
It's time....
...to wish everyone a very Merry Christmas, Frohe Weihnachten, God Jul, Feliz Navidad and Joyeux Noel.
Sylvie x
Wednesday, 21 December 2011
Fish Pie
My friend E has moved to Paris, but from time to time when something brings her back to Manchester she might stay at mine. Knowing that I can't possibly compete with French Cuisine and knowing what it means to live abroad and miss some things from 'home', I usually try to cook something very British on the nights she stays.
When E stayed a couple of weeks ago I decided to make a fish pie. I don't know why I don't make it more often, because it is delicious, comforting and if you keep yourself a little organised in the kitchen it isn't all that much faff either. You can also play around with it a bit. I added some steamed, sliced carrot this time and have also used prawns in the past.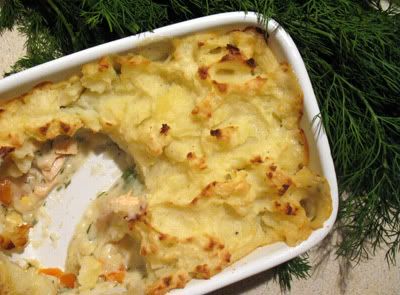
Fish Pie (serves 4)
500g mixed fish (haddock or other white fish, smoked haddock, salmon), cut bite-sized
a little butter for the dish
500ml milk
a bay leaf
6 black peppercorns
a little nutmeg
75g butter
40g flour
a small bunch of dill, roughly chopped
2 hard boiled eggs, chopped coarsly
3/4 cup of frozen peas
1 onion, chopped fairly fine or a finely sliced leek
2 - 2 1/2 cups left-over mashed potato (of course you can make it fresh)
Check the fish for any stray bones.
Place the fish in a shallow pan and pour over the milk to cover the fish.
Add the bay leaf, peppercorns and a very fine grating of nutmeg.
Place over a moderate heat, turning it down just before the milk boils.
Leave to simmer gently for 5-10 minutes, until the fish is opaque and tender.
Turn off the heat, remove the fish and strain the liquor to remove the bay leaf.
Set aside.
Melt 40g of butter in a saucepan, add the flour and cook till pale biscuit-coloured, stirring almost constantly.
Take of the heat and pour in the strained cooking liquid from the fish (adding more, if necessary, to make 500ml) little by little whilst stirring. Continue until you have added all the liquid and the sauce is smooth.
Return to the hob, bring to a simmer and cook over a low heat for 10 minutes, stirring regularly.
Fold in the fish and peas.
Season with salt, pepper, dill and parsley.
While the sauce is cooking, cook the onions (or the sliced leek) over a low heat in a little butter until they are soft.
You want them to go soft but not colour. Placing a lid on your pan and stirring regularly will help.
Set the oven at 180C/gas mark 4.
Gently fold the onions into the fish sauce, add the chopped egg and then transfer to an ovenproof dish.
Top the dish with mashed potato and rough up the top so that you'll have some nice crispy bits once it has baked.
Bake for 40 minutes in the preheated oven until crisp and golden, and the filling is bubbling.
Enjoy!
Tuesday, 20 December 2011
Peppermint Creams
If you don't like baking or your oven is broken, but you still want to make some sweet treats for Christmas you could make some peppermint creams. Of course you could also make them just because they taste great!
These were made by my friend L for the office and I quickly managed to take a picture and get the recipe of her before they all disappeared.
Thanks L.! x
Peppermint Creams (makes about 3 dozen, depending on size)
1 egg white
340g icing sugar
a few drops peppermint essence, to taste
Whisk the egg white lightly in a bowl until frothy but not stiff.
Drizzle with some dark melted chocolate if you like and allow to set.
Enjoy!
Monday, 12 December 2011
The Best Coconut Macaroons
What would Christmas time be without some baking? I had a really busy week last week and managed to doublebook myself nearly every night. On top we had a bit of Christmas afternoon for our final year students at work for which I wanted to bake something christmassy.
Being so short on time meant Coconut Macaroons were the perfect solution. No creaming eggs and sugar, no meassuring loads and loads of ingredients, no cutting out different shapes or time-consuming icing. So, if you're strapped for time or just a lazy baker, try them.
My colleagues and students enjoyed the macaroons. They are lighter than most macaroons as they are not packed with loads of coconut, so you still have the lighness of the meringue coming through and the lemon juice adds a nice bit of freshness. I drizzled them with some melted dark chocolate to make them a little prettier to look at, but that's completely optional, they are good without.

The Best Coconut Macaroons (makes about 20)
2 egg whites
120g caster sugar
1tbsp lemon juice
140g desiccated coconut
Preheat your oven to 160C/Gas 3 and line a large flat baking tray/cookie sheet with baking paper.
In a large clean bowl (avoid plastic) whisk the egg whites until stiff and you can turn the bowl on its head without them falling out.
Add the sugar and slowly whisk in.
Add the lemon juice and fold into the mixture.
Finally add the coconut and also slowly fold under until well mixed.
Using two teaspoons place small mounds of the mixture onto your lines baking tray and bake in the oven for approximately 25 minutes. They should just start to colour and still be a little soft to the touch in the middle.
Allow to cool for 5 minutes on the tray, before carefully transfering to a wire rack to cool completely.
If you like you can melt some chocolate and drizzle it over the macaroons or half dip them in it.
Enjoy.
Tuesday, 22 November 2011
Looking for a Christmas present?
I get contacted by companies quite often asking me to review products or new food stuff that's on the market. I often decline, especially when it comes to food, as I'm not all that interested in shop-bought garlic butter or gourmet ready meals. When I was asked though if I wanted to review the nest of bowls and meassuring spoons by Joseph Joseph, I agreed without hesitation.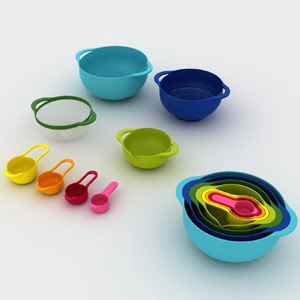
I had seen these in the kitchen department of a design shop before and liked their brightness. Also, if like me you have a tiny kitchen, but can't help buying cockery and other kitchen stuff all the time, anything that stacks easily and stores away nicely is always worth investing in. The bowls would also be ideal for a camper van or galley kitchen on a boat, as not only do you get two mixing bowls and meassuring spoons, but there is also a colander and a fine mesh sieve. Plus, as everything is made from plastic it would easily survive being taken on tour.
You might also want to check out the other christmas gifts available.
The photographs have been borrowed from the findmeagift.com website.
Tuesday, 8 November 2011
Sweet Potato and Lentil Soup
After two weeks of many perfect sunny (and fairly mild) autumn days, today has been grey and pretty cold. The perfect kind of day for soup to warm the cockles of my heart.
I'm on an economy drive, which means making a meal plan for the week on Sundays and doing one big shop on Mondays, rather than loads of little daily shops which end up being expensive. So I sat down and flicked through some cookbooks for inspiration. Making meal plans also seems as good a reason as any to get back to cooking new recipes again and hopefully as a result getting back to weekly blogging.
On a summer holiday to Ireland a few years ago I was impressed by the food in the Avoca cafes and bought two of their cookbooks, one on baking and for soup. That's where I saw this recipe for Sweet Potato and Lentil Soup, full of goodness and warm spices and thick enough to be suitably substantial for dinner (I guess you could call it stoup). I added a little brown sugar to cut through the acidity of the tomtaoes and a few chilli flakes for a little extra heat, but below is the original recipe.
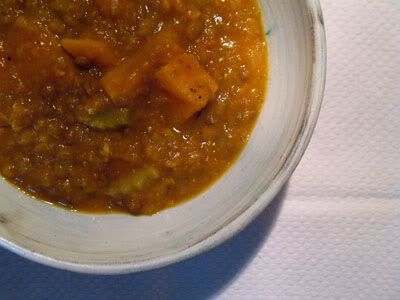
P.S.: When I reheated the left-overs for lunch today, they had thickened
even more and reminded me of a dhal. I added some curry powder and
it made it even better, so I'd probably do that straight away next time.
Sweet Potato and Lentil Soup (serves 4-6)
25g butter
2tbsp olive oil
2 onions, peeled and chopped
1 medium sweet potato, peeled and chopped
1 medium carrot, peeled and chopped
2 celery stalks, trimmed and chopped
150g Puy or brown lentils
1/2tsp tumeric
1tsp ground cumin
a pinch of ground cinnamon
3cm piece of fresh root ginger, peeled and finely chopped
3 cloves of garlic, peeled and chopped
1/2 x 400g can tomatoes
1 litre chicken stock (I used vegetable stock)
1 lemon, juice of
In a large saucepan, heat the butter and oil over medium heat.
Add the onion and fry without colouring for about 10 mins till soft and transluscent.
Add the sweet potato, carrot, celery and lentils and stirr to coat in oil.
Add the spices, ginger and garlic and cook for 2-3 minutes stirring occassionally.
Add the tomatoes and the stock.
Season with lemon juice, salt and pepper and cook for about 30 minutes until the potatoes and the lentils are soft and tender.
Using a stick blender , puree briefly, so everything is still chunky rather than smooth.
Check the seasoning, reheat and serve.
Enjoy!
Tuesday, 1 November 2011
Mixed Tomato Chutney
I didn't have much luck with growing tomatoes this year. Or maybe let me rephrase that, the tomatoes grew beautifully, but only a handful of them actually ripened enough to eat. I blame it on another rainy and cold summer. So, yesterday I finally went into the garden and picked all the fruit still left and decided that I'd make chutney with the last of the not-so-successful crop.
I found a recipe by Nigel Slater on the Guardian website and thought I couldn't really go wrong with it. The chutney turned out tasty but a little runny, so maybe I'd start with a little less vinegar next time and added more if needed later on in the cooking process. I got three and a half jam jars full, so there might even be a lucky person that'll get some for Christmas. Oh and I used about 3/4 green tomatoes to 1/4 ripe.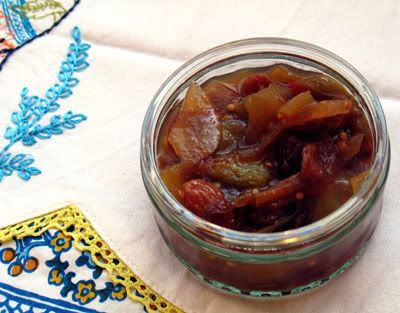
Mixed Tomato Chutney (makes about three jam jars)
900g tomatoes, mixed green and red
350g onions, chopped roughly
90g raisins
250g light muscovado sugar
1 medium hot red chilli, chopped finely
1 tsp salt
2 tsp yellow mustard seeds
300ml white wine vinegar (I'd start off with 3/4 of that)
Cut the tomatoes in half.
Put the green fruit together with the peeled and roughly chopped onions, into a large stainless- steel or enamelled pan.
Add the raisins, sugar, chilli, salt, mustard seeds and vinegar.
Bring to the boil, turn down the heat and leave to simmer for 25 minutes, giving the occasional stir to reduce the risk of the chutney sticking.
Add the ripe tomatoes and continue to simmer for another 35 minutes.
Then spoon into sterilized jars and seal.
Enjoy!
Friday, 7 October 2011
Colcannon Soup
After a week of unseasonably warm weather, autumn has now definitely arrived. At mine that means time for soup, lots of it. My friend L dropped by for lunch on Tuesday and since we had discovered in a conversation the week before that we both love cabbage and potatoes, so what better recipe to make than Colcannon Soup?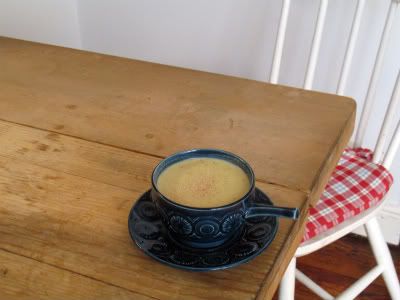
Colcannon Soup (serves 4-6)
4 tablespoons butter
1 shredded cabbage (I like Savoy best)
1 1/2 lbs potatoes, peeled and cut into 1 inch pieces
1 lb leek, washed and chopped (white and pale green parts only)
1 1/2 litres vegetable stock
salt, to taste
freshly ground pepper, to taste
ground nutmeg, to taste
cream, to taste
Melt butter in a large saucepan over medium heat.
Add the cabbage, potatoes, and leeks. Cover and cook for about 10 minutes, stirring occassionaly.
Add stock and bring to a boil.
Cover, then reduce heat to a simmer, and cook until the vegetables are soft, this shoul take about 15minutes.
Transfer to a blender or food processor in batches and blitz until smooth or use an immersion stickblender.
Return to the saucepan, season with salt, pepper, and nutmeg.
Add a little cream to finish.
Enjoy.
Sunday, 18 September 2011
Chocolate Chunk Pecan Cookies
I baked to put a smile one somebody's face. I think it worked.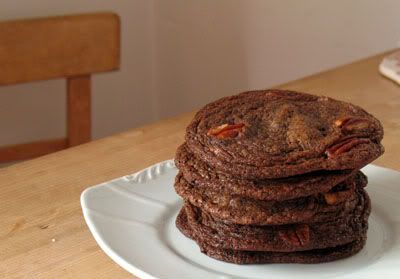
Chocolate Chunk Pecan Cookies (makes 12 large cookies)
200g good quality dark chocolate (like Green & Blacks 70%), broken into squares
100g butter , chopped
50g light muscovado sugar
85g golden caster sugar
1 tsp vanilla extract
1 egg, beaten
100g whole pecans
100g plain flour
1 tsp bicarbonate of soda
Preheat oven to 180C/Gas 4.
Melt 85g chocolate over a pan of simmering water in a mixing bowl or in the microwave.
Add the butter, sugars, vanilla and egg until and beat until smooth
Stir in three-quarters of both the nuts and remaining chocolate, then the flour and bicarbonate of soda.
Heap 12 spoonfuls, spaced wide apart, on 2 baking sheets (don't spread the mixture), then poke in the reserved nuts and chocolate.
Bake for 12 mins, then leave to cool on the sheets. They will be soft when they come out of the oven and you might think they need longer, but they'll crisp up whilst cooling.
Enjoy!
Monday, 12 September 2011
Blackberry Pecan Streusel Cake
I'm in the middle of some serious procrastination. I have sharpend my pencils, sorted my e-mail inbox and even my junk mail folder, made various cups of tea and wasted precious time just watching some tarpaulin blowing in the wind outside my office window. I still have no inclination to finish the reports I need to have done for this afternoon. Instead I find myself blogging about a cake that I made a few weeks ago for my friend Lucy's dad's birthday.
The blackberries make the cake really moist and all the spices make it very moreish. I got the recipe from another blog called The English Kitchen and maybe you should nip over there to have a look at Marie's pictures of the cake, as I guess mine could be described as quirky, but maybe it's not so successful at selling the cake.
Blackberry Pecan Crumble Cake
For the cake:
125ml of sour cream
1 large free range egg
1 tsp pure vanilla extract
4.25 ounces plain flour
1/2 tsp baking powder
1/2 tsp bicarbonate of soda
1/4 tsp salt
1/4 tsp ground cloves
1/4 tsp freshly ground nutmeg
4 tbs unsalted butter, softened
3/5 ounces granlulated sugar
1 cup fresh or frozen blackberries
For the streusel:
6 TBS soft light brown sugar, packed
2 ounces plus 1 tsp flour (1/4 cup)
1/'2 tsp ground cinnamon
1 1/2 ounces chopped toasted pecans (1/4 cup)
2 tbsp unsalted butter, chilled and cut into small bits
Preheat the oven to 180C/350F.
Grease an 8 inch square pan and line with baking paper, leaving an overhang to help lift the cake out.
Make the streusel by the flour, brown sugar, and cinnamon with your fingertips in a large bowl. Add the butter and rub together until you get coarse crumbs. Stir in the chopped pecans. Set aside.
Whisk together the flour, baking powder, soda, salt, cloves and nutmeg for the cake batter in a medium bowl. Set aside.
Whisk the sour cream, egg and vanilla together in a beaker. Set aside.
Cream together the butter and sugar until light and fluffy. Slowly drizzle in the egg mixture, beating all the while. Beat in the flour mixture, in three additions, beating well after each and scraping down the sides of the bowl each time.
Scrape the batter into the prepared pan, smoothing the top with a spatula. Sprinkle the blackterries over top and then sprinkle the streusel evenly over all.
Bake for 45-50 minutes until golden brown and the cake tests down when a toothpick inserted into the centre comes out clean.
Remove from the oven and allow to cool in the pan for 15 minutes before lifting out to a wire rack to finish cooling.
Cut into squares to serve.
Enjoy!
Sunday, 28 August 2011
Almond Biscotti
When I was asked a few weeks ago if I wanted to review a copy of Stacy Adimando's 'The Cookiepedia' I didn't really have to think twice before saying 'yes, please'. If you like cookies, or biscuits as they are called in the UK, you will like this book. Nothing but biscuit recipes, from the simple to the fancy (and one recipe for brownies, which in my opinion are not really a biscuit, but I guess they aren't really cake either, so I'll overlook that).
The book has a really nice layout and design, with good photographs and lovely illustrations, as well as easy to follow instructions, and plenty of space for your own annotations. Measurements are given in cups and Fahrenheit, so I guess it was initially aimed at the American market (hence the title!). There are easily accessible conversion tables in the front and back cover to help if you're not familiar with American measurements though. Saying that I think it'd still be easier to get yourself a measuring cup if you haven't already got one (1 cup = 250ml).
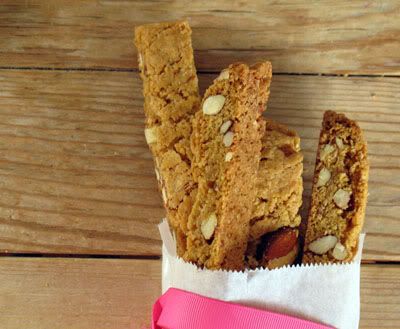
I'm invited to my friend Sarah's for dinner tonight and thought it'd be nice to bring a little something along, so chose to make the Almond Biscotti. I hope everyone else will enjoy them as much as I do.
Almond Biscotti (makes 3 dozen)
1 3/4 cups plain flour
1/4 cornmeal
1 cup sugar
1 tsp baking soda
1/2tsp salt
2 eggs
1 tsp vanilla or almond extract
4tbsp unsalted butter, melted
1 cup almonds, coarsely chopped
Preaheat your oven to 350F/180C.
Beat together the flour, cornmeal, sugar, baking soda and salt. Add the eggs, working them in one at a time until fully incorporated.
Add the vanilla (or almond extract) and butter, mixing well until the dough begins to form. It will not come together completely. add the almonds and stir to evenly distribute.
Turn the dough out onto a cookie sheet with lightly floured hands. Divide in half and shape into two logs, each about 1 1/2inch thick and 2inches wide. (Leave plenty of room betwen the logs as they will spread whilst baking.)
Bake the biscotti for 20 minutes (this is the first of the two times you'll bake them), rotating the sheet half way through baking. Take it out and let the logs rest for 20 minutes. They'll still be slightly spngy to the touch, kind of like dense bread. Lower the oven temperature to 250F/135C.
After 20 minutes, transfer the logs to a chopping board. Cut them into 1/2-inch slices with a serrated knife. Finally move the slices (cut side up for any ends) back to one sheet and bake for 40 minutes more. the biscotti will still be slightly soft while warm but will harden once they've cooled.
Enjoy!
Sunday, 31 July 2011
Rotweinkuchen (Red Wine Chocolate Cake)
This is one of those cakes that my mum makes quite regularly. It's simple, easy to transport and keeps well, should you have any leftovers for some strange reason. The red wine gives it some depth in flavour and also makes sure it's moist.
So when I went home for a family visit and all went on a holiday at Easter this cake is one of the things we took along with us and enjoyed with a cup of coffee after a five-hour car journey to East Germany. Why I'm only just getting around to blogging about it now, I don't know!
It usually looks a little darker, but we didn't have quite enough cocoa powder left.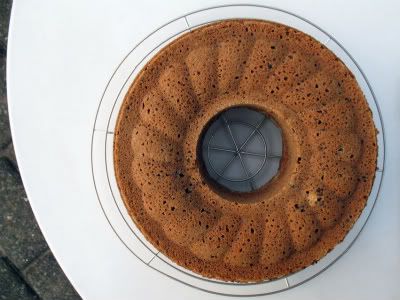
Rotweinkuchen (1 cake)
250g softened butter or magarine
250g sugar
250g plain flour
2 tsp baking powder
4 eggs
1 1/2 tbsp cocoa powder
1/2tbsp ground cinnamon
a pinch of salt
1tsp vanilla essence
125ml red wine
125g coarsly chopped or grated dark chocolate
Preheat your oven to 175C/Gas4.
Grease a Kugelhop or fluted cake tin.
In a large bowl cream the butter with the sugar until light in colour.
Add one egg at the time and continue to beat with an electric whisk.
Add the cocoa powder, cinnamon, salt and vanilla essence and red wine and continue to beat until combined.
Sift the baking powder and flour together and add little by little by little whilst continuing to whisk.
Add the chocolate and mix in with a wooden spoon.
Pour into your prepared cake tin and bake for around 60 minutes until a skewer inserted comes out clean.
Allow to stand for 10 minutes before carefully turning out onto a cooling rack.
Once cool, dust with icing sugar.
Enjoy!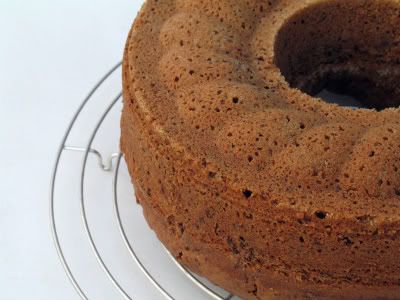
Friday, 29 July 2011
Easy Cherry Tomato and Feta Tart
Even if you can't cook you can make this tart and impress at a party.
I made four of them for the annual Cherry Berry party yesterday, two with thyme and two with basil. There are always so many sweets on offer I thought something savoury would be a good idea. It was great with the Greek Salad that L. had made.
A big thanks to L. for organising it this year.
I., if you're reading, this is one for you, much easier than cheesecake!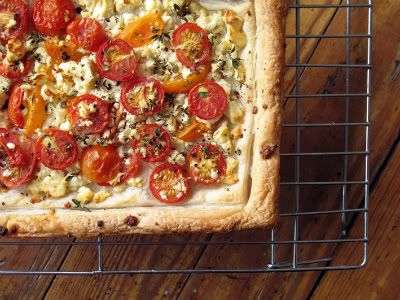
Easy Cherry Tomato and Feta Tart (serves 4)
1 large sheet of ready-made puff pastry (375g)
250g feta cheese
30-40 cherry or baby plum tomatoes, halved
fresh basil, thyme or oregano, to taste
freshly ground black pepper, to taste
Preheat your oven to 180C/Gas4.
Cut the large sheet of pastry in half (or you can leave it as one if you prefer/cut it into small individual portions) and score line around all four edges about 2cm in.
Crumble 3/4 of the feta cheese over the pastry, leaving the scored edge free.
Top with the tomatoes and crumble the rest of the feta over the top.
Season with freshly ground black pepper. You won't need salt as the feta is salty enough.
Bake for 15 minutes, sprinkle with herbs of your choice and return to the oven for another 5-10minutes until the pastry is golden brown and cooked through.
Serve hot or cold.
Enjoy!
Wednesday, 13 July 2011
Roasted Beet and Rocket Salad
Remember I had dinner with friends after having been sent some cookbooks? I know it was a while ago and it has taken me a lot longer than planned to write about the final recipe, but better late than never.
The third and final dish I tried from The Free Range Cook was Roasted Beet and Rocket Salad and I'll definitely be making it again, especially once the beetroot in my veg patch is ready for eating. For years I thought I hated beetroot. There aren't many foods I won't eat and most I keep trying with again every now and then to see if my taste buds have changed, sometimes that works as in the case of beetroot (the supposed pleasures of celery still elude me to this day though).
Well to be honest, I guess it wasn't a case of my taste buds changing, more the fact that after having only ever eaten pickled beets, I went to Finland and was served a vegetable stew that had the most amazing tasting beetroot in it. I was converted. Now I have it often, still never pickled though!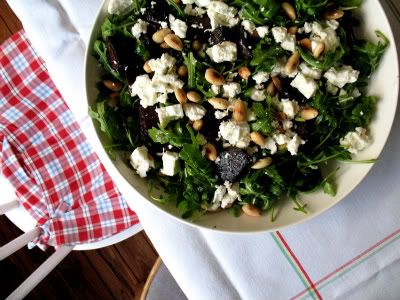
Roasted Beet and Rocket Salad (serves 6)
5 medium beetroot, peeled and cut into 2cm wedges
2tbsp extra virgin olive oil
1tbsp brown sugar
1tbsp balsamic vinegar
salt, to taste
freshly ground black pepper, to taste
8 handfuls of rocket
1 handful of baby beet leaves (optional)
1 lemon, juice of
2tbsp extra virgin olive oil
135g roasted almonds
120g feta cheese, crumbled
Preheat your oven to 180C/Gas5. Place the beetroot wedges in a large roasting tin lined with baking paper and mix with the first measure of oil, the sugar, vinegar and season with salt and pepper to taste.
Roast for 45 minutes, until tender. Allow to cool in the roasting dish.
Toss the salad leaves with the sec ond measure of oil and lemon juice and place on a large serving platter or other shallow dish. Top with roasted beets and scatter the almonds and crumbled feta on top.
Enjoy!
Sunday, 12 June 2011
Broad Bean Puree with Mint and Parmesan
So, here's the next recipe from last week's dinner party as promised. Broad Bean Puree with Mint and Parmesan. Well, what can I say, it looks great and was delicious, but I'm not so sure I will be rushing to make it again soon.
The recipe calls for 1kg of frozen broad beans to be de-podded. Whilst I was busy removing the tough skins on every single one of them, Lucy called to see if I needed help and to ask how I was feeling. My answer: 'Like Cinde-fucking-rella!'. Saying that though, once you have overcome this tedious task, the recipe is superquick to finish off. I'll probably try it again using peas instead of beans.
You can serve it warm as a side or at room temperature as a topping for bruscetta. The recipe book also suggest serving it as a pasta sauce after thinning it with some of the pasta cooking water.
Broad Bean Puree with Mint and Parmesan (serves 4-6 as a side)
1kg frozen broad beans
3 cloves of garlic, chopped finely
2 lemons, grated zest of
24 mint leaves, finely chopped
4tbsp extra virgin olive oil
50gr freshly grated parmesan
salt, to taste
freshly ground black pepper, to taste
1-2tbsp water
Put your broad beans in a large bowl and cover with boiling water. Set aside until cool enough to handle.
De-pod the beans, by gently squeezing them out of their greyish outer skin from the grooved end. Discard the skins.
Place the beans and all other ingredients, except the water in a food processor (or you can use a stick blender like me) until you have a very thick puree. The mixture can be prepared ahead of time until this point and will keep in the fridge for up to four days.
When you are ready to eat, heat the beans in a pot, adding the water and stir until heated through.
Add more salt and pepper if needed.
Tuesday, 7 June 2011
Caramelised Onion and Feta Cheese Tart
I'm finally back with some cooking.
Coming home the other week to find a missed delivery card from the postman had me a little confused as I was sure I had not been spending money, buying things I now couldn't even remember. So I was pleasantly surprised when I got to the collection office and found that I had been sent The Free Range Cook by Annabel Langbein to review. Nice. Not having a television, I have to admit to not hading heard of this chef, but opening the book quickly got me interested.
Also what better excuse to invite some friends round for dinner and try some of the recipes. Last night seven of us got together, I cooked, they brought drinks, we ate, drank and were merry. I made Caramelised Onion and Feta Cheese Tart, Roasted Beet and Rocket Salad and Broad Bean Mash with Mint and Parmesan from the book, as well as my own Tomato Salad, Roast Potatoes and Lucy kindly provided Fruity Tiramisu for pudding. Dinner parties on Monday nights might be the new thing. I chose some food for which I could do quite a lot of prep the day before and then just finish it all off after work.
There are some really nice recipes in the book. It seems to me that it's all about using good ingredients and keeping flavours fresh and clean. Nothing too fancy or heavy. I (and I think everyone else) really enjoyed the food. I kept the menu vegetarian so everyone could tuck in without me having to make extra options, but that's not to say that there aren't some really good looking meat and fish recipes in the book also. The only thing I'd say is that the timings are a little enthusiastic, or both me (I'll tell you about shelling the broad beans another time) and my oven are slow. It's also worth keeping in mind that some of the things listed as ingredients in the recipe (such as the caramelised onions) actually are a separate recipe and will also take time to make.
I'll be posting the other recipes soon.
Thanks to Gibbo, Hilary, Lucy, Dylan, Graham and Yuri for being guinea pigs!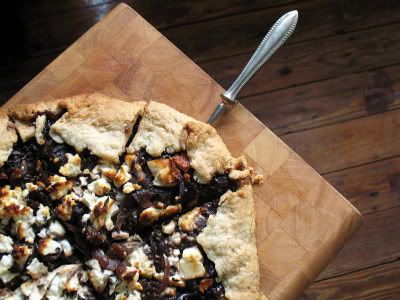
Caramelised Onion and Feta Tart (serves 8)
PASTRY:
250g strong white flour
1tsp baking powder
1tsp salt
220g frozen butter, grated
4tbsp cold water
FILLING:
Caramelised Onions (see recipe below)
150g feta cheese, crumbled
2tsp fresh thyme
To make the pastry, mix the flour and baking powder in a large bowl.
Add the grated butter and work into the flower with your fingers until you have a mixture resembling rough crumbs.
Add the cold water and mix with your hands until you have a soft dough. Don't overwork the pastry, it'll make it tough.
Place a large sheet of baking paper on your work surface and tip the dough onto it. Place another sheet of baking paper over the top and roll the pastry out with a rolling pin into a circle of about 35cm.
Leave between the layers of baking paper and transfer to a baking tray. Chill in the fridge for at least 10 minutes or until ready to assemble.
Preheat your oven to 200C/Gas 6.
Take the pastry from the fridge and remove the top layer of baking paper.
Spread the onions over the top leaving an approx. 4cm border all around.
Crumple the feta over the top and sprinkle with thyme.
Fold the pastry edges toward the centre to partially enclose the filling, then pleat in little folds to make a pastry border.
Bake for 15 minutes the reduce heat to 180C/Gas 5 and bake for another 35-40 minutes until golden and crisp.
N.B. My tart took longer to bake, closer to 15 minutes + 50 minutes. I also covered the filling with aluminium foil after a while to stop the feta from burning, which is easy enough, or you could just add the feta half way through the baking.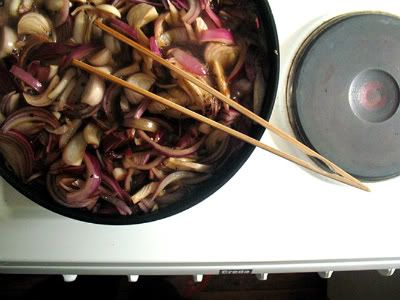
Caramelised Onions
6 red onions, peeled and cut into thin wedges
375ml water
75g brown sugar
75ml balsamic vinegar
2tbsp oil
1tsp salt (or to taste)
freshly ground black pepper, to taste
Place all the ingredients into a large pot and bring to the boil.
Reduce heat and simmer gently, stirring now and then, for about 40-45 minutes until the liquid has all but evaporated and the onions are very soft. (I cooked mine slowly for over an hour and they was still quite a bit of moisture.)
During the final steps of cooking take care that the onions don’t catch and burn, so stirr a little more frequently.
Remove from the heat and cool before storing in the fridge in a covered container.
Onions will keep, covered, in the fridge for a week.
You could also use these as a base to make onion soup or onion gravy.
Sunday, 10 April 2011
I'm excited
Don't worry this is not going to turn into a gardening blog, but I just had to share my excitement. Last Monday I found myself in a garden centre. It was not a plannned trip, just one of those things that happened. My friend Lucy had to take Dolores to a welder to see about fixing a leak in the roof. When you are trying to turn a van into a living space and mobile artist's book library it is not such a great thing to be able to see the sky through the roof. Especially if you find yourself in Manchester where it rains often.
Anyways, I digress, back to the rainy afternoon in the garden centre. Well, we were a little early so it seemed the perfect place to stop. I have always liked garden centres, I can't tell you exactly why, but it feels good to be there and I have been meaning to turn some of our communal garden into a vegetable patch ever since I moved here four summers ago, but then usually lost my can-do-attitude. Well, not this time! The garden centre had its usual effect on me and got me all excited about getting my fingers dirty and growing my own food. So, I got a large trolley and filled it with soil and compost, but much more importantly peas, pumpkins, courgettes, seed potatoes, beetroot, lettuces and an assortment of herbs.
Luckily I have some fabulous friends who are not shy to lend a helping hand, who have their own can-do-attitudes and who came round yesterday to help me build some beds and plant my veg, in exchange for the promise of dinner, pancake breakfast and a van valet. There is still some work to do as I ran out of top soil and will need to make another trip to the shops for it (not so easy when you only have a bicycle), but the beds are built and half planted.
So this summer, there will hopefully be plenty of fresh stuff, straight from the veg patch to the kitchen, worthy blogging about. We finished the day with a well deserved late lunch of Creamy Tomato Soup. I changed the recipe a bit, as I had run out of tomato puree, so used 2 1/2tbsp of red pesto instead and I think it was still better. The reason it seemed to taste extra good could simply be that we'd been working hard and were really hungry though.
A huge thanks to H, G and B for your elbow grease, to J for trusting me with your tools and to J for dropping by with encouragement and flapjacks!
Sunday, 27 March 2011
Banana Bread
When I'm not blogging, which is most of the time these days, I'm an artist (and lecturer, for my sins) and one of the things I do is make artist's books. So, to refresh and improve some of my skills and knowledge and just to carve out some time to think about new ideas and talk to other people I signed up to an evening class, run by Lucy May Schofield at Hot Bed Press.
Unfortunately the course has come to an end and I now have to think of something else to do with my Wednesday nights again, but to celebrate the fun we had and work everyone made I took along a Banana Bread to the last class, which was shared nicely between books, bodkins and bone folders.
Banana Bread
250g plain flour
1tsp bicarbonate of soda
pinch of salt
115g butter, softened
115g dark brown soft sugar
2 eggs, beaten
3 large over-ripe bananas, mashed
1/2 cup of your favourite nuts, optional
| | | Preheat the oven to 180 C / Gas mark 4. Lightly grease a 23x13cm loaf tin. | |
| | |||
| | | In a large bowl, combine flour, bicarbonate of soda and salt. | |
| | |||
| | | In a separate bowl, cream together butter and brown sugar. Stir in eggs and mashed bananas until well blended. Stir banana mixture into flour mixture; stir just to moisten. Pour mixture into prepared loaf tin. | |
| | |||
| | | Bake in preheated oven for 60 to 65 minutes, until a knife inserted into centre of the loaf comes out clean. Leave to cool in tin for 10 minutes, then turn out onto a wire cooling rack. Enjoy! (I once again forgot to take my camera, so the phone had to do. This seems to become a common theme!) | |

Monday, 21 February 2011
A whole lotta pancake love
Every few months there seems to be a request from friends for a big pancake breakfast at mine. It has turned into one of my favourite ways to spend a Sunday morning or in yesterday's case lunchtime.
Ingredients:
good friends
a whole lotta love
stacks of pancakes
golden syrup
pancake syrup
real maple syrup
blueberries
raspeberries
strawberries
bananas
crushed nuts
butter
Greek yoghurt
black coffee
pots of tea
fresh orange juice
sunday papers
and good music
You can find the pancake recipe here.
Sunday, 30 January 2011
Lemon Meringue Pie
It's the last weekend in January, which means tax returns for many of my self-employed friends. I tried to do something to cheer L and H up a little and make sorting through mountains of receipts a little more bearable. I went round to their house and baked my first ever Lemon Meringue Pie. I also wanted it to be a little thank you, as they have been feeding me far too many nights in the last few weeks without me contributing much to any of it. So, girls, thank you! I hope you enjoyed the pie!
I got the recipe from the BBC Good Food website, but have copied it below for ease.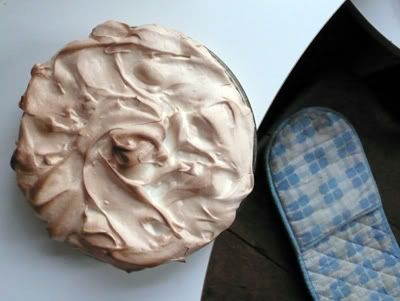
Lemon Meringue Pie
For the pastry:
175g plain flour
100g cold butter , cut in small pieces
1 tbsp icing sugar
1 egg yolk
For the filling:
2 level tbsp cornflour
100g golden caster sugar
finely grated zest 2 large lemon
125ml fresh lemon juice (from 2-3 lemons)
juice of 1 small orange
85g butter , cut into pieces
3 egg yolks
1 whole egg
For the meringue:
4 egg whites , room temperature
200g golden caster sugar
2 level tsp cornflour
For the pastry:
Put the flour, butter, icing sugar, egg yolk (save the white for the meringue) and 1 tbsp cold water into a food processor. Using the pulse button so the mix is not overworked, process until the mix starts to bind.
Tip the pastry onto a lightly floured surface, gather together until smooth, then roll out and line a 23 x 2.5cm loose-bottom fluted flan tin. Trim and neaten the edges. Press pastry into flutes. The pastry is quite rich, so don't worry if it cracks, just press it back together. Prick the base with a fork, line with foil, shiny side down, and chill for 1⁄2-1 hour (or overnight).
Put a baking sheet in the oven and heat oven to 200C/fan 180C/gas 6.
Bake the pastry case 'blind' (filled with dry beans) for 15 mins, then remove the foil and bake a further 5-8 mins until the pastry is pale golden and cooked. Set aside. (Can be done a day ahead if you want to get ahead.)
Lower the oven to 180C/fan 160C/gas 4.
Mix the cornflour, sugar and lemon zest in a medium saucepan. Strain and stir in the lemon juice gradually. Make orange juice up to 200ml/7fl oz with water and strain into the pan. Cook over a medium heat, stirring constantly, until thickened and smooth.
Once the mixture bubbles, remove from the heat and beat in the butter until melted. Beat the egg yolks (save white for meringue) and whole egg together, stir into the pan and return to a medium heat. Keep stirring vigorously for a few minutes, until the mixture thickens and plops from the spoon.
Take off the heat and set aside while you make the meringue:
Put the egg whites in a large bowl. Whisk to soft peaks, then add half the sugar a spoonful at a time, whisking between each addition without overbeating. Whisk in the cornflour, then add the rest of the sugar as before until smooth and thick.
Quickly reheat the filling and pour it into the pastry case.
Immediately put spoonfuls of meringue around the edge of the filling, then spread so it just touches the pastry (this will anchor it and help stop it sliding). Pile the rest into the centre, spreading so it touches the surface of the hot filling, then give it all a swirl with a fork so you have nice peaks.
Return to the oven for 18-20 mins until the meringue is crisp and slightly coloured. Let the pie sit in the tin for 30 mins, then remove and leave for at least another 1⁄2-1 hr before slicing. I like to chill it in the fridge for a couple of hours before serving.
Enjoy.
Tuesday, 25 January 2011
Nigella's Chocolate Orange Loaf Cake
Well, it's Burns Night, but if you've come looking for haggis I have to disappoint you. I volunteered to bring the pudding to my friend H's Burns Night dinner and I know this isn't even Scottish, but nobody seemed to mind that it wasn't quite in keeping. There was not much left by the end, even though we had all had plenty of haggis, neeps and tatties.
I didn't have any unwaxed oranges, so left out the orange zest called for in the recipe, but I'm sure it is even better with it in, if that is possible. The cake is really moist and not too heavy. It will sink in the middle after coming out of the oven, but even Nigella's cake in the cookbook looks like that, and if it's good enough for her, it's good enough for me.
Now the only thing I can't wait for is longer days, so that I can take decent pictures in daylight again.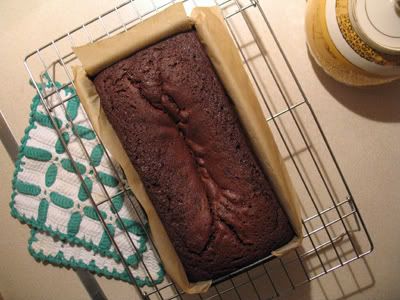
Chocolate Orange Loaf Cake
150gr soft unsalted butter, plus some extra for greasing the pan
2 tbsp golden syrup
175gr dark muscovado sugar
150gr plain flour
1/2 tsp bicarbonate of soda
25gr best-quality cocoa powder, sifted
2 eggs
zest of 2 oranges and juice of 1 orange
Preheat your oven to 170C/Gas 3 and grease and line a 2lb loaf tin with baking paper.
In a large bowl beat the soft butter with the sugar and golden syrup until you have a smooth mixture.
Sift together the flour, bicarb of soda and cocoa powder in a separate bowl.
Beat one tablespoon of the dry ingredients into the creamed butter.
Add one egg and continue to beat before adding another couple of tablespoons of the dry ingredients and the other egg.
Continue to add the dry ingredients, before finally beating in the orange zest and lastly the orange juice. It says in the book that at that stage the batter might look as if it could be curdling a little but not to worry. That didn't happen with mine though, but as I said I left out the zest and that could have something to do with it.
Spoon the batter into your prepared tin and bake for 40-50 minutes. If you test the cake with a wooden skewer for doneness it will not come out completely clean as there should still be some moisture at the very centre, hence the sinking of the middle.
Leave to cool for a short while in its tine, before carefully turning it out and allowing it to cool completely on a wire rack.
Enjoy!
Monday, 17 January 2011
Roast Haunch of Venison
If I want to not default on my New Year's resolutions straight away, I better get posting.
This year I decided not to do the quintessential turkey for our Christmas Dinner and after some deliberating on what to do instead, it was the butcher that decided for me, by having venison haunches on offer. Perfect!
I apologise for the bad photo, but Christmas Dinner in our house is all about the sitting down together and having a good chat and a laugh, so there was no time for faffing about with my camera and I just got a quick shot of my brother carving in the kitchen. It really doesn't do it justice, but I guess you all know what a roast joint looks like anyways.
I chose a Hugh Fearnley-Whittingstall recipe, as when it comes to meat (or most other foods) the man knows what he's doing. I did marinate the venison in buttermilk for 24 hours before preparing it. That removes some of the gamyness and also helps to keep it moist and tender.
Roast Haunch of Venison (serves 8-10)
1 haunch of venison, tunnel-boned
Salt and black pepper
6 fresh bay leaves
3 large sprigs thyme or rosemary (I used rosemary)
10-12 rashers streaky bacon
For the gravy
½ glass red wine
250ml game stock
Redcurrant jelly
Preheat the oven to 220C/425F/gas mark 7.
Season the haunch, and lay the bay leaves and thyme or rosemary over the meat. Place bacon over the herbs, covering the meat, and secure the package with butcher's string - you might find it helpful to use skewers to hold the fat in place while you work.
Weigh the joint. Place the joint in a large roasting tray and, if it's under 2kg, roast for 20 minutes, or 30 minutes if it's over 2kg. This 'sizzle' browns the joint beautifully. Turn down the oven to 170C/325F/gas mark 3 and roast for a further 12 minutes per 500g of meat. This should give you medium-rare meat: just pink in the middle.
While the meat is resting, make the gravy.
Skim off any fat from the juices in the roasting tin, then put the tin over a low heat, add the wine to deglaze, stirring well and scraping up all the bits of caramelised meat stuck to the bottom of the tin.
Add the stock and boil to reduce and concentrate the sauce. When the gravy has reached your required level of intensity, season and stir in a little redcurrant jelly. That hint of sweetness and sharpness is a perfect foil to the richness of the venison.
Carve the rested meat and serve with the strained gravy.
Enjoy!
Saturday, 1 January 2011
Happy New Year
Last year I began the year with a look back at my favourite recipes from the year passed, but I'm ashamed to say that there is not much point in doing that on this first day of 2011, as I was a terribly lazy blogger over the last twelve months and there is not much to choose from.
So, as I am sat here in a studio overlooking the hills in the Scottish Borders, thinking about and making resolutions and plans for this brand new year, one of the things that comes to mind straight away is to get this show on the road properly again. Well, now I've said it. You can all tell me off if I won't stick to it!
All the best for 2011 to you all. May some of your dreams come true, may you stay healthy and happy cooking!
Sylvie x


